How to add Sign in with Appwrite to your app_
Let users log in with their Appwrite account using the built-in OAuth2 provider. Learn how the flow works and how to set it up end to end.

Appwrite Auth ships adapters for a long list of OAuth2 providers: Google, GitHub, Apple, Discord, and dozens more. One of them is Appwrite itself. With the Appwrite provider enabled, users sign in to your app with their Appwrite account, approve a consent screen, and land back in your app with an active session.
If you build products for developers, this is the shortest path to authentication you can offer. Your users already have an Appwrite account, so there is no new password and no separate identity to manage. In this guide, we'll look at how the flow works and set it up end to end.
When Sign in with Appwrite makes sense
Social login works best when the provider matches your audience. A consumer app reaches more users with Google or Apple. A developer tool, a project dashboard, an education platform, or anything else aimed at people who already build with Appwrite reaches them fastest with the account they use every day.
There is a second advantage. Because Appwrite is the identity provider, the account you receive is a developer identity. If you later want deeper integration, such as accessing the projects and organizations your users choose to share, the same OAuth2 infrastructure extends into Sign in with Appwrite for apps with scoped, consent-based tokens.
How the flow works
The Appwrite provider follows the same OAuth2 flow as every other provider in Appwrite Auth:
- Your app calls one SDK method, which redirects the user to Appwrite's consent screen.
- The user signs in to their Appwrite account if they have no active session.
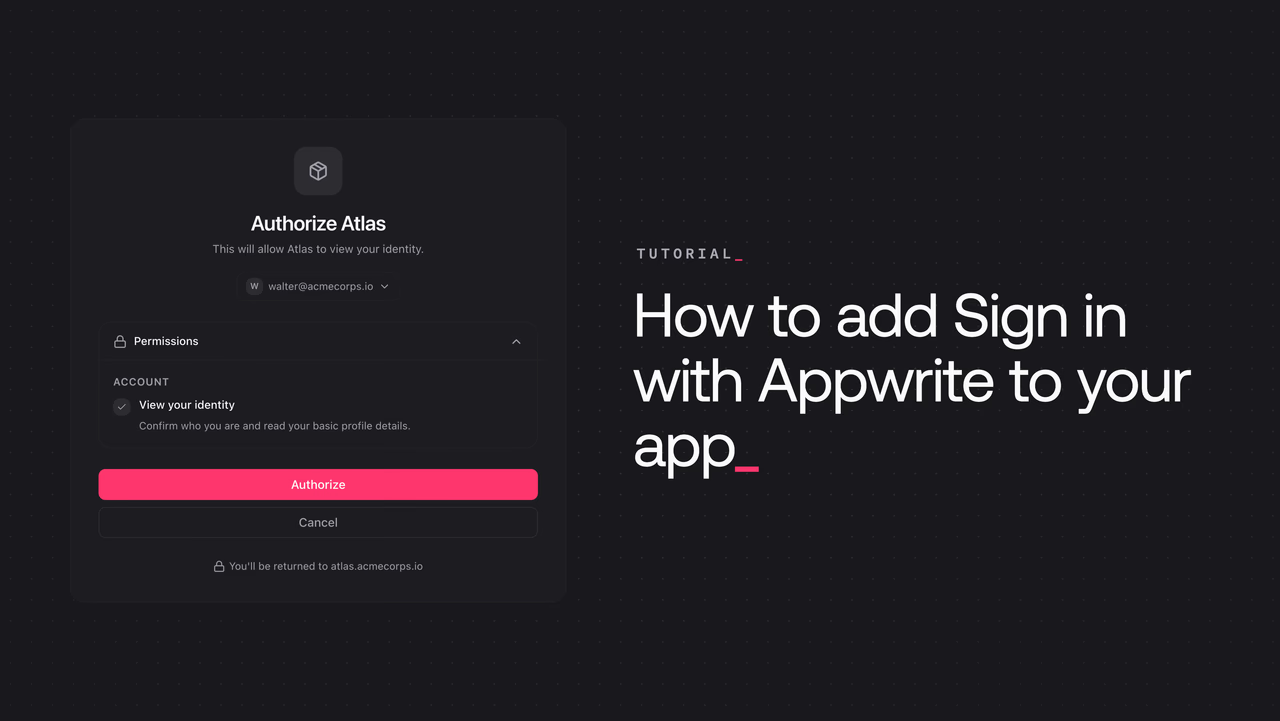
- The consent screen shows your app's name and the requested permissions.
- When the user approves, Appwrite redirects back with an authorization code.
- The code is exchanged for tokens server-side, and your user returns to your success URL with an active session.
The adapter requests the openid, profile, and email scopes, and generates a PKCE code verifier and S256 challenge for every authorization request, which protects the flow against code interception. You write none of this yourself.
Enabling the provider
Open your project in the Appwrite Console and navigate to Auth > Social providers. Find the Appwrite provider in the list and open it.
Turn on the Enabled toggle. The provider now needs credentials.
Configuring credentials with Quick setup
Every OAuth2 provider needs a registered client. For Google that means a trip to the Google Cloud console, for GitHub a developer settings page. For the Appwrite provider, the registration target is Appwrite itself, so the Console can do the whole round trip for you.
In the Quick setup card, enter an app name in the Create app tab and click Create and fill credentials. Appwrite creates the app in your organization, registers the redirect URI, and fills the Client ID and Client Secret fields. Click Update and you're done.
If you already registered an app, pick it in the Select app tab instead, or paste its client ID and secret manually. When you configure credentials manually, make sure the redirect URI shown in the dialog is added to the app.
Signing in from your frontend
With the provider configured, sign-in is one SDK call. Here's the flow with the Web SDK:
import { Client, Account, OAuthProvider } from 'appwrite';

const client = new Client()
    .setEndpoint('https://<REGION>.cloud.appwrite.io/v1')
    .setProject('<PROJECT_ID>');

const account = new Account(client);

account.createOAuth2Session({
    provider: OAuthProvider.Appwrite,
    success: 'https://your-app.com/dashboard',
    failure: 'https://your-app.com/login?error=oauth'
});
The user is redirected to the consent screen:
One click on Authorize, and they return to your success URL with a session already in place. The same method exists in the Flutter, Apple, Android, and React Native SDKs, with the platform-specific callback setup covered in the documentation.
Reading the profile
After sign-in, the session behaves like any other Appwrite session. Fetch the user to render their profile:
const user = await account.get();

console.log(user.name);   // name from the Appwrite account
console.log(user.email);  // email from the Appwrite account
Like all OAuth2 logins, the sign-in creates an identity on the user, so an existing user can connect their Appwrite account alongside other providers.
Final thoughts
Sign in with Appwrite turns authentication for developer-facing products into a few minutes of setup: enable the provider, let Quick setup register the app, and call one SDK method. Appwrite runs both sides of the flow, so the consent screen, PKCE, token exchange, and session management all come built in.
If you have questions or want to share what you're building, join us on the Appwrite Discord server.
Further reading
It is an OAuth2 provider built into Appwrite Auth that lets users log in to your app with their Appwrite account, the same way they would with Google or GitHub. Appwrite acts as the identity provider and handles the consent screen, token exchange, and session creation.
Open your project in the Appwrite Console, go to Auth, then Social providers, and open the Appwrite provider. Turn on the Enabled toggle, then use Quick setup to create an app and fill the credentials automatically, or paste a client ID and secret from an app you registered before.
No. The Quick setup card in the provider settings creates an Appwrite app in your organization, registers the redirect URI, and fills the Client ID and Client Secret fields for you. Manual registration is still available if you want to reuse an existing app.
The provider requests the openid, profile, and email scopes. Appwrite uses them to read the user's ID, name, and email, and to create the session. Users see exactly these permissions on the consent screen and can revoke access from their Appwrite account at any time.
Yes. The adapter generates a PKCE code verifier and S256 challenge for every authorization request, which protects the flow against authorization code interception.
Use it when your users are likely to have Appwrite accounts, for example if you build developer tools, dashboards, starter platforms, or education products for people who already ship with Appwrite. For a general consumer audience, providers like Google or Apple usually reach more of your users.