Passkeys_
Let users sign up and sign in with a passkey, a key pair stored on their device and unlocked with Face ID, Touch ID, a fingerprint, or a device PIN, on the web, Android, and Apple platforms.
9 min read
A passkey replaces a password with a key pair that lives on the user's device or in their password manager, such as iCloud Keychain or Google Password Manager. The user unlocks it with Face ID, Touch ID, a fingerprint, or the device PIN. The private key never leaves the device, and the public key that Appwrite stores is useless to an attacker. A passkey only works on the domain it was created for, so a look-alike phishing site cannot use it.
Passkeys follow the WebAuthn standard. Your app gets a challenge from Appwrite and hands it to the device. The user unlocks a passkey to answer it, and your app sends the signed answer back to Appwrite. One passkey works on your website and in your Android and iOS apps, because they all belong to the same domain.
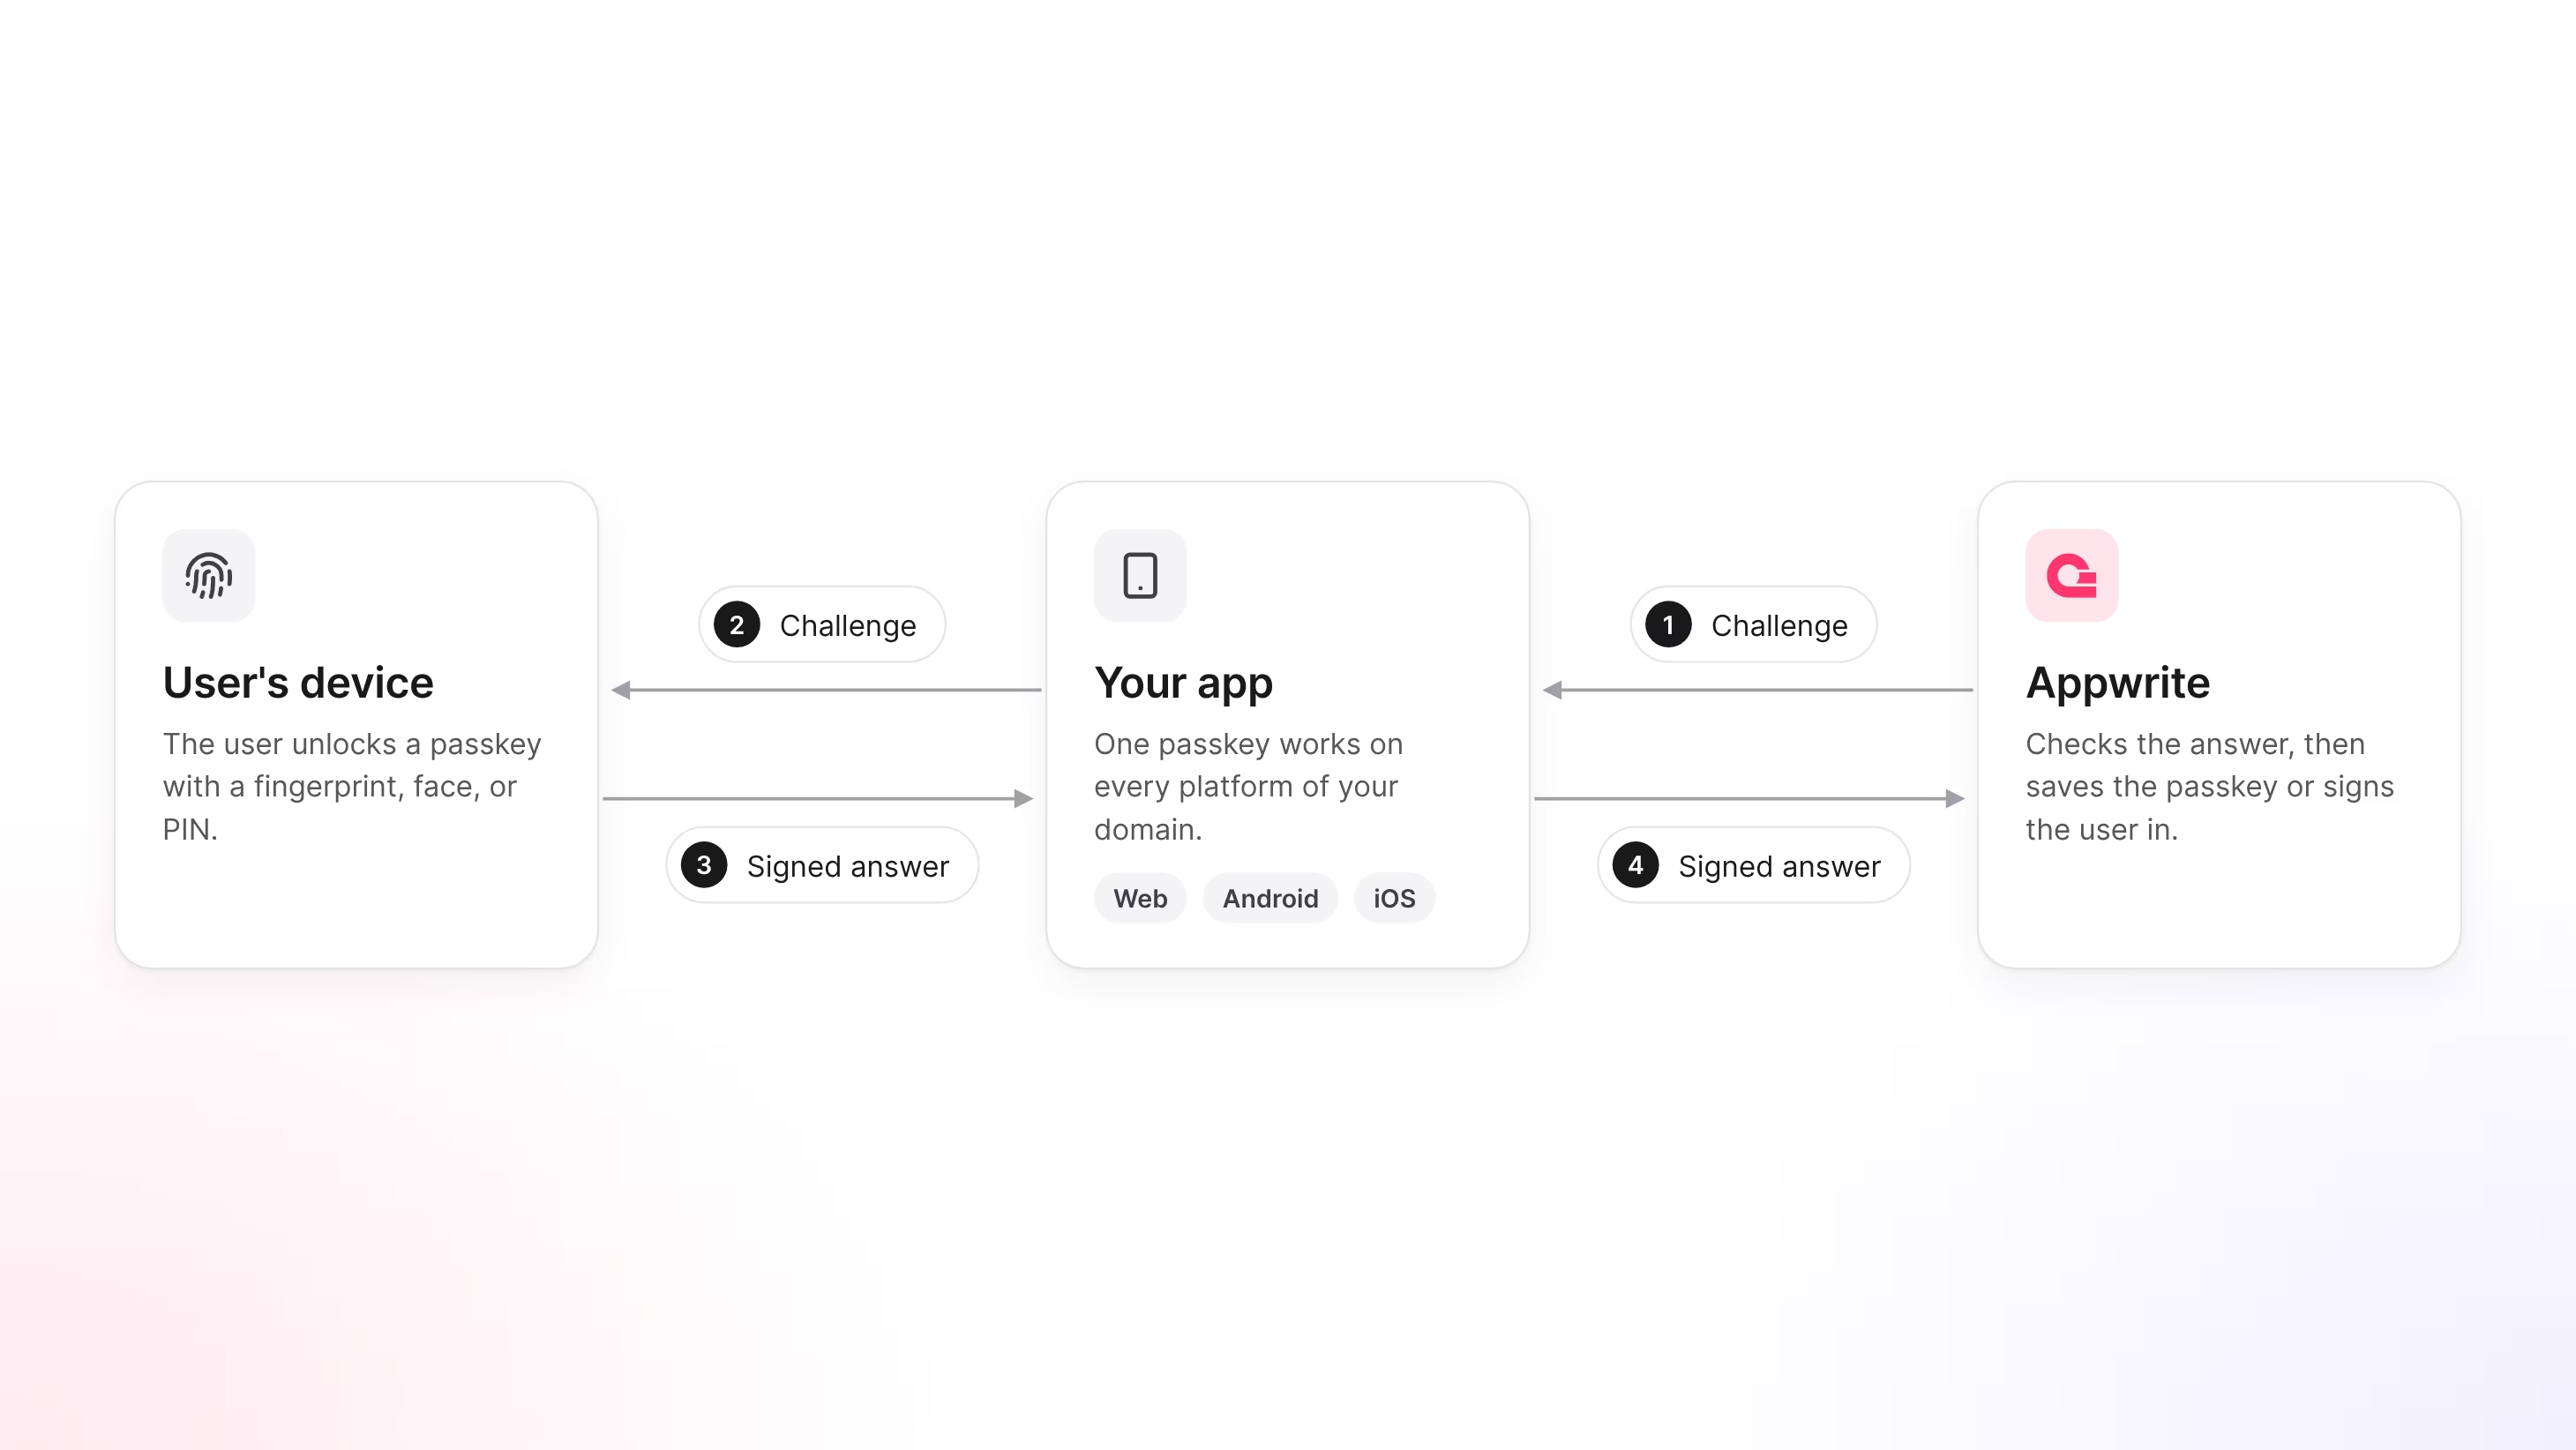
Sign-in is usernameless. The user picks a passkey, and Appwrite finds the account it belongs to, so your sign-in screen needs no email field.
Passkeys are available on Appwrite Cloud and on self-hosted Appwrite 2.5 or later.
Every passkey ceremony requires user verification, such as a biometric or the device PIN. A session created with a passkey already proves two factors, so it also satisfies multi-factor authentication.
How it works
Passkeys are bound to a relying party ID: the domain of your app, such as example.com. The browser or the operating system only offers a passkey on that domain and the apps that the domain trusts.
Appwrite works out where each passkey may be used from your project's platforms. You do not maintain a separate list of origins.
| Platform | Origin Appwrite accepts | Setup |
|---|---|---|
| Web | https://app.example.com | A web platform on the relying party ID or one of its subdomains. |
| Android | android:apk-key-hash:<hash> | An Android platform with the SHA-256 fingerprints of your signing keys, and an assetlinks.json file on the relying party ID. |
| Apple | https://example.com | An Apple platform, an associated domain, and an apple-app-site-association file on the relying party ID. |
| Local development | http://localhost:<port> | A localhost web platform. |
A native app needs a domain even if you have no website. The domain only has to serve the two .well-known files over HTTPS.
Turn on passkeys
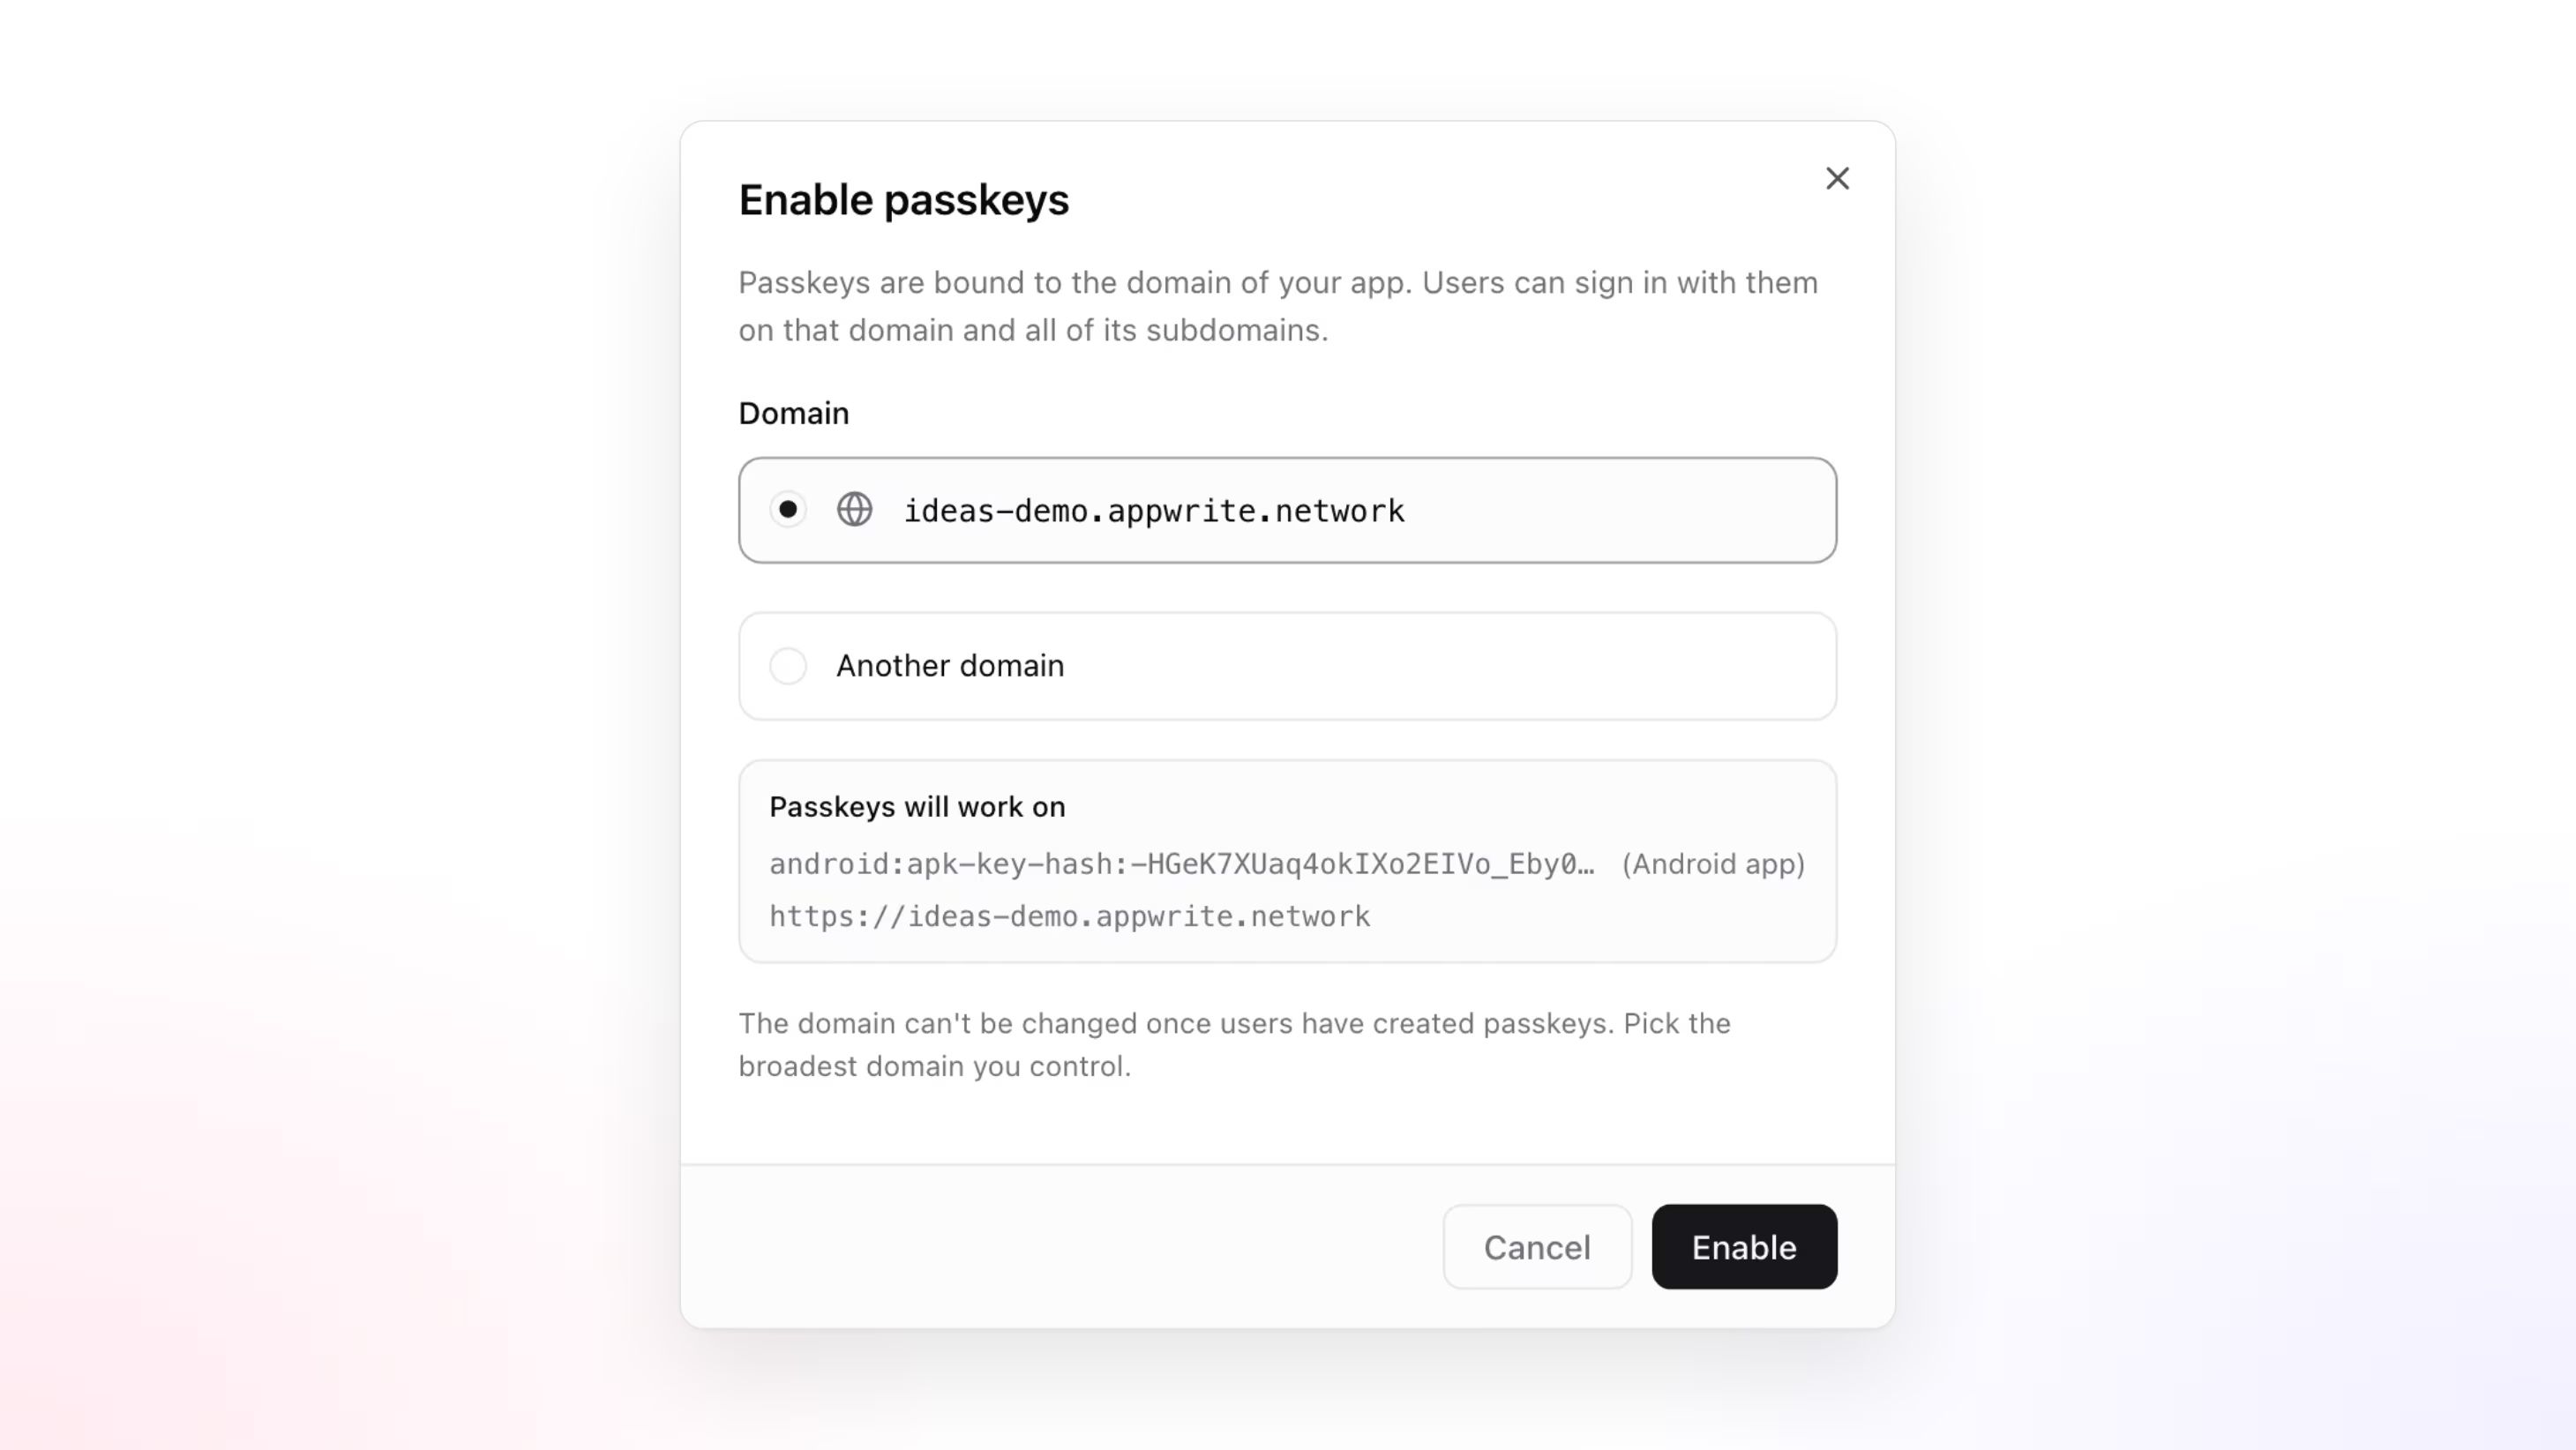
- In the Appwrite Console, open your project and go to Auth, then Settings.
- Turn on Passkey.
- Choose the domain passkeys belong to. The dialog suggests domains from your web platforms, or you can type another one.
- Select Enable.
Use the registrable domain, such as example.com, rather than a subdomain like app.example.com. A passkey created on example.com also works on every subdomain that is a web platform, so you can add subdomains later without asking users to create new passkeys.
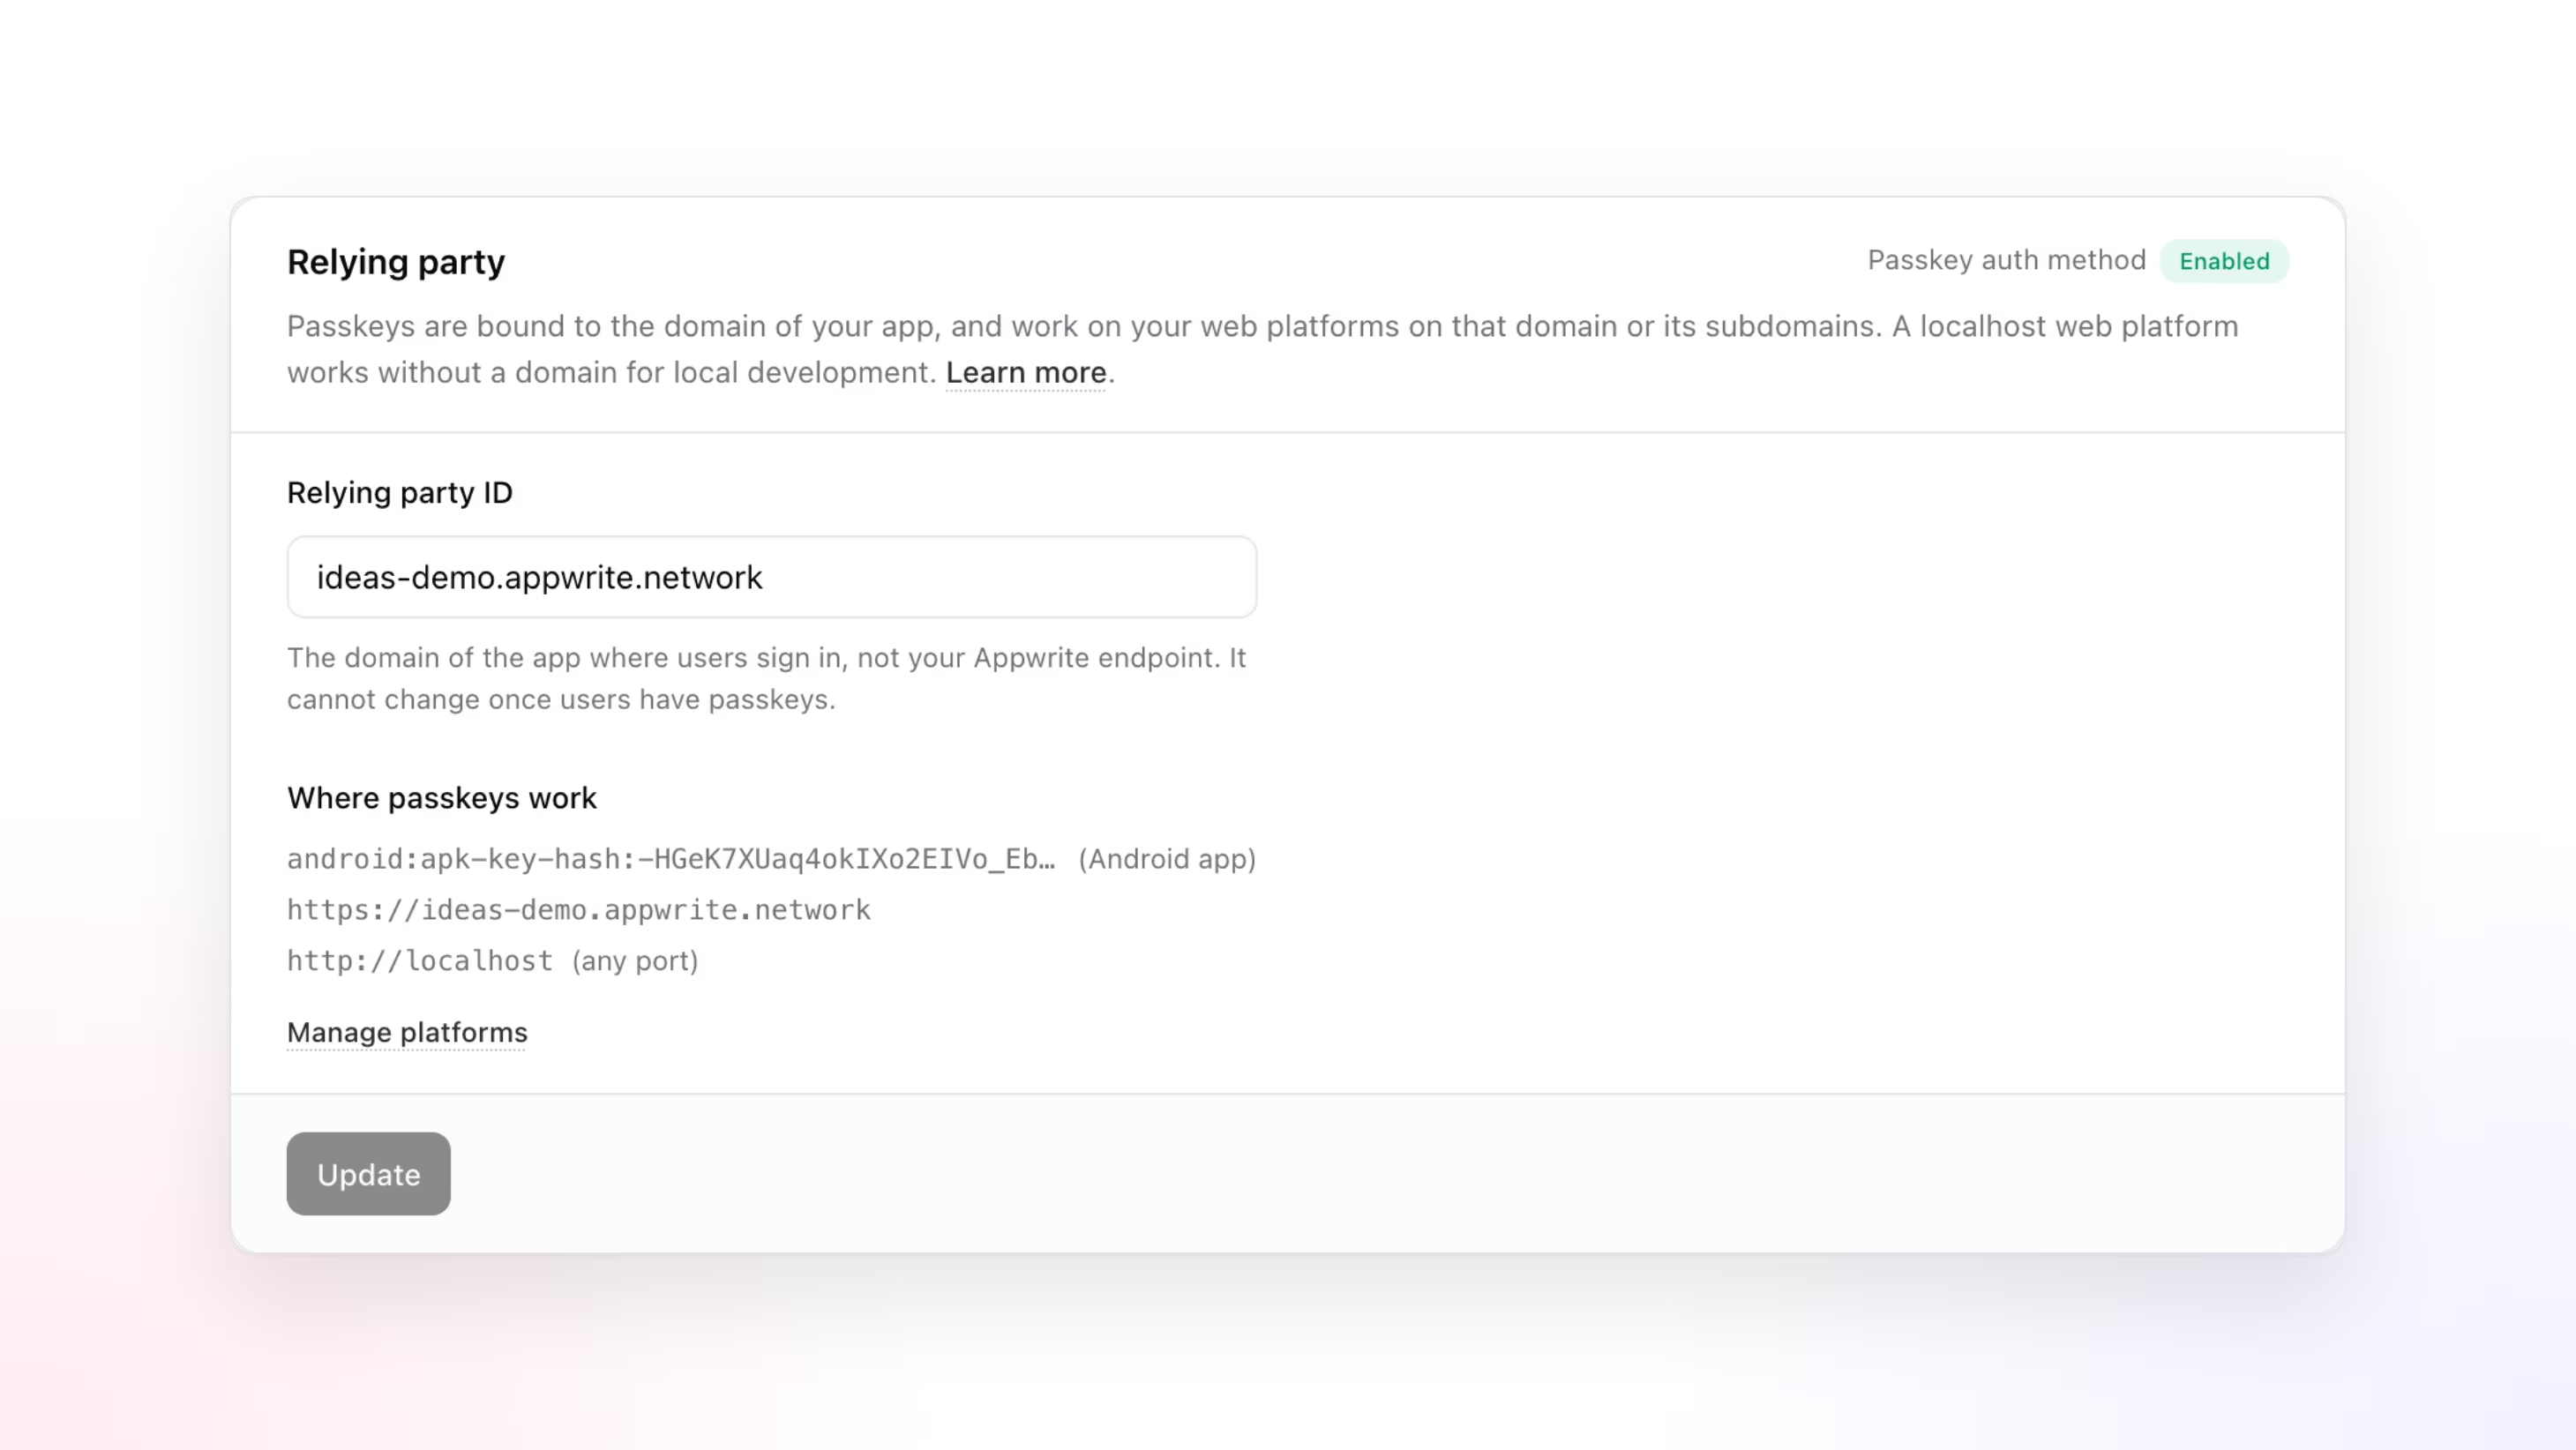
Every passkey is bound to the relying party ID it was created for. Once users have registered passkeys, Appwrite refuses to change it, because their passkeys would stop working.
To review the setup, go to Auth > Policies > Passkeys. The Where passkeys work list shows every origin Appwrite accepts, computed from your platforms.
You can also configure passkeys with a server SDK and an API key with the policies.write and project.write scopes.
const sdk = require('node-appwrite');
const client = new sdk.Client()    .setEndpoint('https://<REGION>.cloud.appwrite.io/v1') // Your API Endpoint    .setProject('<PROJECT_ID>')                            // Your project ID    .setKey('<API_KEY>');                                  // Your secret API key
const project = new sdk.Project(client);
await project.updatePasskeyPolicy({ rpId: 'example.com' });await project.updateAuthMethod({ methodId: 'passkey', enabled: true });
Local development
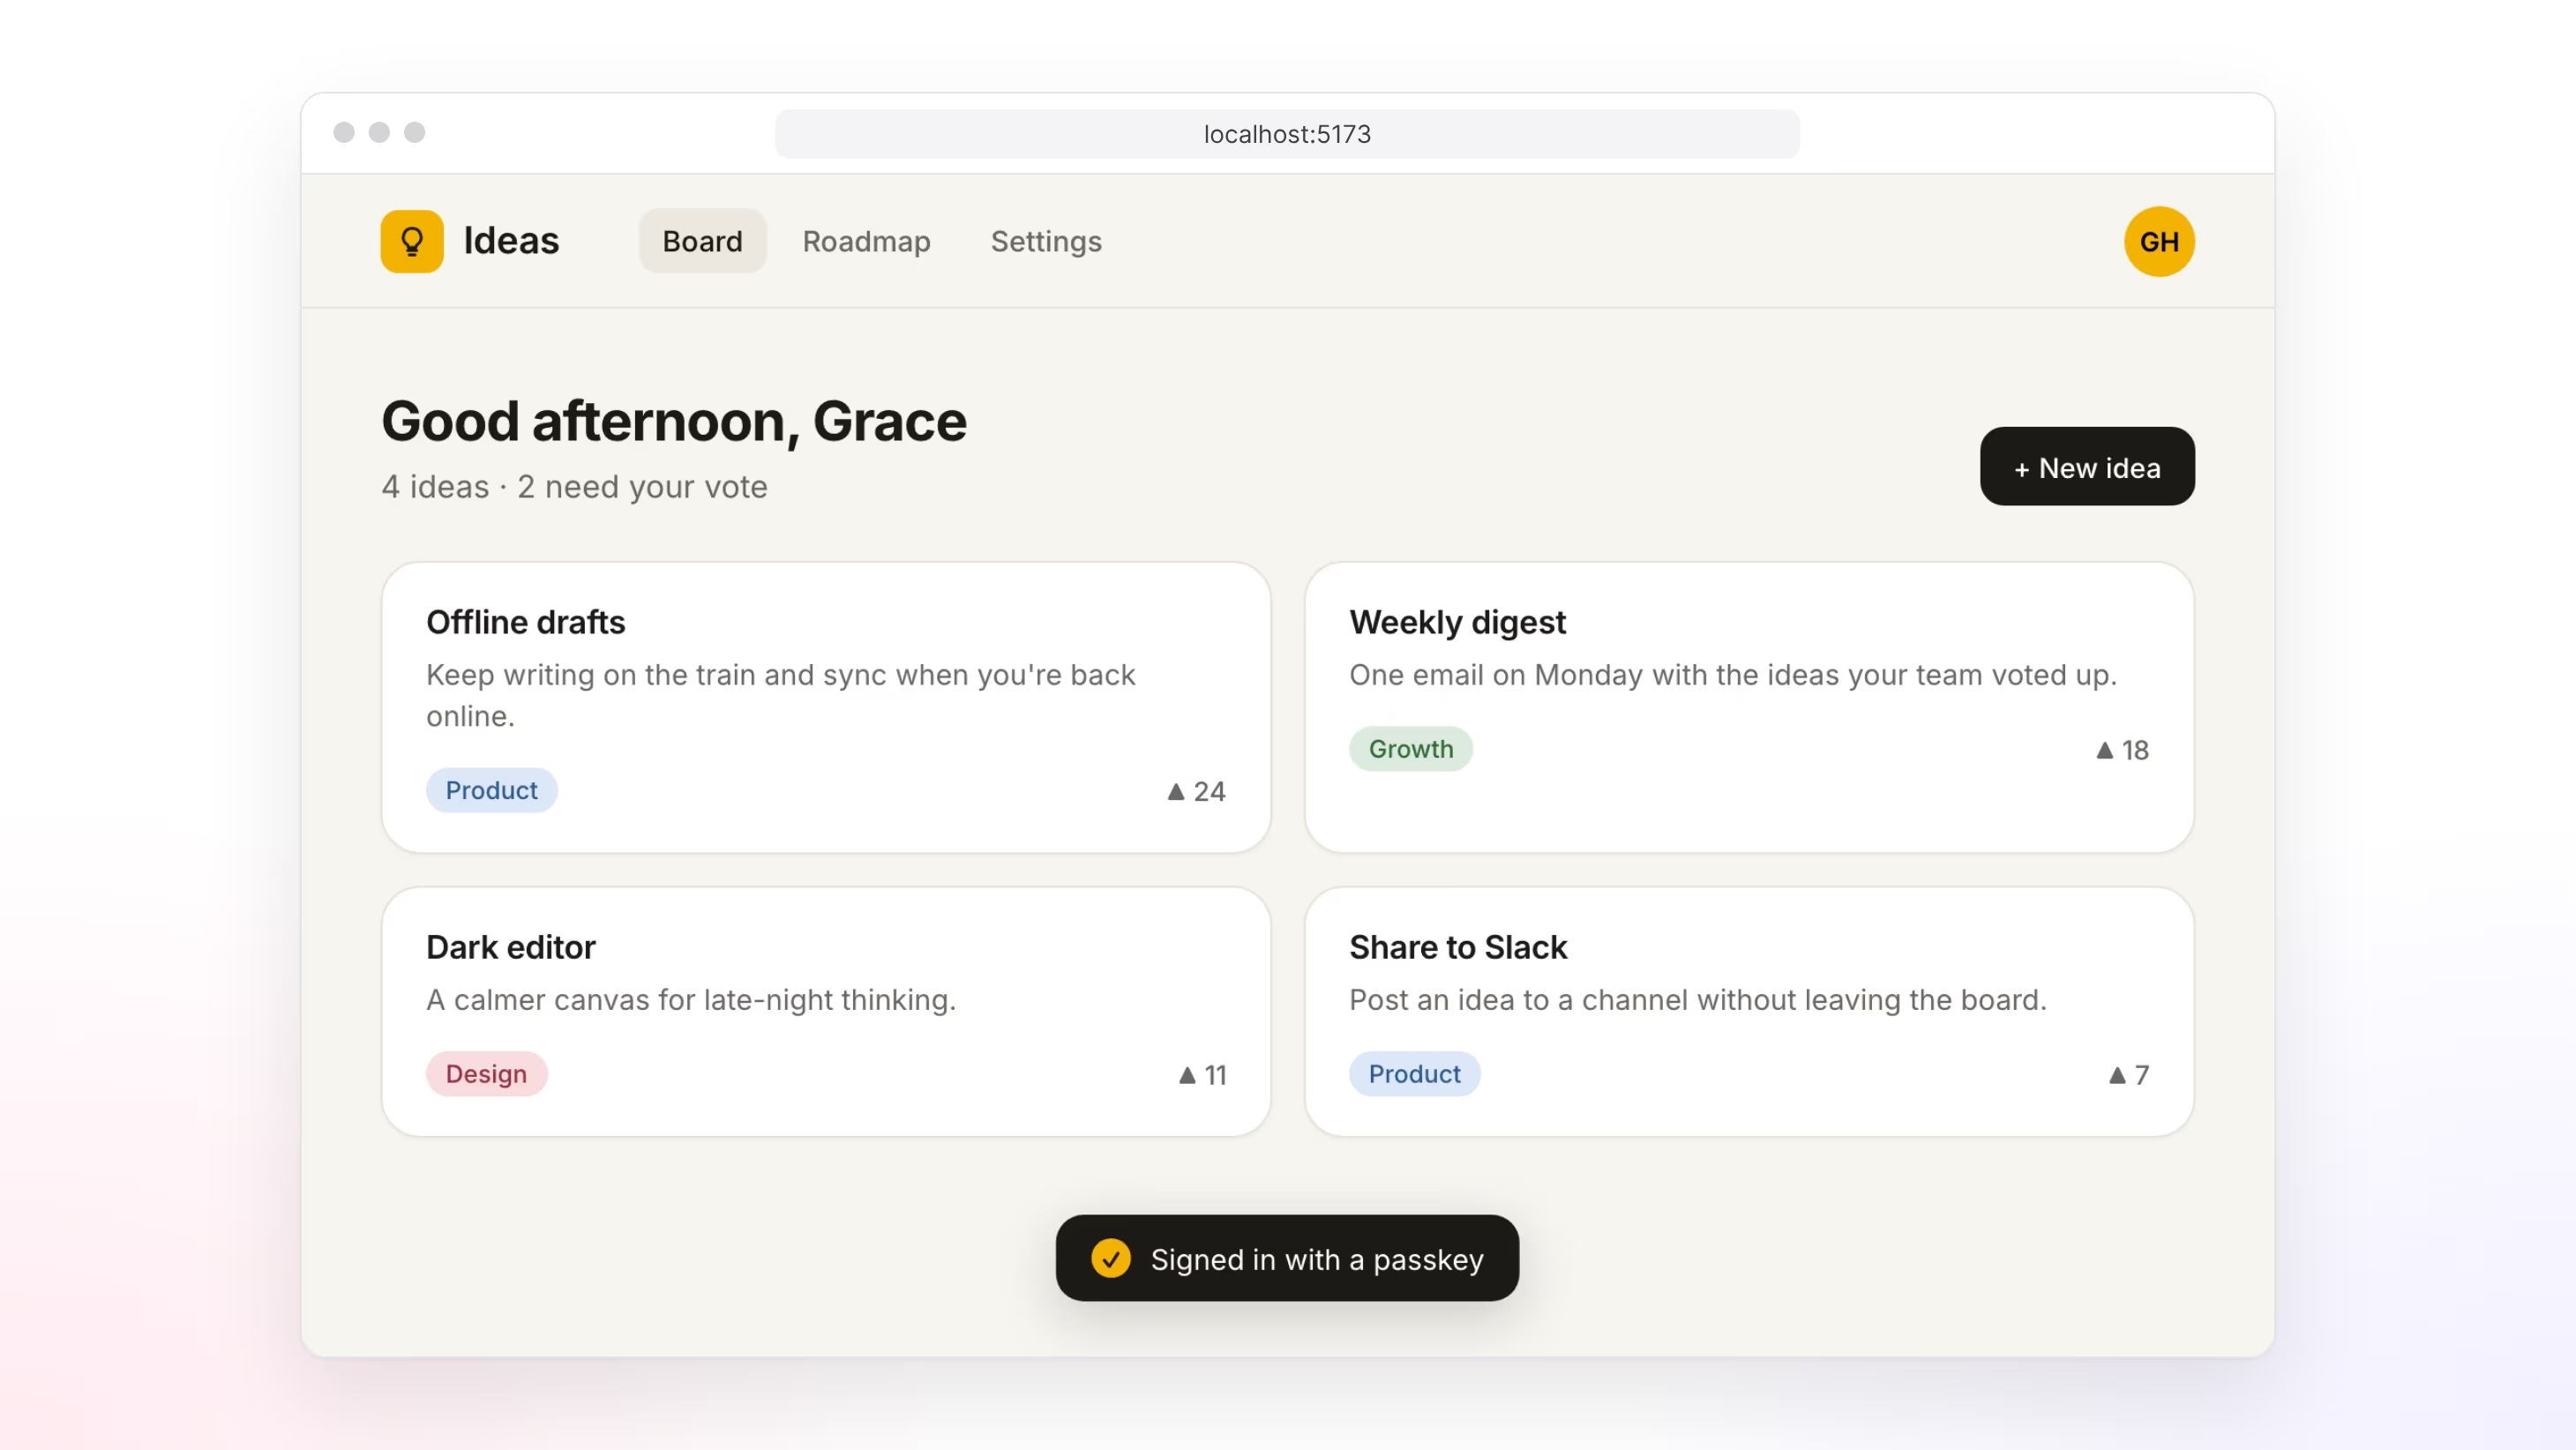
Add localhost as a web platform, and passkeys work on http://localhost on any port. Requests from localhost get their own relying party, localhost, so you can develop without a domain and without touching the production relying party ID.
Passkeys created on localhost only work on localhost. They are separate from your production passkeys, but they still count as registered passkeys: once one exists, Appwrite refuses to change the relying party ID until it is deleted. Set your production relying party ID before you test on localhost, and use localhost, not 127.0.0.1.
Set up your platforms
Web
Add a web platform for each hostname your app runs on, such as example.com and app.example.com. The hostname must be the relying party ID or one of its subdomains. A wildcard platform such as *.example.com covers every subdomain, but not example.com itself.
Browsers need no other setup. Passkeys work on HTTPS origins on the default port, and on http://localhost on any port for development.
Android
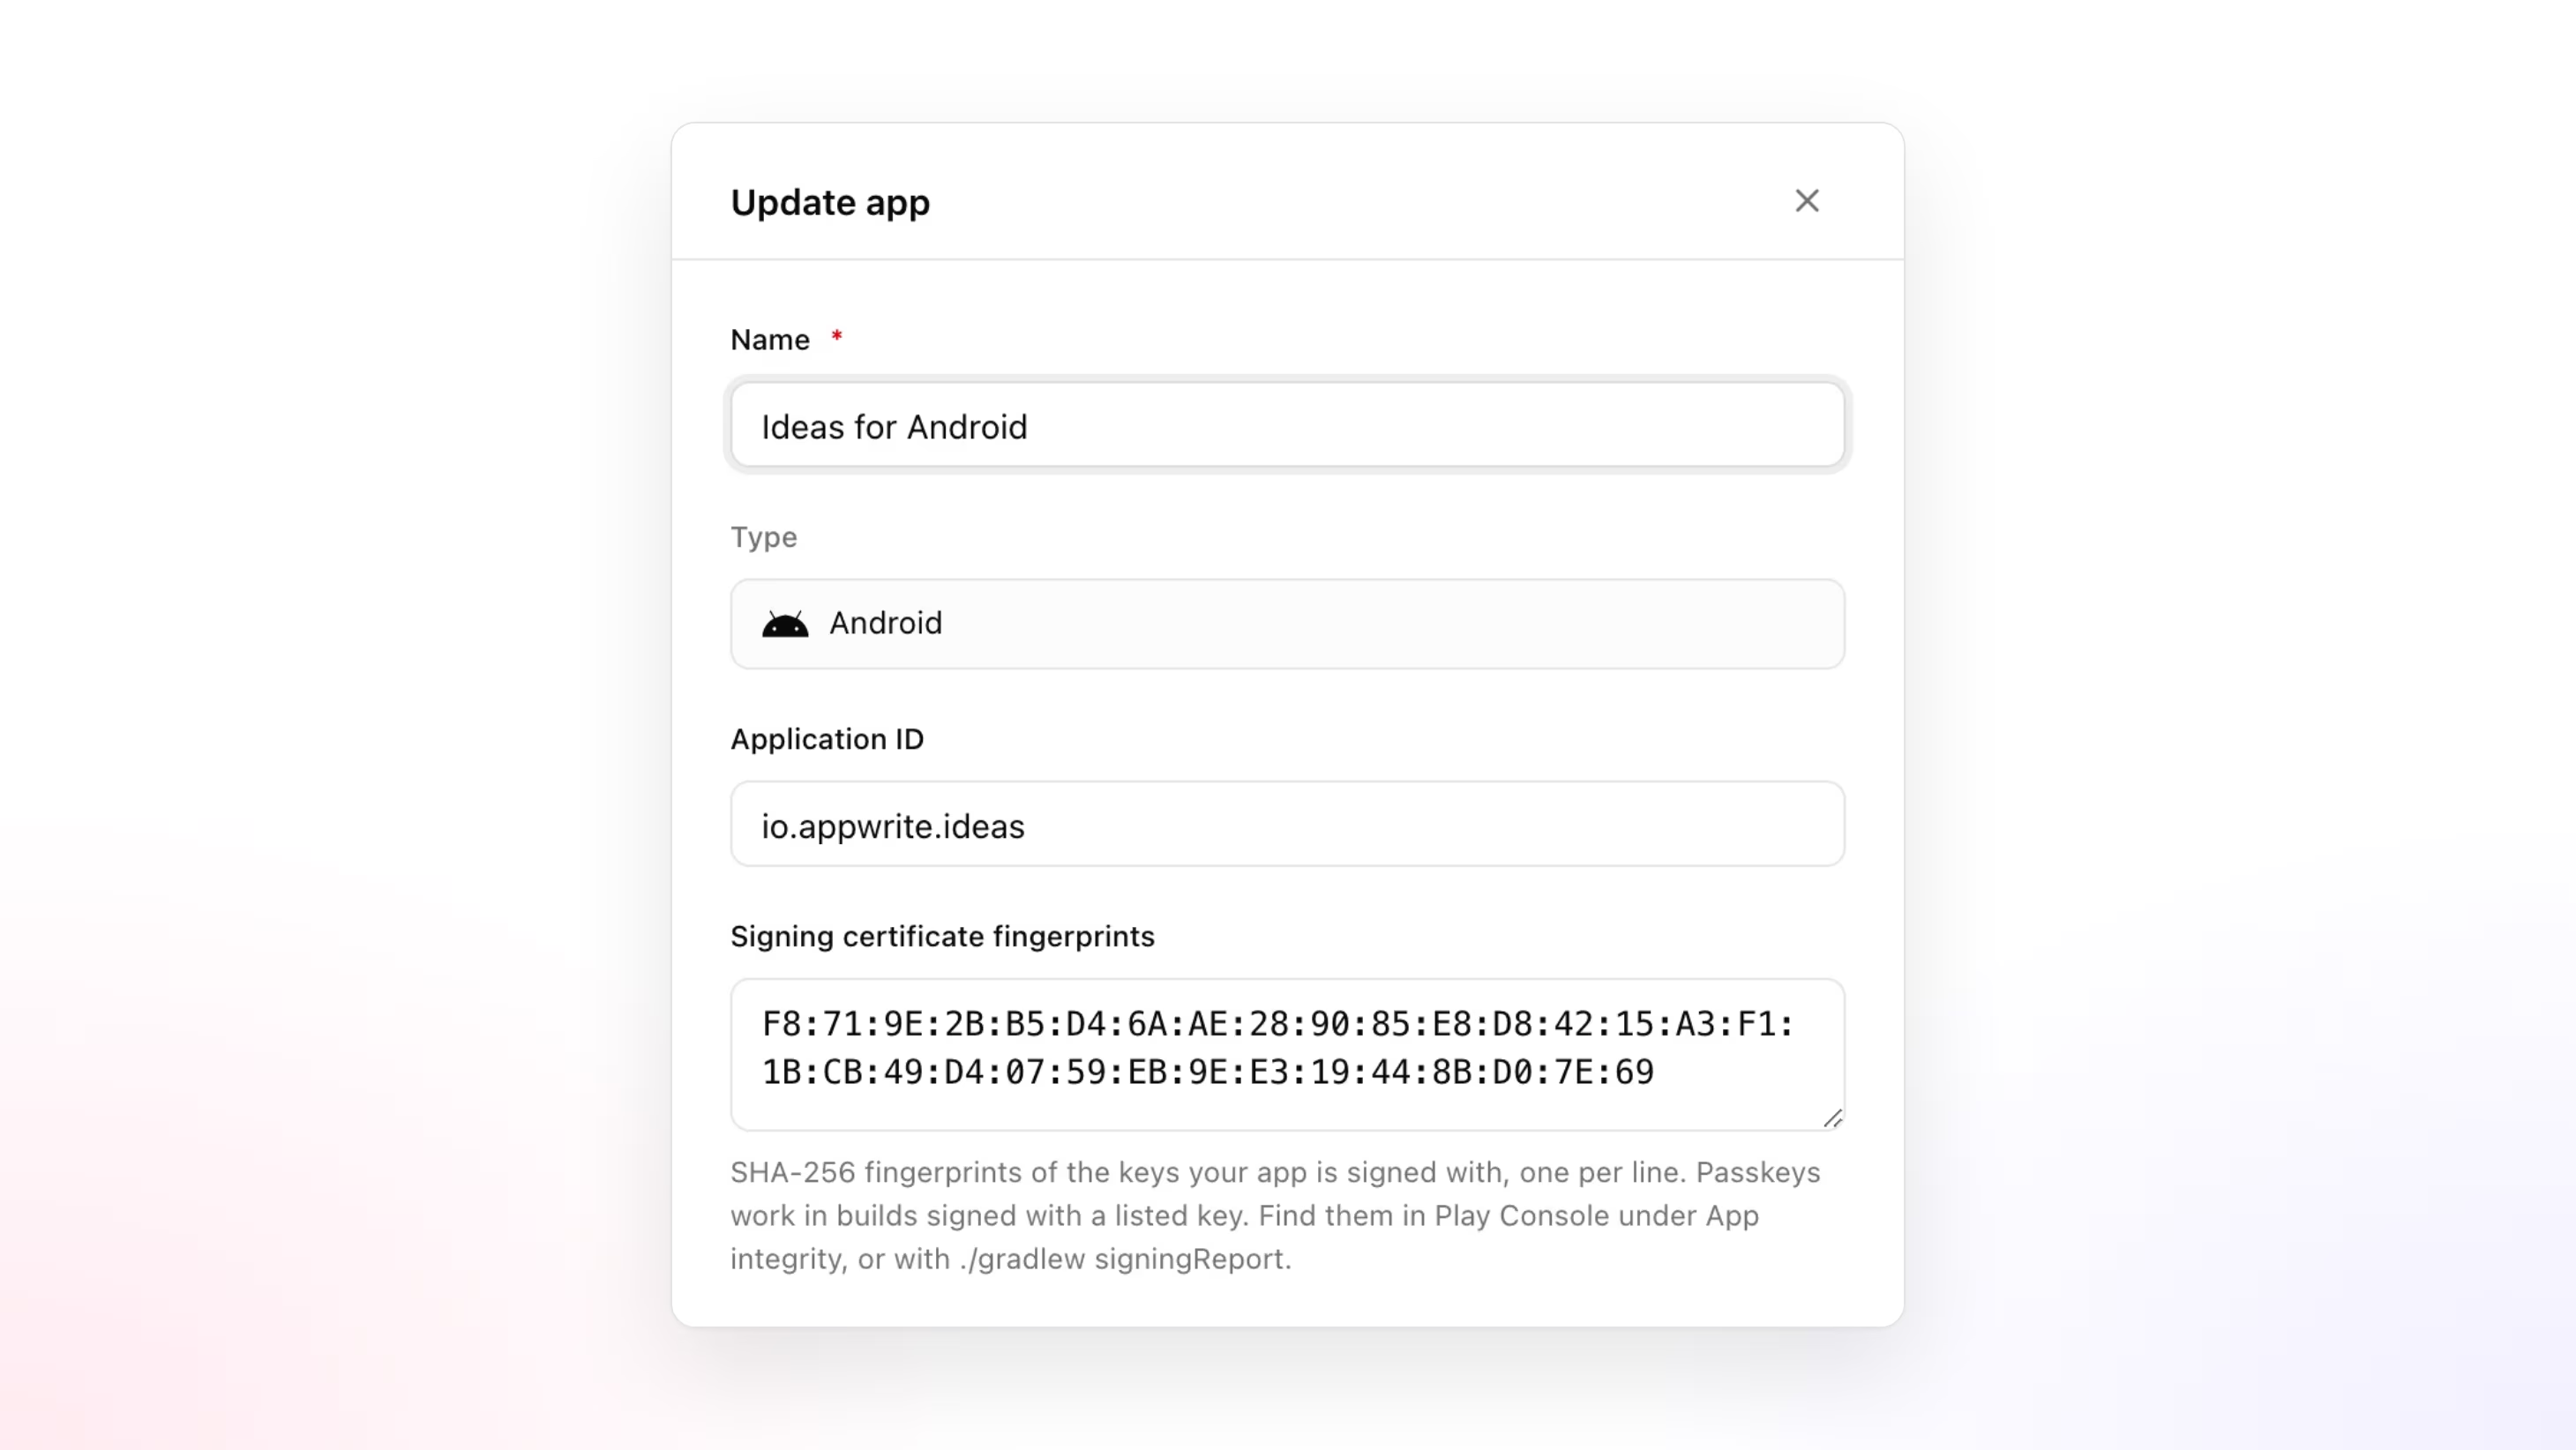
An Android app does not sign in from a web origin. Android identifies it by a hash of the certificate the app is signed with, so Appwrite needs that certificate's fingerprint.
- In the Appwrite Console, go to Apps and select your Android app. Add one if you have not yet.
- Under Signing certificate fingerprints, paste the SHA-256 fingerprint of each key that signs your app, one per line.
- Select Update.
Most apps have more than one signing key:
- Debug builds are signed with the debug keystore on each developer's machine. Run
./gradlew signingReportin your Android project, which prints the SHA-256 fingerprint for every build variant. - Builds from Google Play are re-signed by Google with the app signing key. In Play Console, open App integrity, select Play app signing, and copy the SHA-256 fingerprint of the App signing key certificate.
- Builds you install yourself carry the key that signed them, such as your upload key.
Android also checks that your domain trusts the app before it creates or uses a passkey. Host this file at https://example.com/.well-known/assetlinks.json, on your relying party ID, with your package name and the same fingerprints:
[ { "relation": [ "delegate_permission/common.handle_all_urls", "delegate_permission/common.get_login_creds" ], "target": { "namespace": "android_app", "package_name": "com.example.app", "sha256_cert_fingerprints": [ "14:6D:E9:83:C5:73:06:50:D8:EE:B9:95:2F:34:FC:64:16:A0:83:42:E6:1D:BE:A8:8A:04:96:B2:3F:CF:44:E5" ] } }]Add the Credential Manager library to your app, which shows the system passkey sheet:
dependencies { implementation("androidx.credentials:credentials:1.6.0") implementation("androidx.credentials:credentials-play-services-auth:1.6.0") implementation("com.google.code.gson:gson:2.14.0")}The examples below use Gson to convert between the JSON strings Credential Manager works with and the maps the Appwrite SDK takes.
Apple
On iOS and macOS, the operating system confirms that your app may use your domain's passkeys, and the app signs in from the relying party ID itself. Appwrite accepts https://example.com once the project has an Apple platform.
- In the Appwrite Console, add an Apple platform with your app's bundle ID.
- In Xcode, open your target's Signing & Capabilities, add Associated Domains, and add
webcredentials:example.com. - Host this file at
https://example.com/.well-known/apple-app-site-association, with your team ID and bundle ID:
{ "webcredentials": { "apps": ["ABCDE12345.com.example.app"] }}Apple fetches the file through its CDN, so changes can take a while to reach devices. During development, add ?mode=developer to the entitlement, such as webcredentials:example.com?mode=developer, to fetch it directly from your server.
Register a passkey
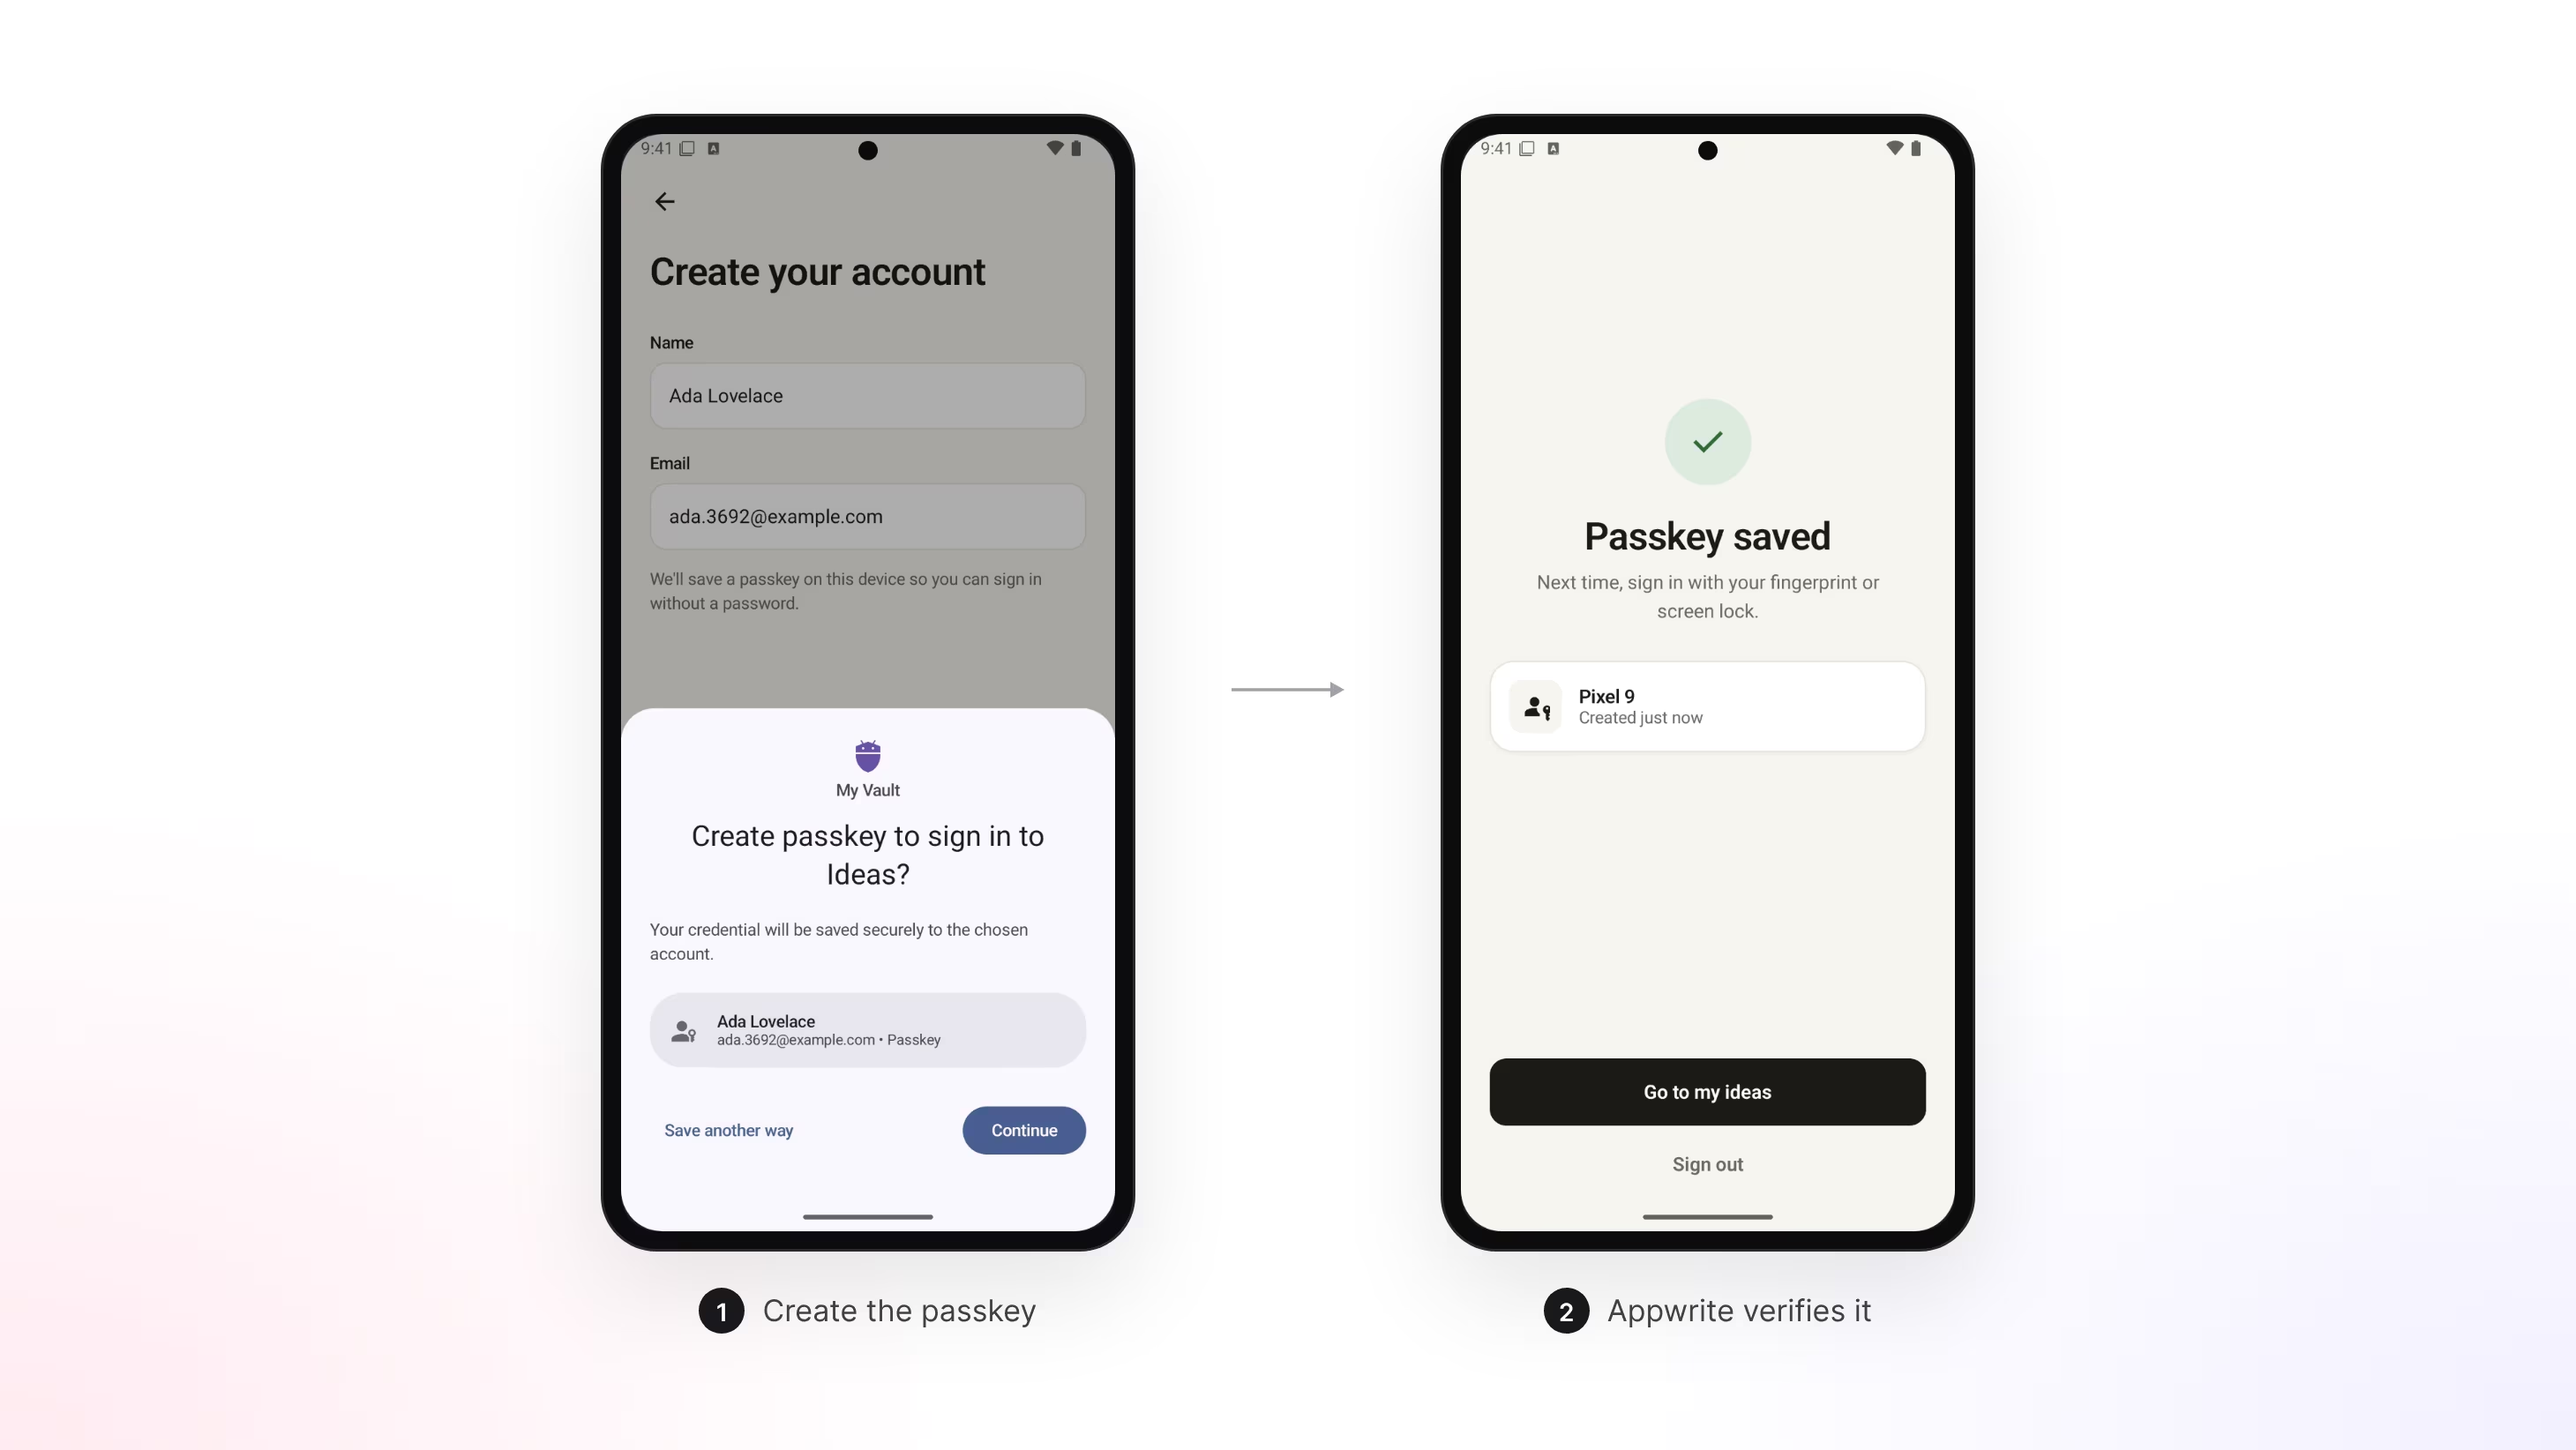
A passkey is added to an account the user is already signed in to. For a new user, create the account and a session first, then register the passkey. For an existing user, offer to add a passkey after they sign in.
Registration takes three steps:
- Call
createPasskey(). Appwrite returns apasskeyIdand thepublicKeycreation options. - Pass the options to the platform's passkey API. The user confirms with a biometric or the device PIN.
- Send the resulting credential to
updatePasskeyVerification(). Appwrite verifies it and stores the passkey.
The session must have signed in, or completed an MFA challenge, within the last 10 minutes, and step 3 must use the same session as step 1. The challenge expires after 5 minutes, and each user can have up to 10 passkeys, counting registrations still in progress.
import { Client, Account } from "appwrite";
const client = new Client()    .setEndpoint('https://<REGION>.cloud.appwrite.io/v1') // Your API Endpoint    .setProject('<PROJECT_ID>');                           // Your project ID
const account = new Account(client);
const challenge = await account.createPasskey({ name: 'MacBook' });
const credential = await navigator.credentials.create({    publicKey: PublicKeyCredential.parseCreationOptionsFromJSON(challenge.publicKey),});
const passkey = await account.updatePasskeyVerification({    passkeyId: challenge.passkeyId,    credential: credential.toJSON(),});
Flutter apps call the platform's passkey API through the passkeys package, which reads and returns the same JSON Appwrite uses.
import 'package:appwrite/appwrite.dart';import 'package:passkeys/authenticator.dart';import 'package:passkeys/types.dart';
final client = Client()    .setEndpoint('https://<REGION>.cloud.appwrite.io/v1') // Your API Endpoint    .setProject('<PROJECT_ID>');                           // Your project ID
final account = Account(client);final authenticator = PasskeyAuthenticator();
final challenge = await account.createPasskey(name: 'Pixel');
final response = await authenticator.register(    RegisterRequestType.fromJson(challenge.publicKey),);
final passkey = await account.updatePasskeyVerification( passkeyId: challenge.passkeyId, credential: response.toJson(),);import androidx.credentials.CreatePublicKeyCredentialRequestimport androidx.credentials.CreatePublicKeyCredentialResponseimport androidx.credentials.CredentialManagerimport com.google.gson.Gsonimport com.google.gson.reflect.TypeTokenimport io.appwrite.Clientimport io.appwrite.services.Account
val client = Client(context) .setEndpoint("https://<REGION>.cloud.appwrite.io/v1") // Your API Endpoint .setProject("<PROJECT_ID>") // Your project ID
val account = Account(client)val credentialManager = CredentialManager.create(context)val gson = Gson()val mapType = object : TypeToken<Map<String, Any?>>() {}.type
val challenge = account.createPasskey(name = "Pixel")
val response = credentialManager.createCredential( activity, CreatePublicKeyCredentialRequest(gson.toJson(challenge.publicKey)),) as CreatePublicKeyCredentialResponse
val passkey = account.updatePasskeyVerification( passkeyId = challenge.passkeyId, credential = gson.fromJson(response.registrationResponseJson, mapType),)import AuthenticationServicesimport Appwrite
let client = Client() .setEndpoint("https://<REGION>.cloud.appwrite.io/v1") // Your API Endpoint .setProject("<PROJECT_ID>") // Your project ID
let account = Account(client)
let challenge = try await account.createPasskey(name: "iPhone")let options = challenge.publicKey
let provider = ASAuthorizationPlatformPublicKeyCredentialProvider( relyingPartyIdentifier: (options["rp"]?.value as! [String: Any])["id"] as! String)let request = provider.createCredentialRegistrationRequest( challenge: Data(base64URLEncoded: options["challenge"]?.value as! String)!, name: (options["user"]?.value as! [String: Any])["name"] as! String, userID: Data(base64URLEncoded: (options["user"]?.value as! [String: Any])["id"] as! String)!)
// Present an ASAuthorizationController with the request.// In authorizationController(controller:didCompleteWithAuthorization:):guard let registration = authorization.credential as? ASAuthorizationPlatformPublicKeyCredentialRegistration else { return }
let passkey = try await account.updatePasskeyVerification( passkeyId: challenge.passkeyId, credential: [ "id": registration.credentialID.base64URLEncodedString(), "rawId": registration.credentialID.base64URLEncodedString(), "type": "public-key", "response": [ "clientDataJSON": registration.rawClientDataJSON.base64URLEncodedString(), "attestationObject": registration.rawAttestationObject!.base64URLEncodedString(), ], ])Foundation has no base64url helpers, so add this extension on Data. Appwrite expects base64url without padding.
extension Data {    init?(base64URLEncoded string: String) {        var base64 = string.replacingOccurrences(of: "-", with: "+").replacingOccurrences(of: "_", with: "/")        base64 += String(repeating: "=", count: (4 - base64.count % 4) % 4)        self.init(base64Encoded: base64)    }
    func base64URLEncodedString() -> String {        base64EncodedString()            .replacingOccurrences(of: "+", with: "-")            .replacingOccurrences(of: "/", with: "_")            .replacingOccurrences(of: "=", with: "")    }}
React Native apps call the platform's passkey API through the react-native-passkey library, which reads and returns the same JSON Appwrite uses.
import { Client, Account } from 'react-native-appwrite';import { Passkey } from 'react-native-passkey';
const client = new Client()    .setEndpoint('https://<REGION>.cloud.appwrite.io/v1') // Your API Endpoint    .setProject('<PROJECT_ID>');                           // Your project ID
const account = new Account(client);
const challenge = await account.createPasskey({ name: 'iPhone' });
const credential = await Passkey.create(challenge.publicKey);
const passkey = await account.updatePasskeyVerification({    passkeyId: challenge.passkeyId,    credential,});
Sign in with a passkey
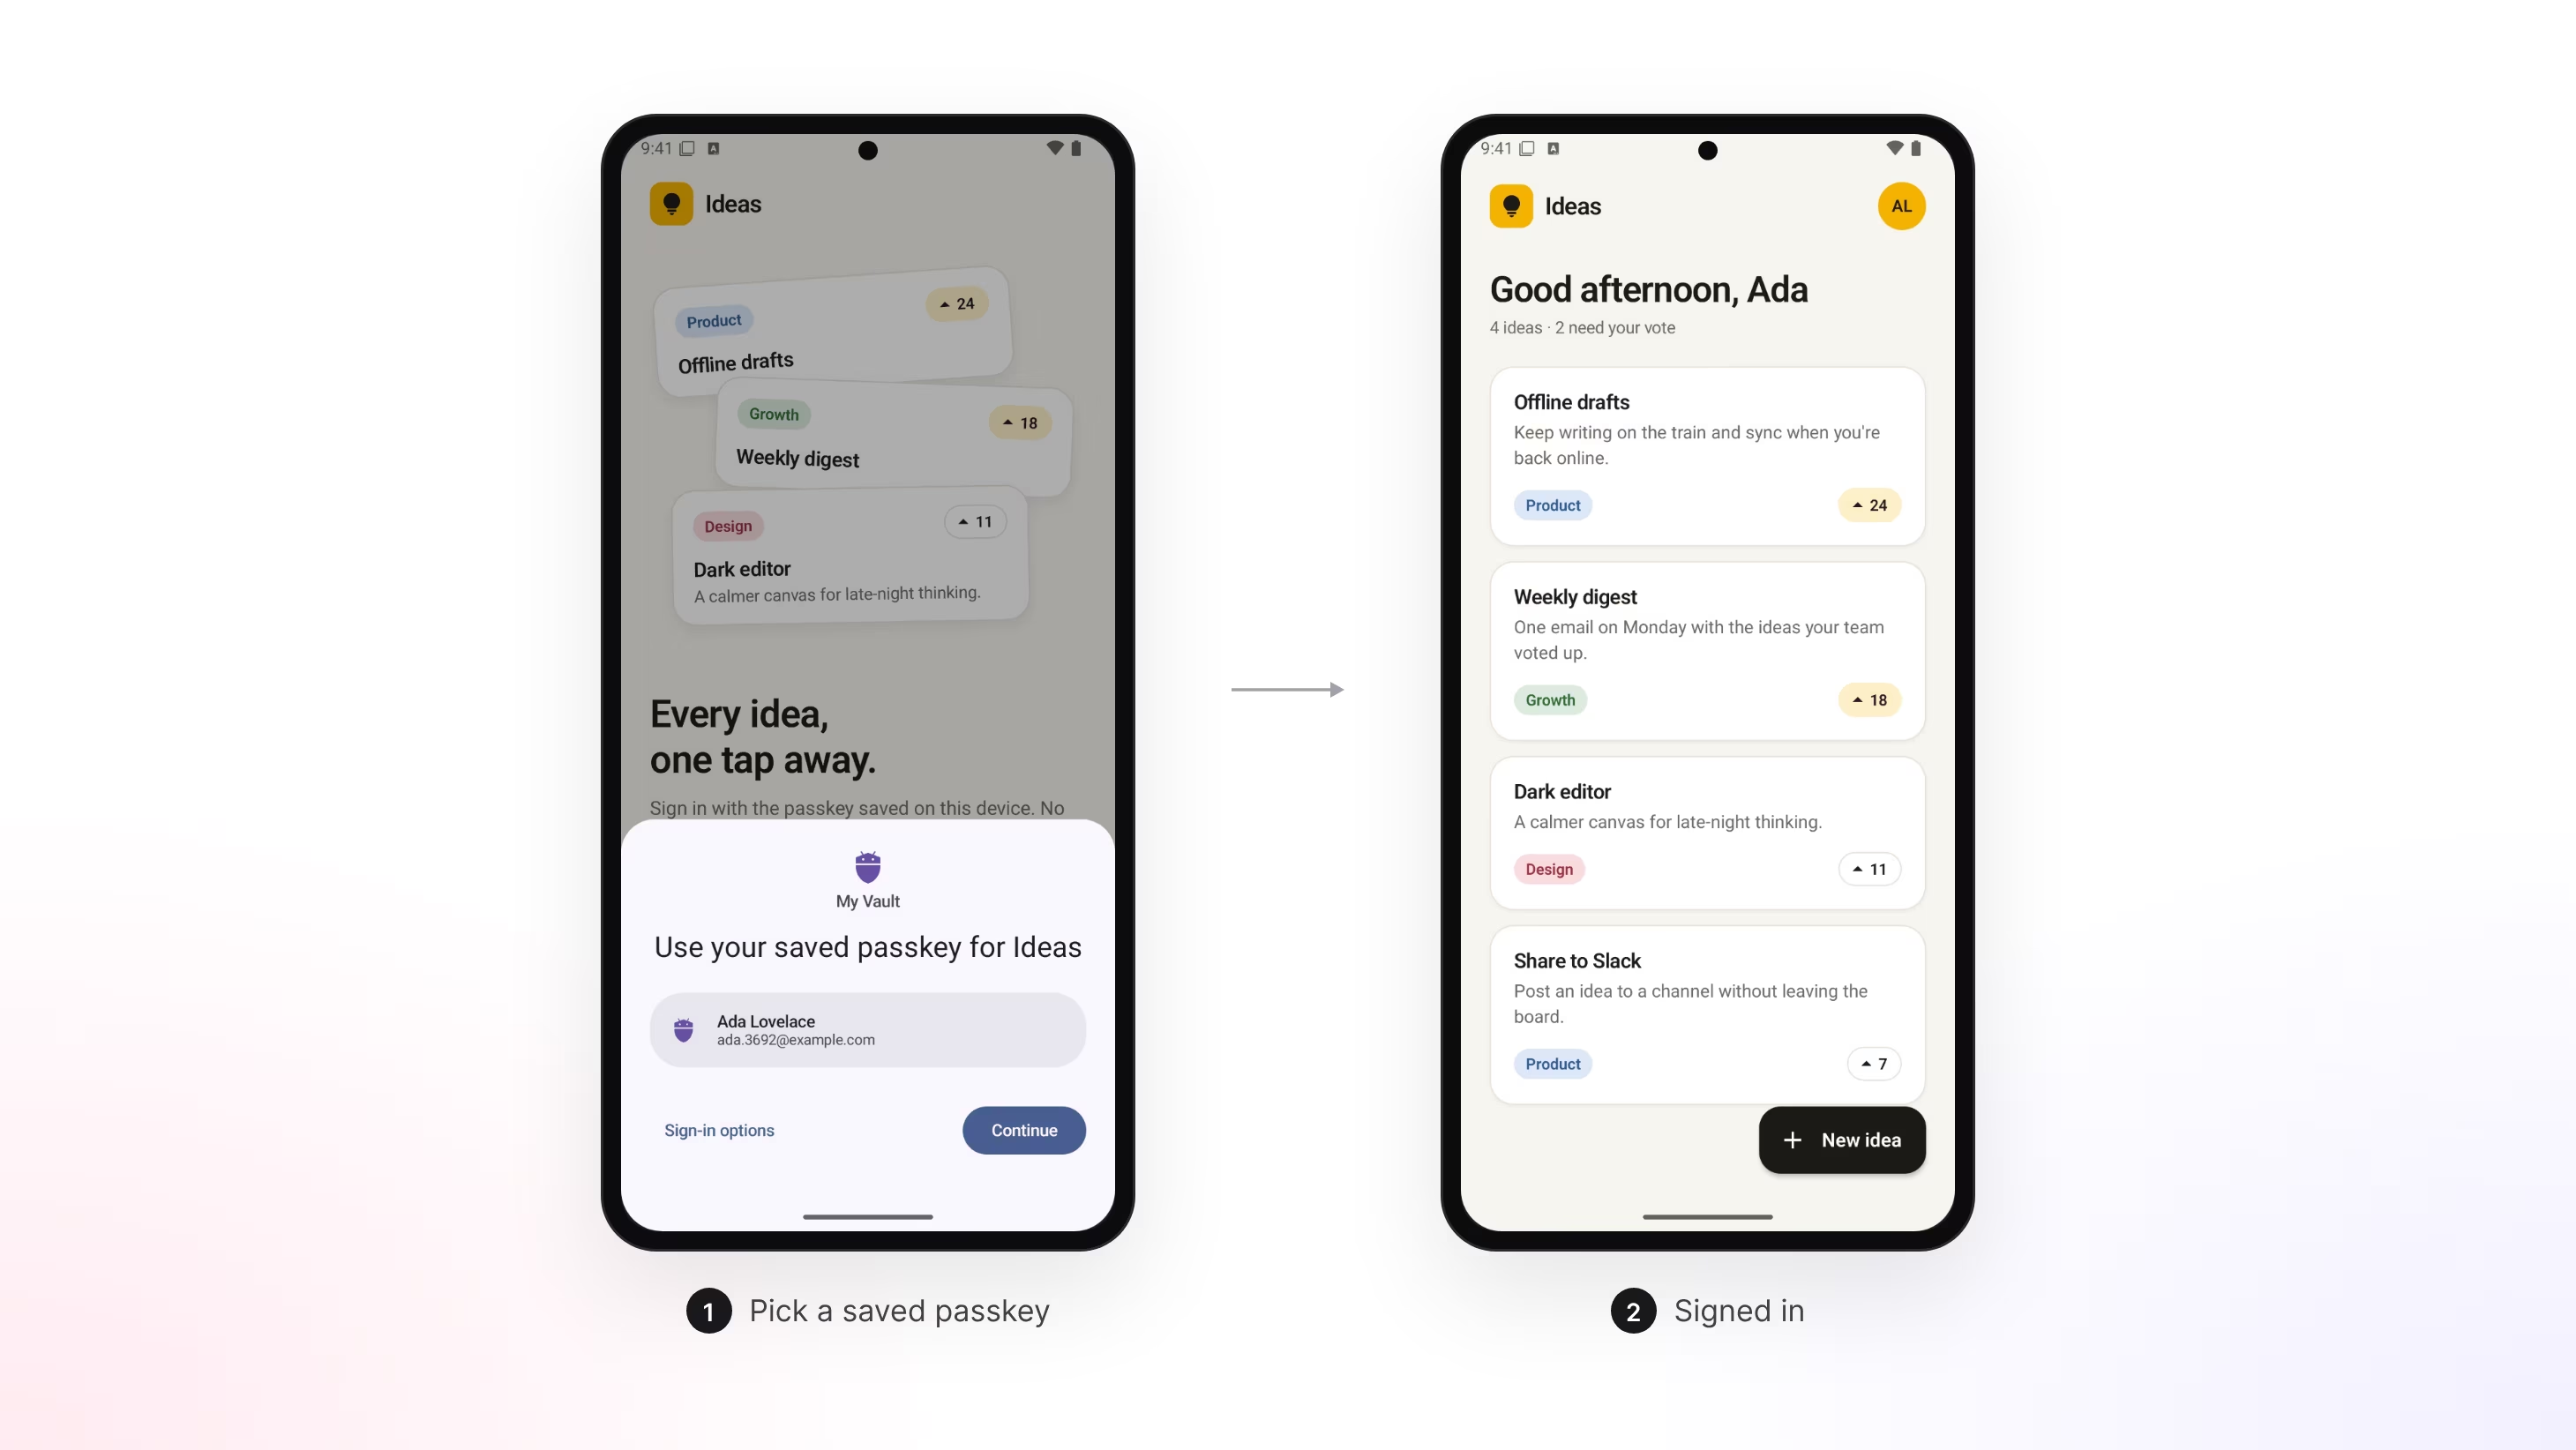
Sign-in needs no email or password. The user picks one of their passkeys for your domain, and Appwrite finds the account it belongs to.
- Call
createPasskeyToken(). Appwrite returns a challenge with its$idand thepublicKeyrequest options. - Pass the options to the platform's passkey API. The user picks a passkey and confirms.
- Send the credential to
updatePasskeyToken(). Appwrite verifies it and returns a token with auserIdandsecret. - Exchange the token for a session with
createSession(), as with any token.
The token expires after one minute, and each challenge can only be used once. Each IP address can start and complete 10 passkey sign-ins per hour.
import { Client, Account } from "appwrite";
const client = new Client()    .setEndpoint('https://<REGION>.cloud.appwrite.io/v1') // Your API Endpoint    .setProject('<PROJECT_ID>');                           // Your project ID
const account = new Account(client);
const challenge = await account.createPasskeyToken();
const credential = await navigator.credentials.get({    publicKey: PublicKeyCredential.parseRequestOptionsFromJSON(challenge.publicKey),});
const token = await account.updatePasskeyToken({    challengeId: challenge.$id,    credential: credential.toJSON(),});
const session = await account.createSession({ userId: token.userId, secret: token.secret,});import 'package:appwrite/appwrite.dart';import 'package:passkeys/authenticator.dart';import 'package:passkeys/types.dart';
final client = Client() .setEndpoint('https://<REGION>.cloud.appwrite.io/v1') // Your API Endpoint .setProject('<PROJECT_ID>'); // Your project ID
final account = Account(client);final authenticator = PasskeyAuthenticator();
final challenge = await account.createPasskeyToken();
final response = await authenticator.authenticate( AuthenticateRequestType.fromJson(challenge.publicKey),);
final token = await account.updatePasskeyToken( challengeId: challenge.$id, credential: response.toJson(),);
final session = await account.createSession( userId: token.userId, secret: token.secret,);import androidx.credentials.CredentialManagerimport androidx.credentials.GetCredentialRequestimport androidx.credentials.GetPublicKeyCredentialOptionimport androidx.credentials.PublicKeyCredentialimport com.google.gson.Gsonimport com.google.gson.reflect.TypeTokenimport io.appwrite.Clientimport io.appwrite.services.Account
val client = Client(context) .setEndpoint("https://<REGION>.cloud.appwrite.io/v1") // Your API Endpoint .setProject("<PROJECT_ID>") // Your project ID
val account = Account(client)val credentialManager = CredentialManager.create(context)val gson = Gson()val mapType = object : TypeToken<Map<String, Any?>>() {}.type
val challenge = account.createPasskeyToken()
val result = credentialManager.getCredential( activity, GetCredentialRequest(listOf(GetPublicKeyCredentialOption(gson.toJson(challenge.publicKey)))),)val credential = (result.credential as PublicKeyCredential).authenticationResponseJson
val token = account.updatePasskeyToken( challengeId = challenge.id, credential = gson.fromJson(credential, mapType),)
val session = account.createSession( userId = token.userId, secret = token.secret,)import AuthenticationServicesimport Appwrite
let client = Client() .setEndpoint("https://<REGION>.cloud.appwrite.io/v1") // Your API Endpoint .setProject("<PROJECT_ID>") // Your project ID
let account = Account(client)
let challenge = try await account.createPasskeyToken()let options = challenge.publicKey
let provider = ASAuthorizationPlatformPublicKeyCredentialProvider( relyingPartyIdentifier: options["rpId"]?.value as! String)let request = provider.createCredentialAssertionRequest( challenge: Data(base64URLEncoded: options["challenge"]?.value as! String)!)
// Present an ASAuthorizationController with the request.// In authorizationController(controller:didCompleteWithAuthorization:):guard let assertion = authorization.credential as? ASAuthorizationPlatformPublicKeyCredentialAssertion else { return }
let token = try await account.updatePasskeyToken( challengeId: challenge.id, credential: [ "id": assertion.credentialID.base64URLEncodedString(), "rawId": assertion.credentialID.base64URLEncodedString(), "type": "public-key", "response": [ "clientDataJSON": assertion.rawClientDataJSON.base64URLEncodedString(), "authenticatorData": assertion.rawAuthenticatorData.base64URLEncodedString(), "signature": assertion.signature.base64URLEncodedString(), "userHandle": assertion.userID.base64URLEncodedString(), ], ])
let session = try await account.createSession( userId: token.userId, secret: token.secret)import { Client, Account } from 'react-native-appwrite';import { Passkey } from 'react-native-passkey';
const client = new Client() .setEndpoint('https://<REGION>.cloud.appwrite.io/v1') // Your API Endpoint .setProject('<PROJECT_ID>'); // Your project ID
const account = new Account(client);
const challenge = await account.createPasskeyToken();
const credential = await Passkey.get(challenge.publicKey);
const token = await account.updatePasskeyToken({ challengeId: challenge.$id, credential,});
const session = await account.createSession({ userId: token.userId, secret: token.secret,});Manage passkeys
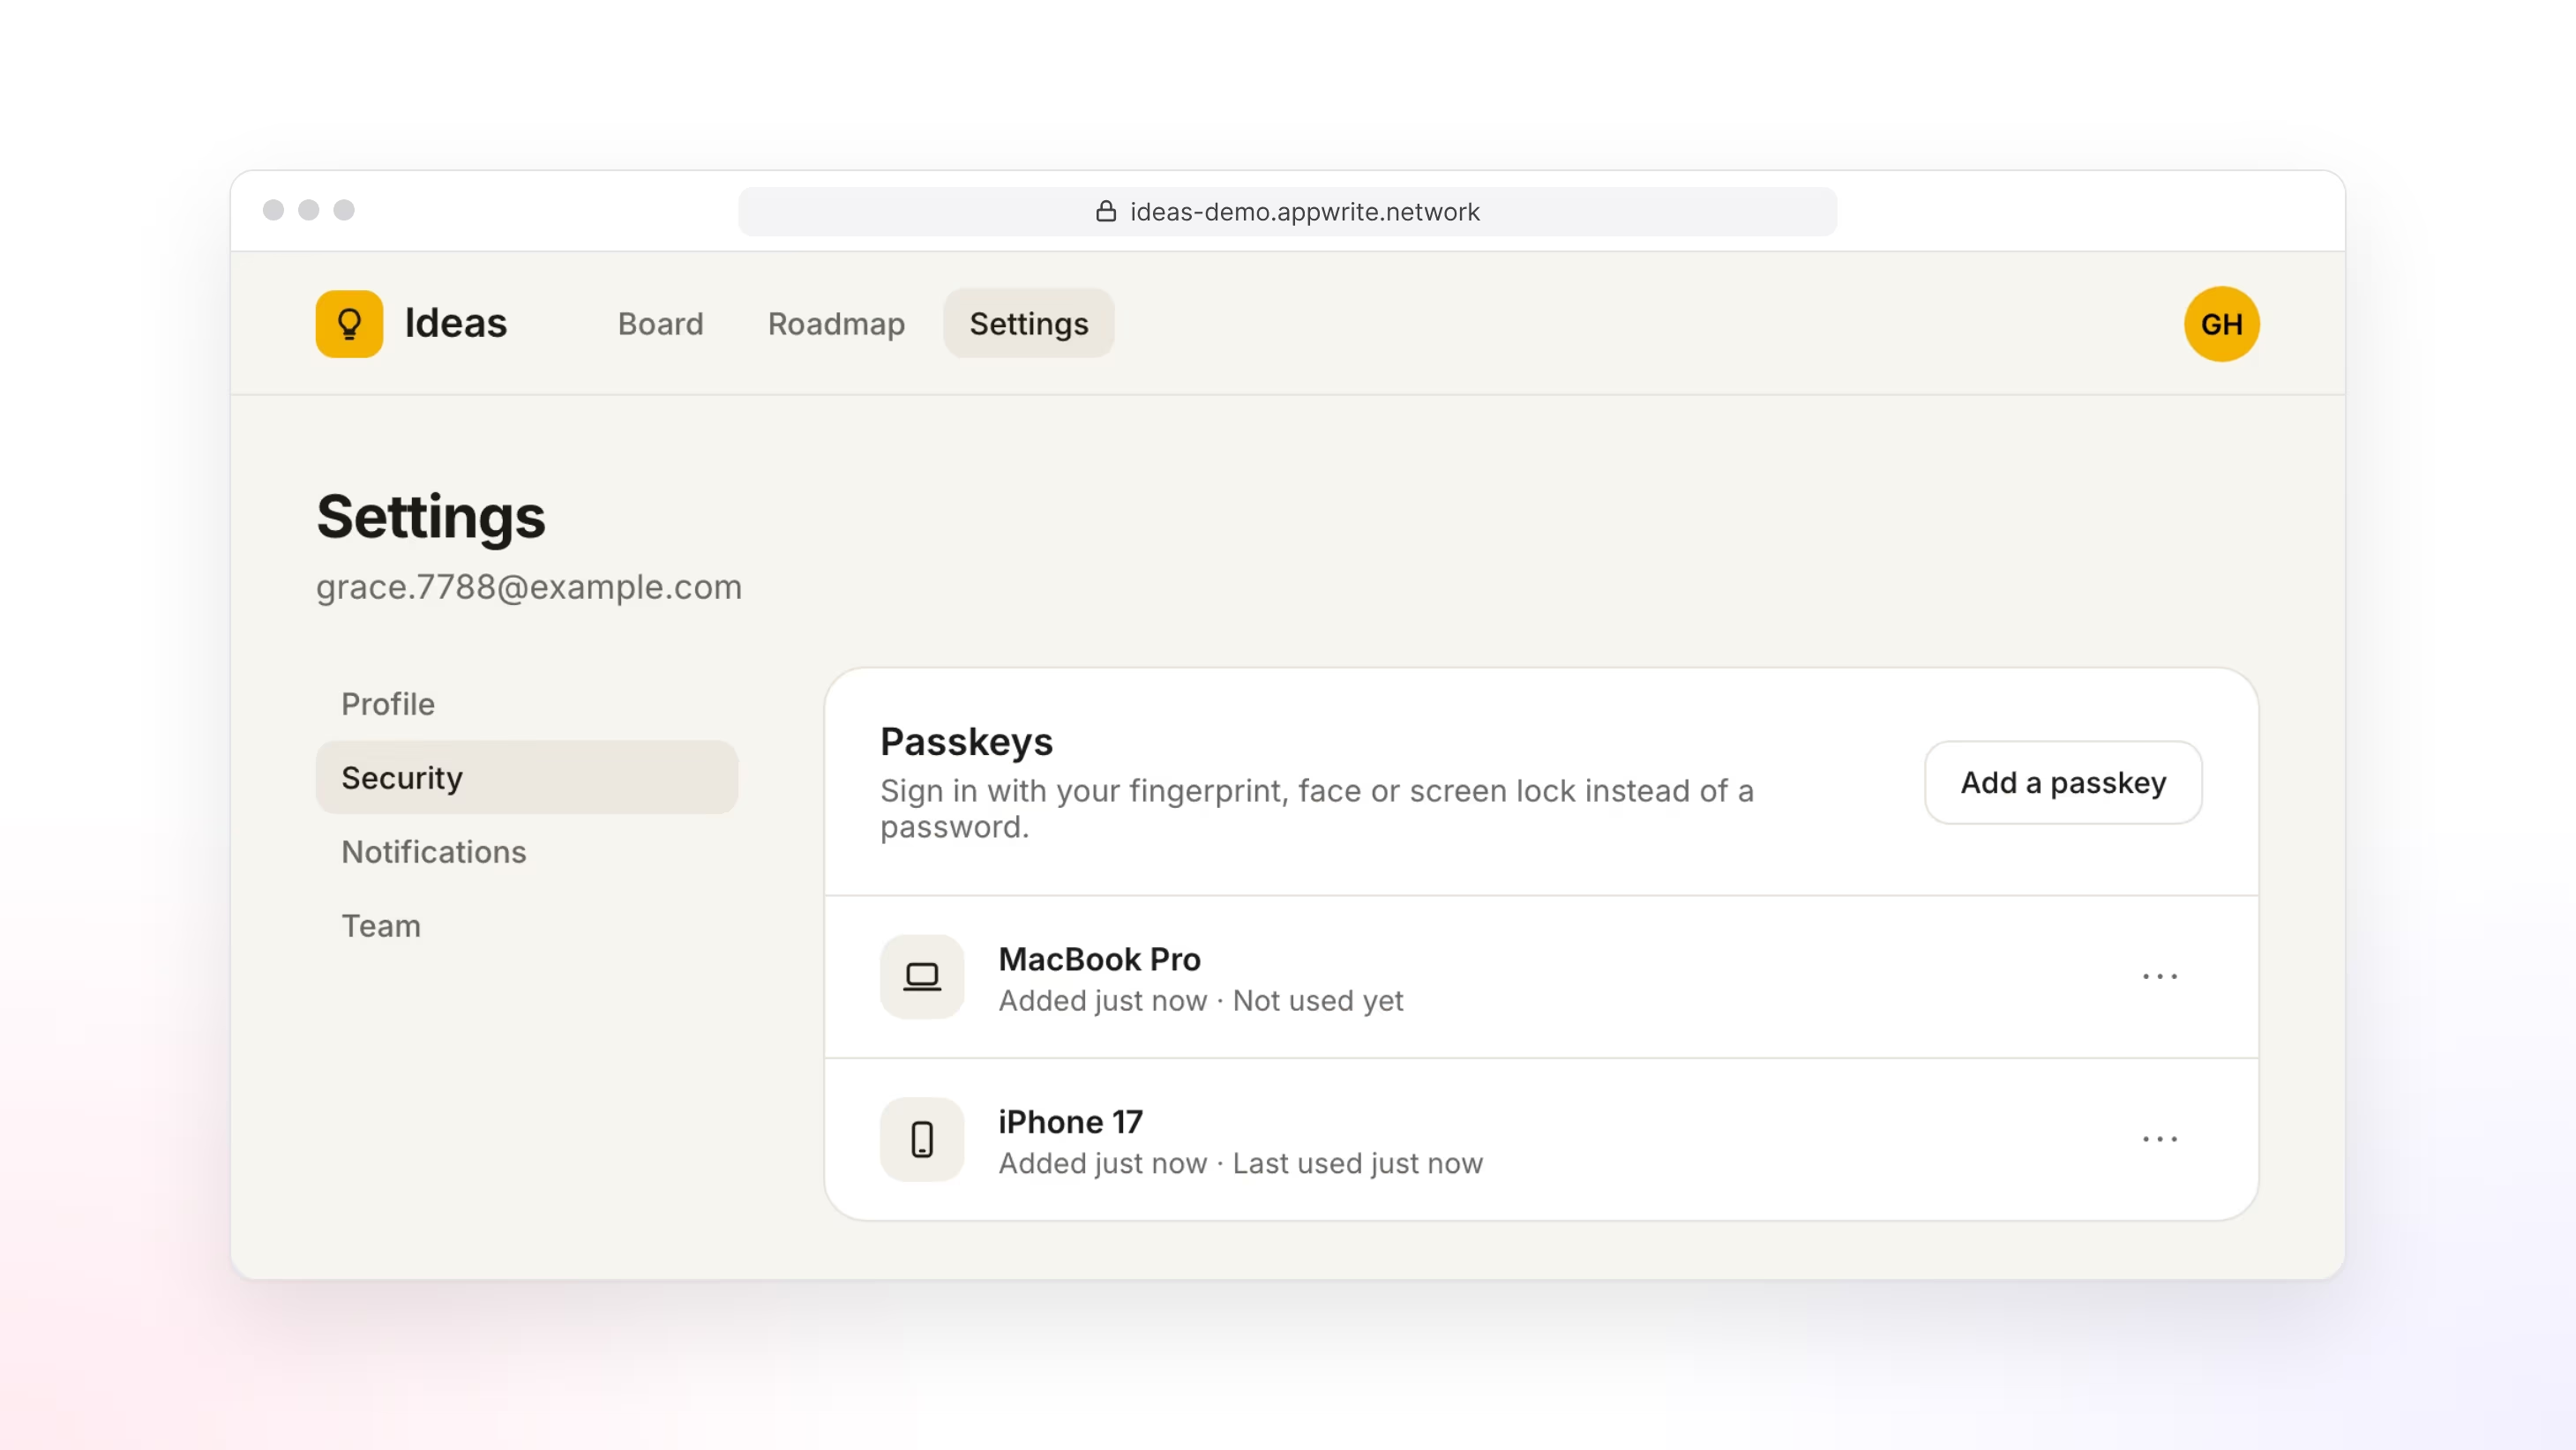
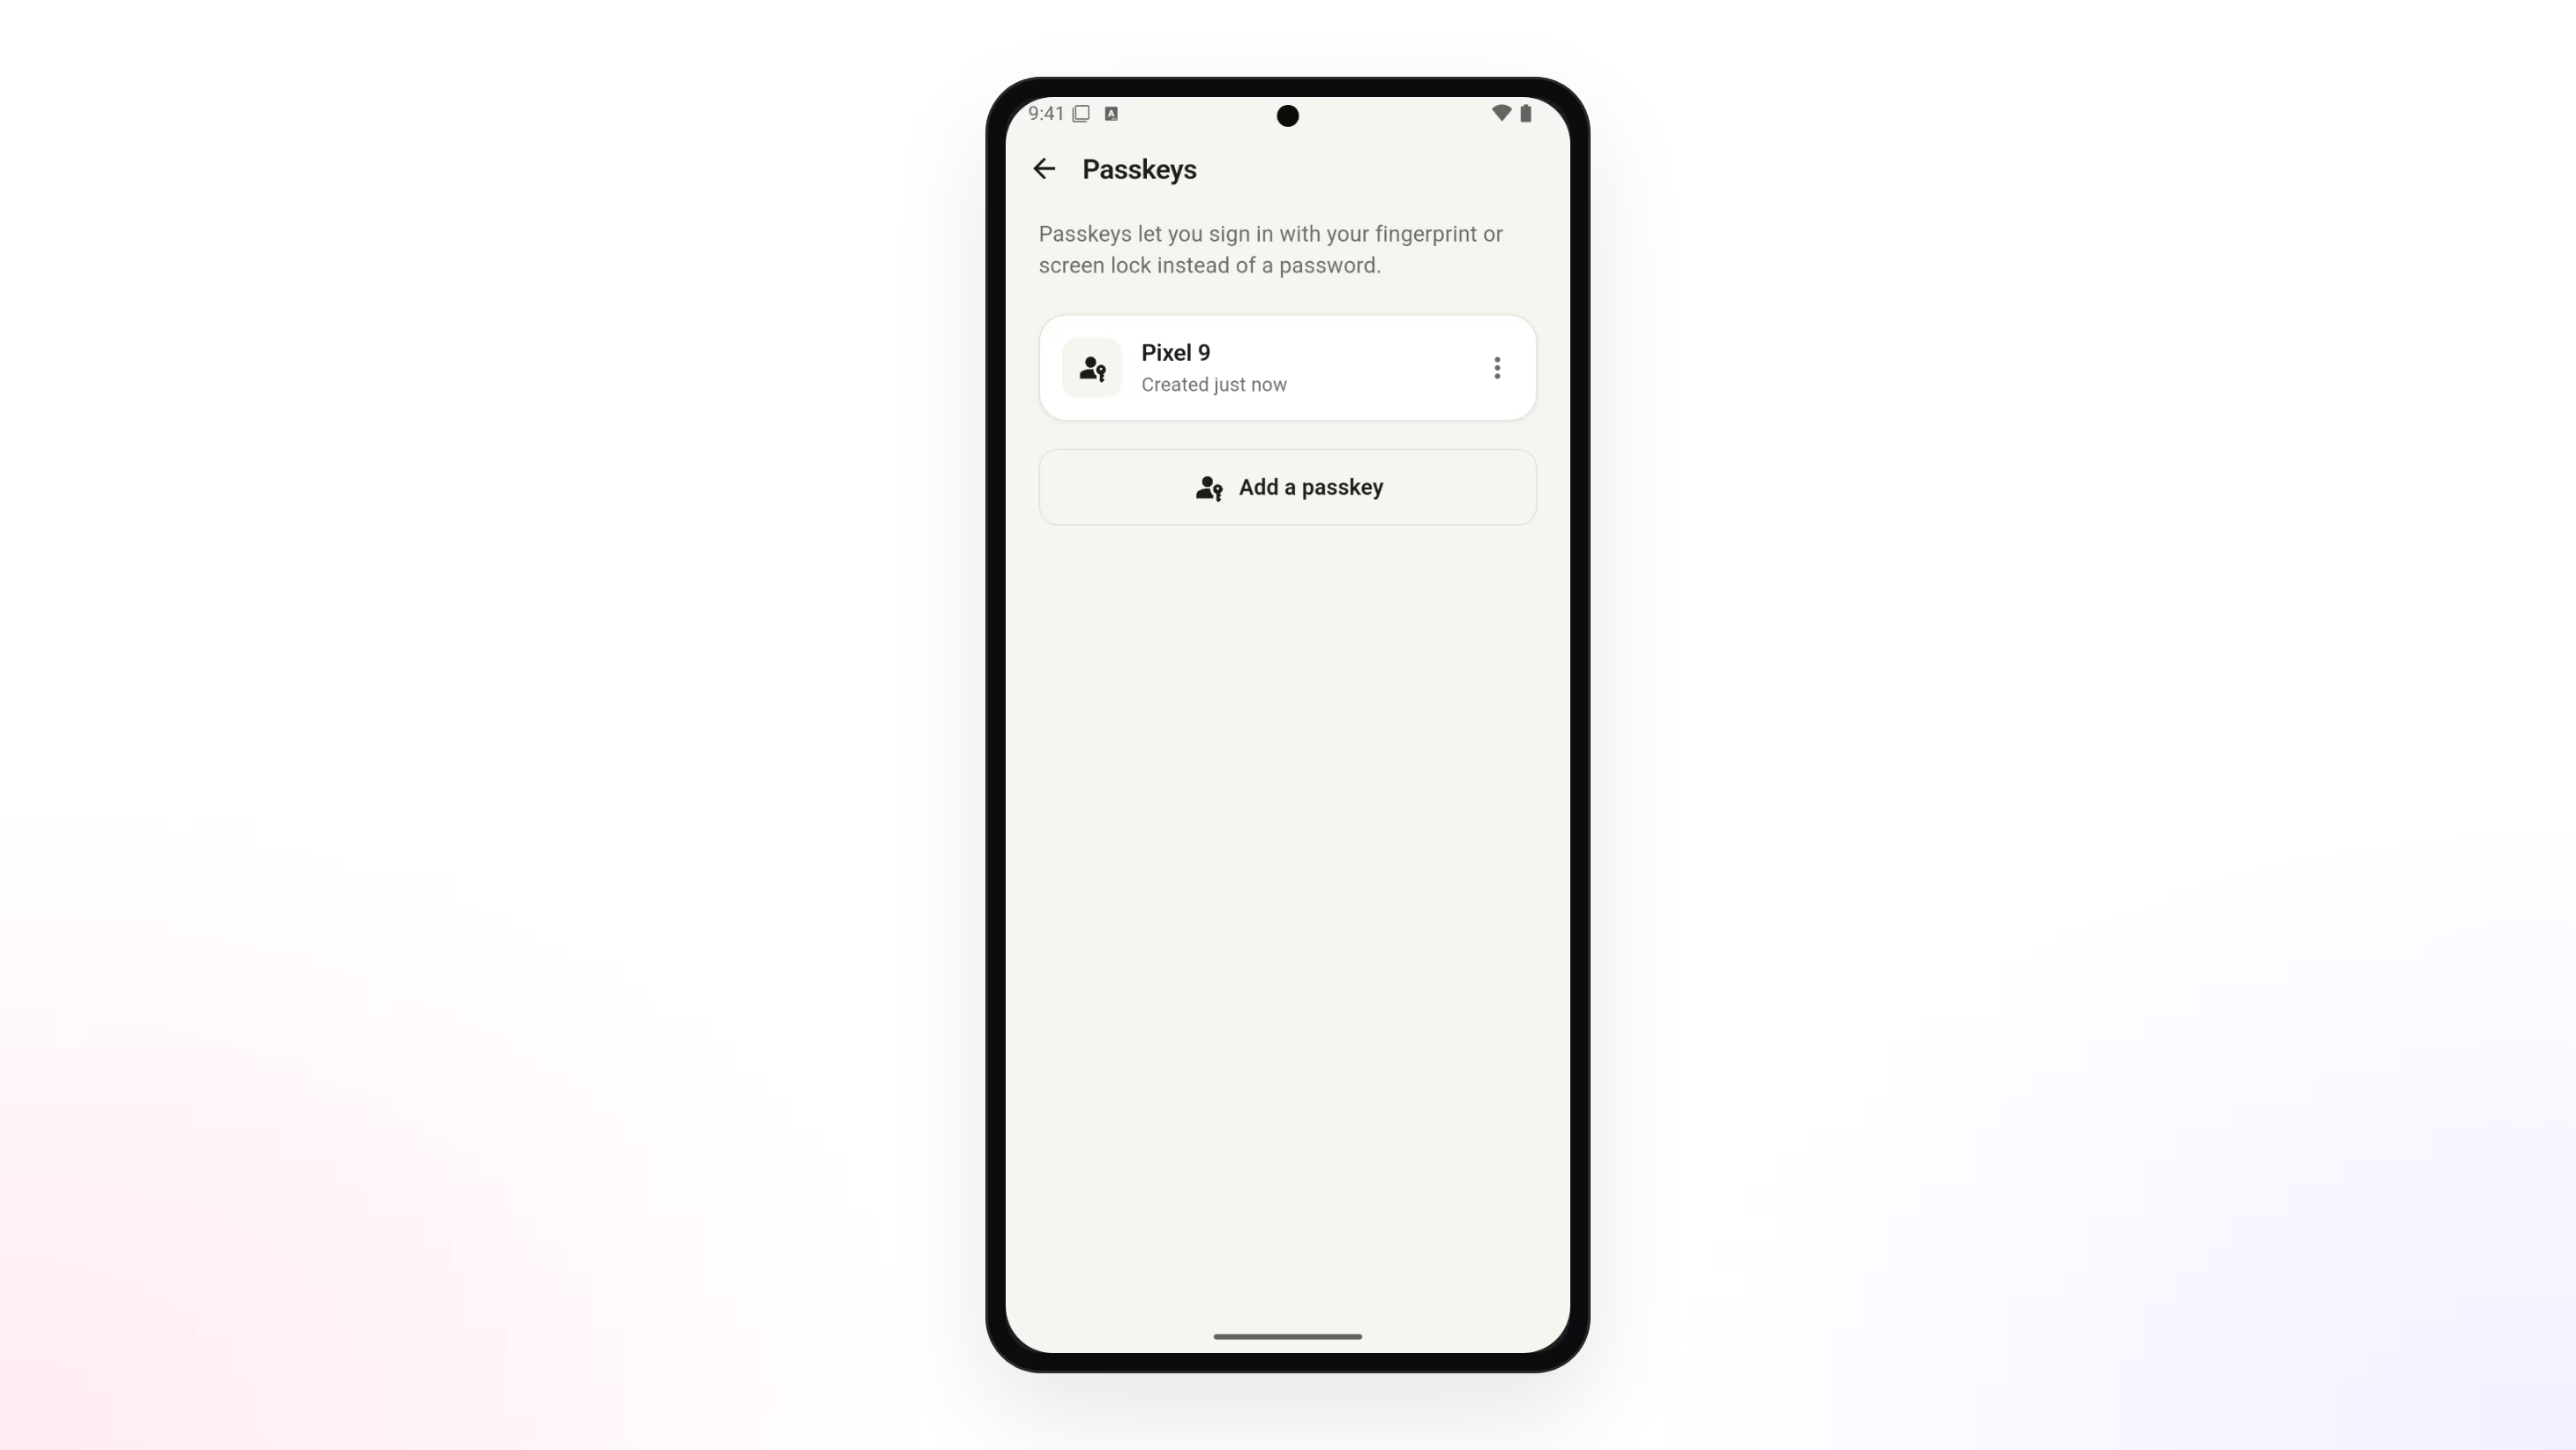
Signed-in users can list, rename, and delete their own passkeys, for example from a security settings screen. Each passkey records its name and when it was last used. Like registration, deleting a passkey needs a session that signed in, or completed MFA, within the last 10 minutes.
import { Client, Account } from "appwrite";
const client = new Client()    .setEndpoint('https://<REGION>.cloud.appwrite.io/v1') // Your API Endpoint    .setProject('<PROJECT_ID>');                           // Your project ID
const account = new Account(client);
// List the passkeys on the accountconst { passkeys } = await account.listPasskeys();
// Rename a passkeyawait account.updatePasskey({ passkeyId: passkeys[0].$id, name: 'Work laptop' });
// Delete a passkeyawait account.deletePasskey({ passkeyId: passkeys[0].$id });
On the server, the Users service has the same operations for any user: users.listPasskeys(), users.getPasskey(), users.updatePasskey() and users.deletePasskey(). Use them to remove a lost device's passkey on a user's behalf. Deleting a user also deletes their passkeys.
Errors
| Error | Cause |
|---|---|
user_auth_method_unsupported | Passkeys are turned off, or the project has no relying party ID with a matching platform. |
user_reauthentication_required | Registering or deleting a passkey needs a session that signed in, or completed MFA, within the last 10 minutes. |
user_invalid_token | The challenge expired after 5 minutes or was already used, registration finished from a different session, the passkey settings changed during the ceremony, or the sign-in token expired after one minute. Start again. |
user_passkey_invalid | The credential failed verification, for example because the origin is not one Appwrite accepts or the signature does not match. |
user_passkey_limit_exceeded | The user already has 10 passkeys, counting registrations still in progress. |
user_passkey_already_exists | This credential, or a passkey with this ID, is already registered. |
user_passkey_not_found | No passkey with this ID belongs to the user, or the registration is no longer pending. |
user_blocked | The passkey belongs to a blocked user. |
general_argument_invalid | You tried to change the relying party ID while users have passkeys, including localhost passkeys and registrations in progress. |
general_rate_limit_exceeded | Too many passkey requests. Registration allows 10 per user and sign-in 10 per IP address each hour. |
When registration or sign-in fails with user_passkey_invalid from a native app, compare the origin the platform sent with Where passkeys work under Auth > Policies > Passkeys. On Android, a missing origin usually means the app was signed with a key whose fingerprint is not on the Android platform.
Was this page helpful?
Share what worked or what we should fix. Once approved, our agents automatically apply suggested updates to the docs.