Dodo Payments is a Merchant of Record for SaaS, AI, and digital products. It sells your product to customers in 220+ countries as the legal seller, so payment processing, sales tax and VAT, fraud screening, and chargebacks are handled for you. Its billing covers subscriptions with renewals, plan changes, and recovery of failed payments, on top of one-time and usage-based billing.
How does the integration work?
You can use a pre-built Appwrite Function template to sell a recurring plan with Dodo Payments, such as a SaaS plan or a membership. The function creates a Dodo Payments checkout session for the signed-in Appwrite user. While the subscription gives access, the function adds a subscriber label to the user, which you can use in permissions to unlock paid features. When the subscription stops, the label is removed.
The function verifies every webhook signature and looks the subscription up in Dodo Payments before changing the label, so a late or repeated webhook can't leave access out of date. It also ships a demo page so you can test the full flow before writing any code.
How to implement
To implement the Dodo Payments subscriptions integration, there are several steps you must complete:
Step 1: Set up Dodo Payments
First, sign up for Dodo Payments and keep the dashboard in Test Mode while you build. Test mode and live mode have separate API keys, products, and webhooks.
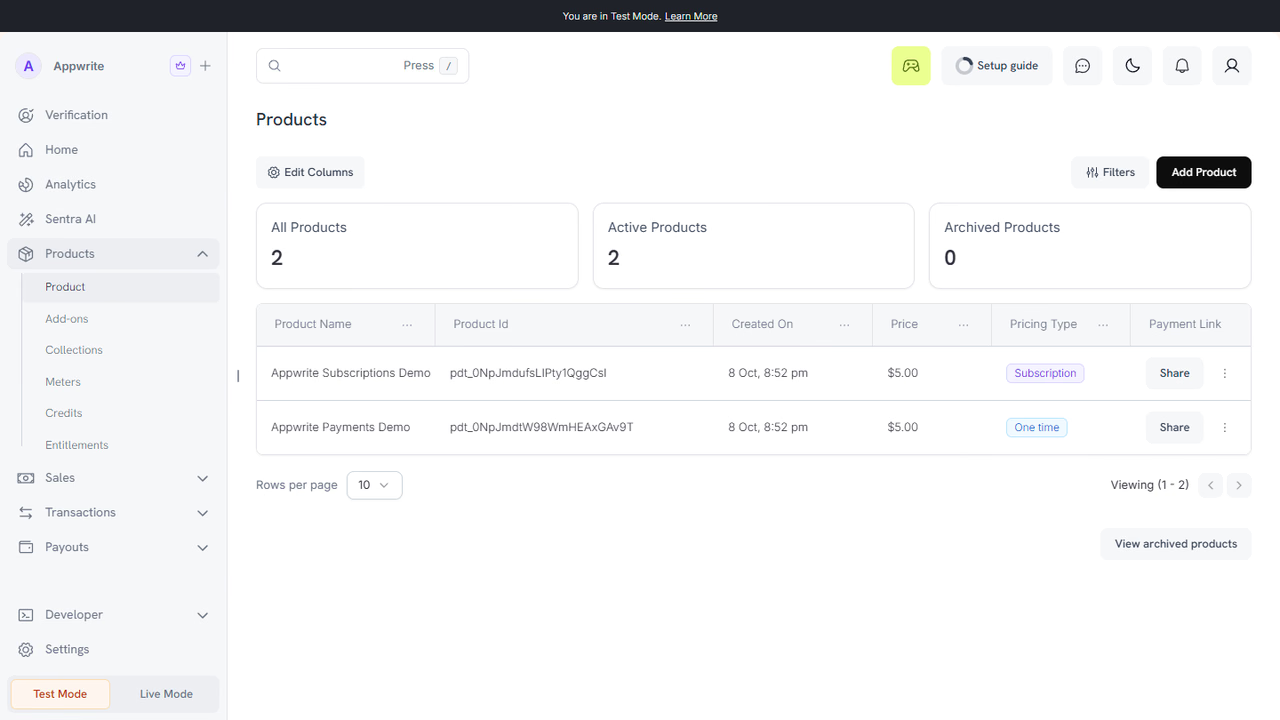
Head to Products in the sidebar and click Add Product. Choose Subscription as the pricing type, fill in the name, price, and billing period, and copy the Product Id from the product list.
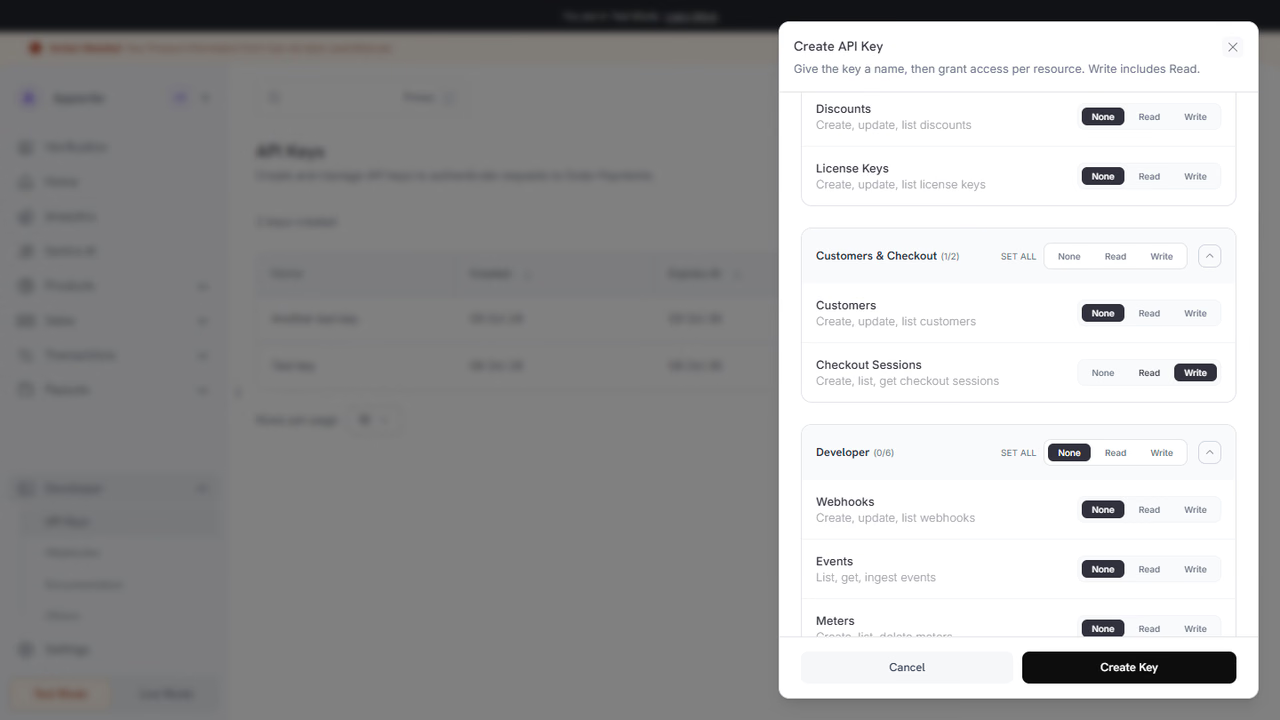
Next, head to Developer > API Keys and click Create New Key. Give the key a name and grant Checkout Sessions write access and Subscriptions read access. Click Create Key and copy the key. Dodo Payments shows it only once.
Step 2: Create the Appwrite Function
For this step, you must create an account on Appwrite Cloud or self-host Appwrite if you haven't already. The Dodo Payments templates are available on Appwrite Cloud and in self-hosted Appwrite 2.6.0 and later. If you self-host Appwrite, there are additional setup steps to use Appwrite Function templates.
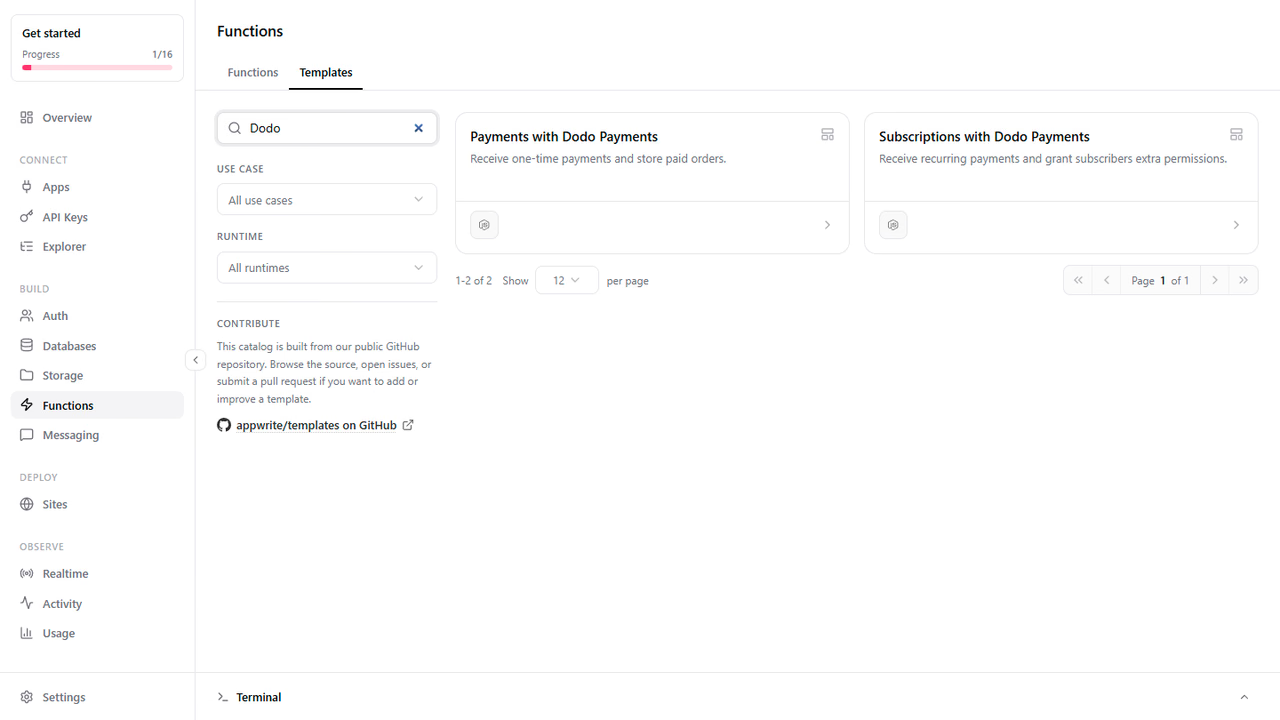
Head over to the Appwrite Console, navigate to the Functions page, click the Templates tab, and search for the Subscriptions with Dodo Payments function template. Click Create from template.
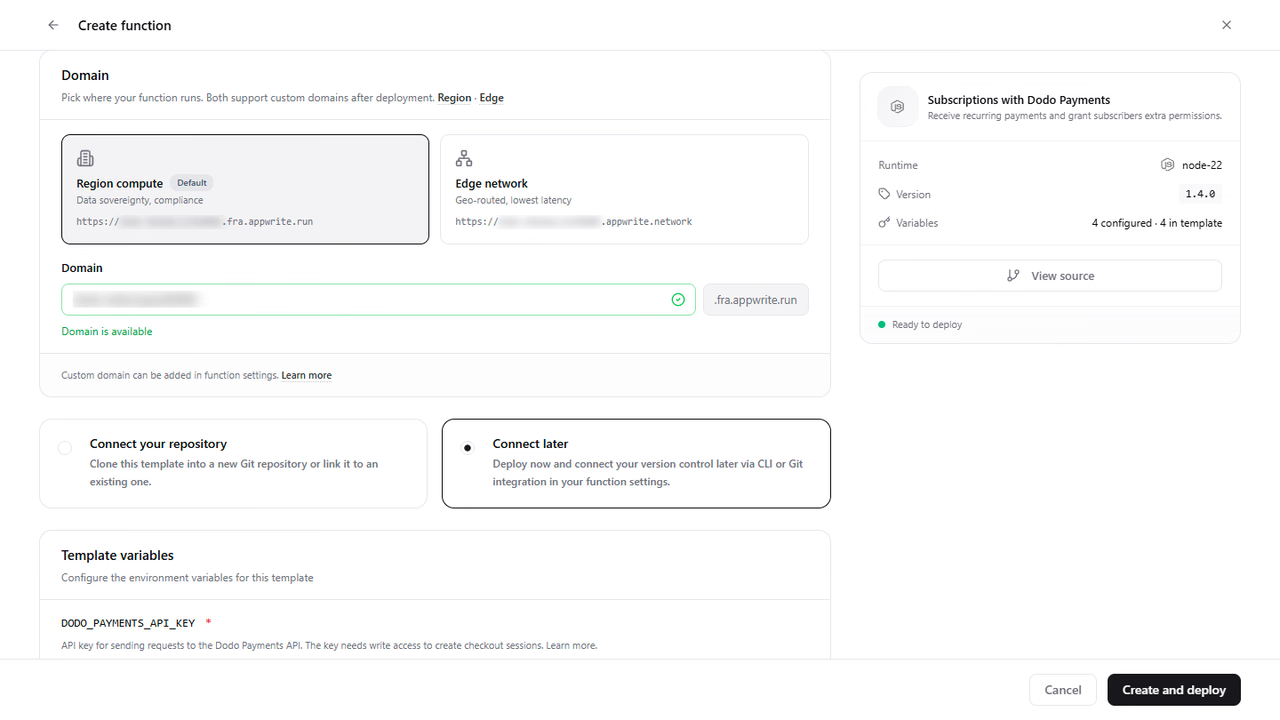
In the Domain section, choose the subdomain your function will run on. Copy the full URL, for example https://<FUNCTION_DOMAIN>.fra.appwrite.run. You need it for the webhook in the next step, so keep this page open.
Step 3: Add the webhook endpoint
In a new tab, go to Developer > Webhooks in the Dodo Payments dashboard and click Add endpoint. Set the Endpoint URL to your function domain followed by /webhook:
https://<FUNCTION_DOMAIN>.fra.appwrite.run/webhookUnder Subscribed events, select the whole subscription group. An endpoint with no events selected receives every event type, so always pick the events.
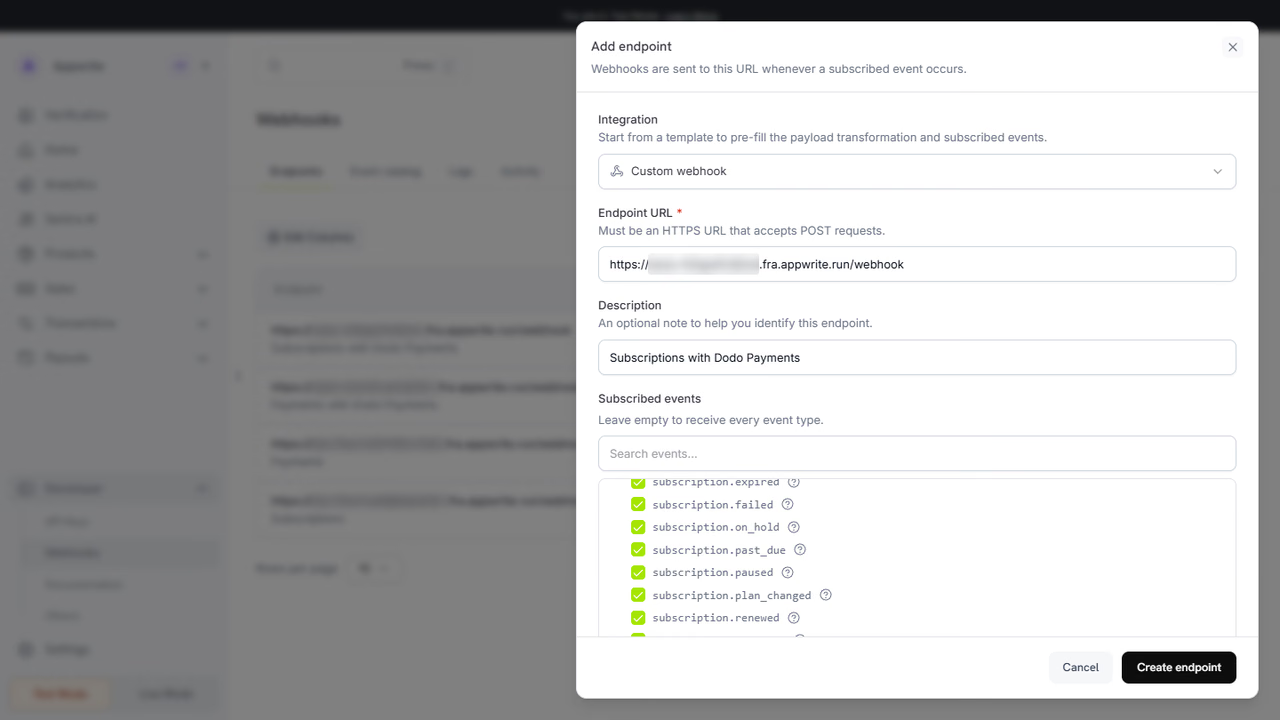
Click Create endpoint. On the endpoint's page, reveal the Signing secret and copy it. The function uses it to verify that webhooks come from Dodo Payments.
Step 4: Configure the variables and deploy
Back in the Appwrite Console, fill in the Template variables:
| Variable | Value |
|---|---|
DODO_PAYMENTS_API_KEY | The API key from step 1 |
DODO_PAYMENTS_WEBHOOK_KEY | The signing secret from step 3 |
DODO_PAYMENTS_PRODUCT_ID | The product ID from step 1 |
DODO_PAYMENTS_ENVIRONMENT | Optional. test_mode (default) or live_mode |
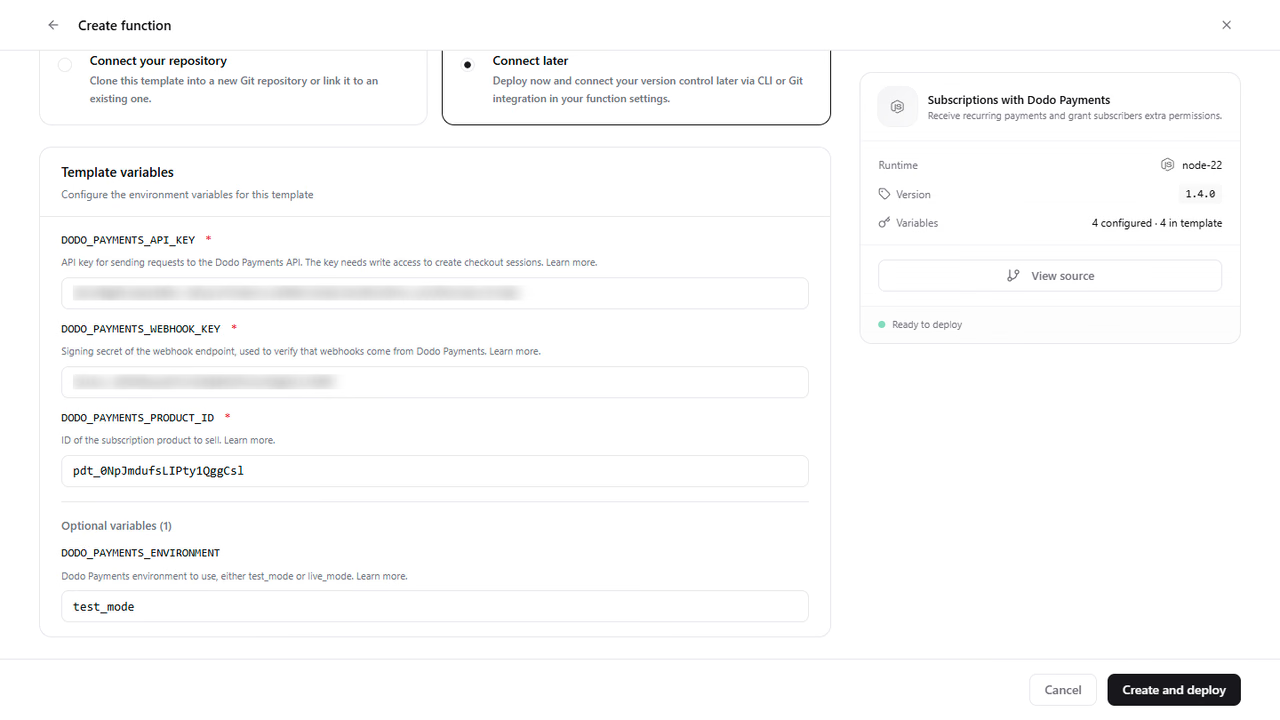
Choose Connect your repository to clone the template into a new Git repository you can edit later, or Connect later to deploy it right away. Then click Create and deploy.
You don't need to create an Appwrite API key. The function talks to Appwrite with an ephemeral API key limited to the scopes the template asks for: users.read and users.write.
Step 5: Test the function
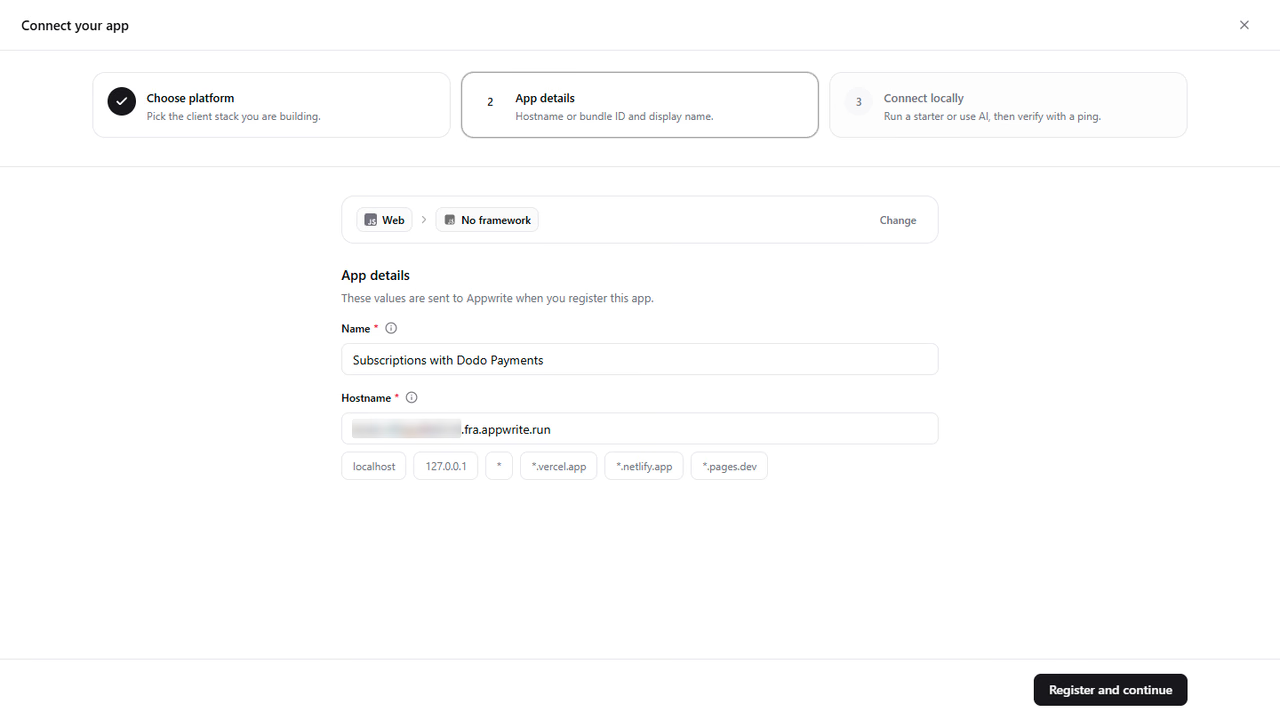
The demo page runs on your function domain and calls Appwrite from the browser, so Appwrite needs to accept requests from that hostname. Open Apps in the project sidebar and click Add app. Choose Web, then No framework, and enter your function domain as the Hostname.
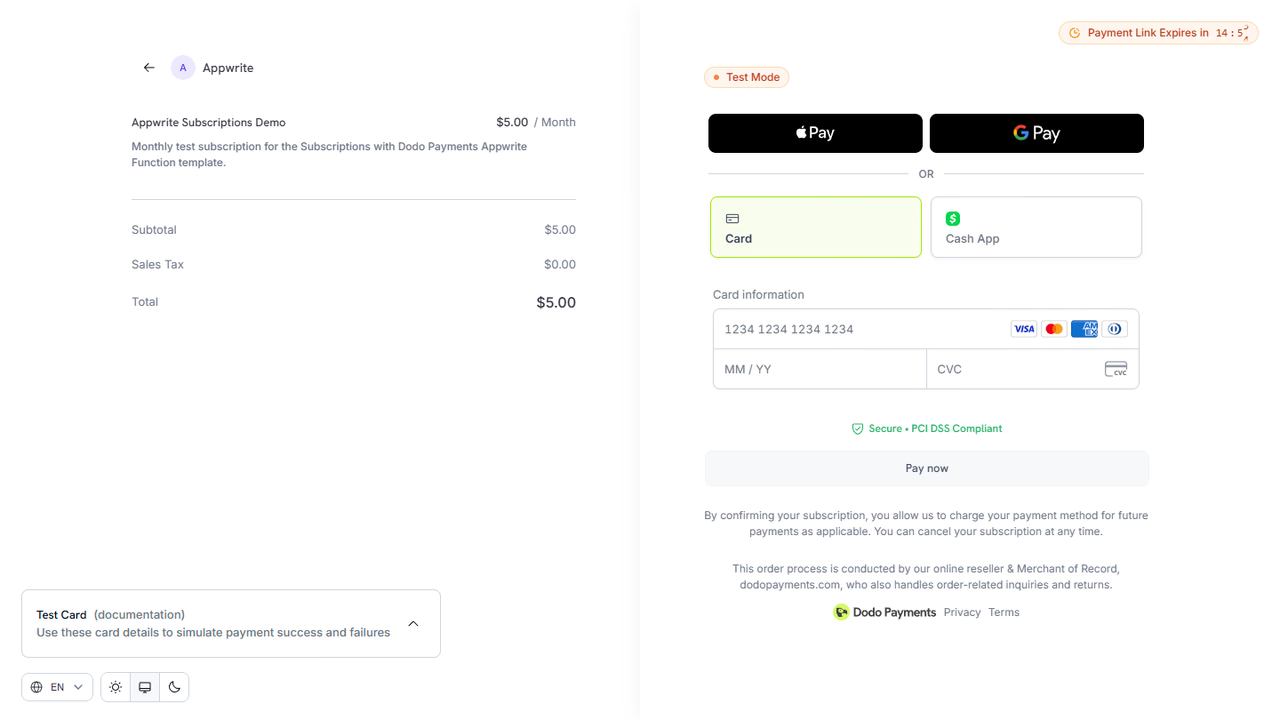
Then, open your function domain in a browser to load the demo page. Click Register as anonymous, then Subscribe with Dodo Payments. The function creates a checkout session and redirects you to the Dodo Payments checkout. Pay with the Dodo Payments test card 4242 4242 4242 4242, any future expiry date, and any CVC.
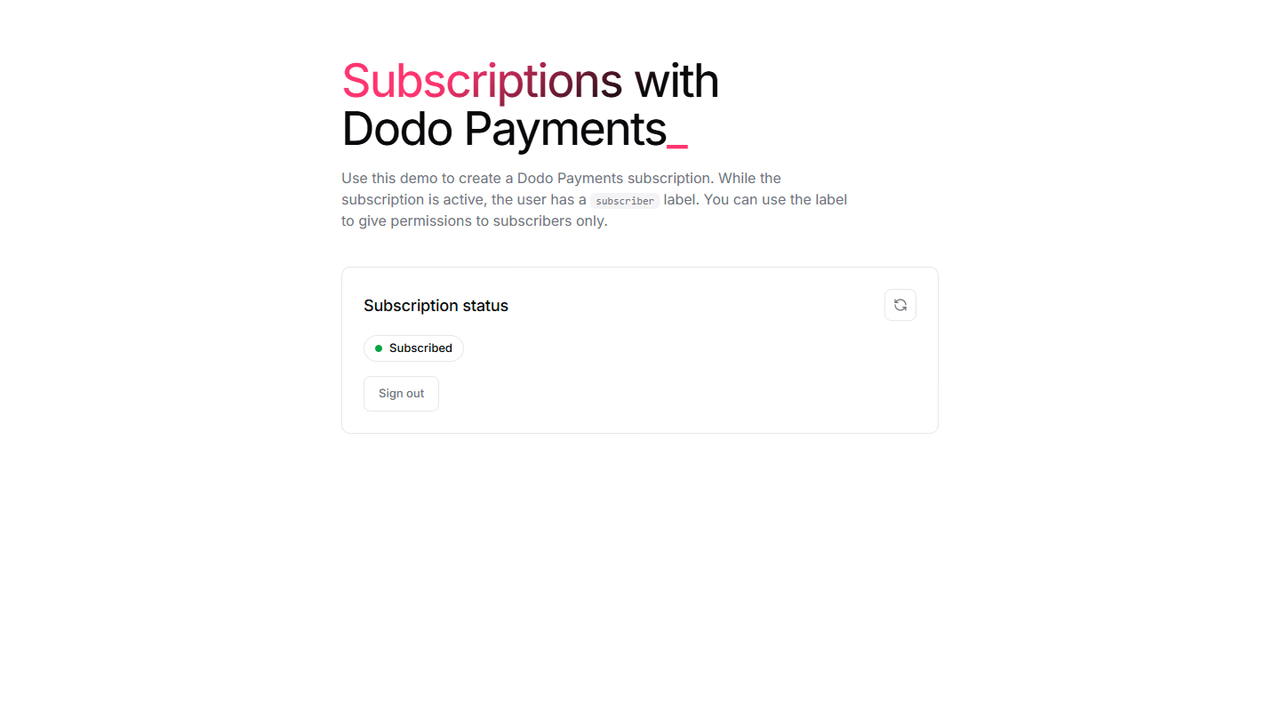
Once Dodo Payments sends you back, the demo page shows that you are subscribed.
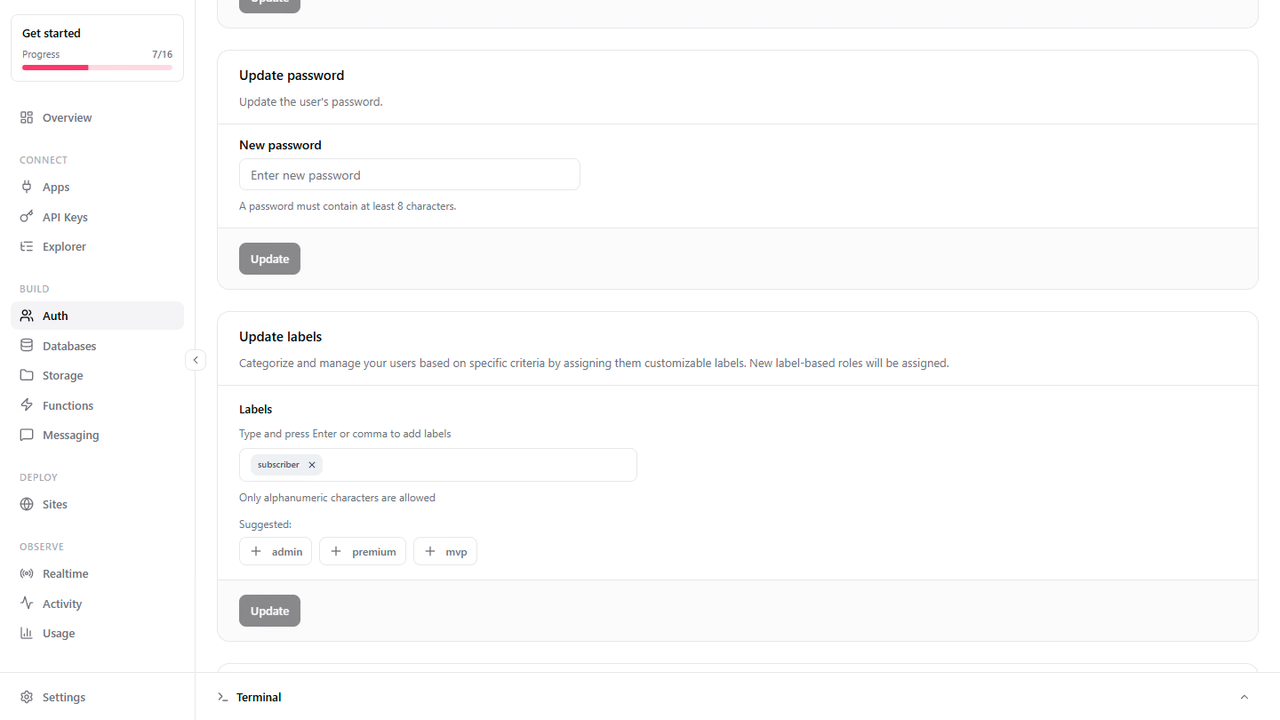
Additionally, your user on Appwrite now has the subscriber label, which you can verify by visiting the Auth page in your Appwrite project and opening the user.
How the function works
The function exposes four routes on its domain:
| Route | Purpose |
|---|---|
GET / | Serves the demo page, where a user can register, subscribe, and see whether they are subscribed |
POST /subscribe | Creates a checkout session for the product in DODO_PAYMENTS_PRODUCT_ID and redirects to it |
GET /success | Verifies the subscription when the user returns from checkout, then redirects them to your success URL |
POST /webhook | Handles every subscription.* event |
To start a subscription from your own app, call /subscribe as the signed-in user, the same way the Payments with Dodo Payments integration calls /checkout.
When a signed-in user starts a checkout, the function stores their Appwrite user ID in the checkout session's metadata, and Dodo Payments carries it through to the subscription. That is how each subscription is tied back to the user who pays for it.
Dodo Payments signs every webhook following the Standard Webhooks specification. The function verifies the signature on every request, then looks the subscription up in Dodo Payments instead of trusting the webhook payload. The /success route repeats the same check when Dodo Payments sends the user back after checkout, so the user gets access even if the webhook is slow.
How access follows the subscription
The function adds or removes the label based on the subscription's current status in Dodo Payments, whatever the event type:
| Subscription status | Effect |
|---|---|
active, past_due | Adds the subscriber label |
on_hold, paused, cancelled, expired, failed, pending | Removes the subscriber label |
past_due is the grace period while Dodo Payments retries a failed renewal, so a customer whose card was declined keeps access until the subscription moves to on_hold or cancelled.
Subscription webhooks can arrive late, twice, or out of order, which is why the function doesn't act on the event type. Each webhook looks up the subscription's current status in Dodo Payments and applies it, so a delayed subscription.active event can't give access back after a cancellation. After each label update, the function checks the status once more and applies it again if it changed in the meantime.
Restrict content to subscribers
The label is what your app builds on. Grant access to Role.label('subscriber') in the permissions of the rows, files, or tables that only paying users should see. For example, with a Server SDK:
import { Client, TablesDB, ID, Permission, Role } from 'node-appwrite';
const client = new Client()    .setEndpoint('https://<REGION>.cloud.appwrite.io/v1')    .setProject('<PROJECT_ID>')    .setKey('<API_KEY>');
const tablesDB = new TablesDB(client);
await tablesDB.createRow({    databaseId: '<DATABASE_ID>',    tableId: 'lessons',    rowId: ID.unique(),    data: { title: 'Advanced lesson' },    permissions: [Permission.read(Role.label('subscriber'))],});
Appwrite enforces that permission on every request, so a user loses access to the lesson as soon as the function removes the label. There's no separate subscription check to write in your app.
Before you go live
The demo flow is built for testing. Before you charge real customers:
- Create a live API key, product, and webhook endpoint in Live Mode, update the variables, and set
DODO_PAYMENTS_ENVIRONMENTtolive_mode. - Check
successUrl,failureUrl, andverifyUrlagainst your own domains inPOST /subscribe, so the function can't be used to redirect people to other sites. - Replace the demo's anonymous sessions with the sign-in method your app uses.
- Mark the API key and signing secret as secret variables so nobody can read them back from the Console.
Read more about Dodo Payments subscriptions and Appwrite Functions
If you would like to learn more about Dodo Payments subscriptions and Appwrite Functions, we have some resources that you should visit:

