React Admin is an open-source framework for building B2B applications and internal tools on top of REST or GraphQL APIs. It provides a rich set of UI components, including data grids, forms, filters, authentication, and more, all powered by Material-UI and following best practices for enterprise-grade admin interfaces.
With Appwrite Sites, you can deploy a fully functional CRM dashboard powered by React Admin in minutes using the pre-built template. The template connects directly to Appwrite's backend services and includes a database seeding script that sets up all the necessary tables and a demo user automatically.
How does the integration work?
Appwrite Sites provides a ready-to-use CRM dashboard template built with React Admin that you can deploy instantly. The template comes pre-configured with Appwrite TablesDB as the data layer and includes customers, orders, products, categories, invoices, and reviews management out of the box.
To deploy the React Admin CRM dashboard template with Appwrite Sites, follow these steps:
Create site
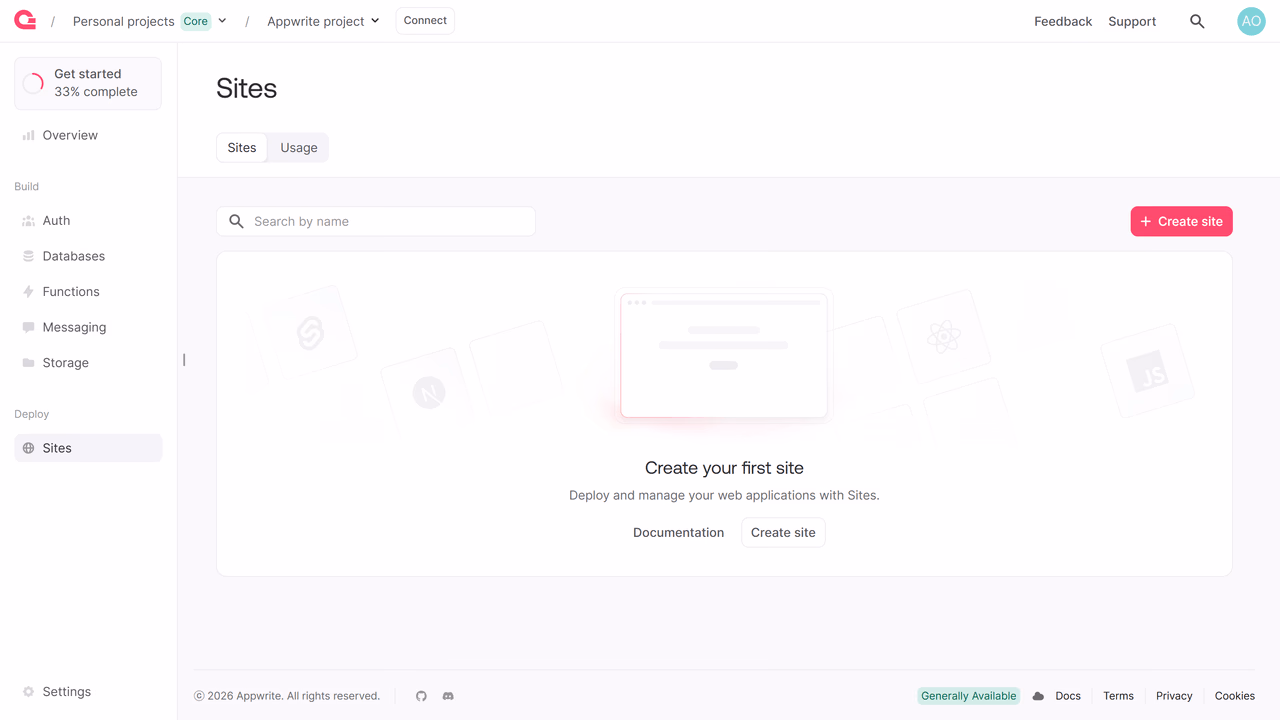
After signing into your Appwrite console, look at the sidebar on the left. Under the Deploy section, you will find the Sites button.
Clicking it opens the Sites page. Here, you will see the Sites tab selected by default. Click Create site to start the deployment process.
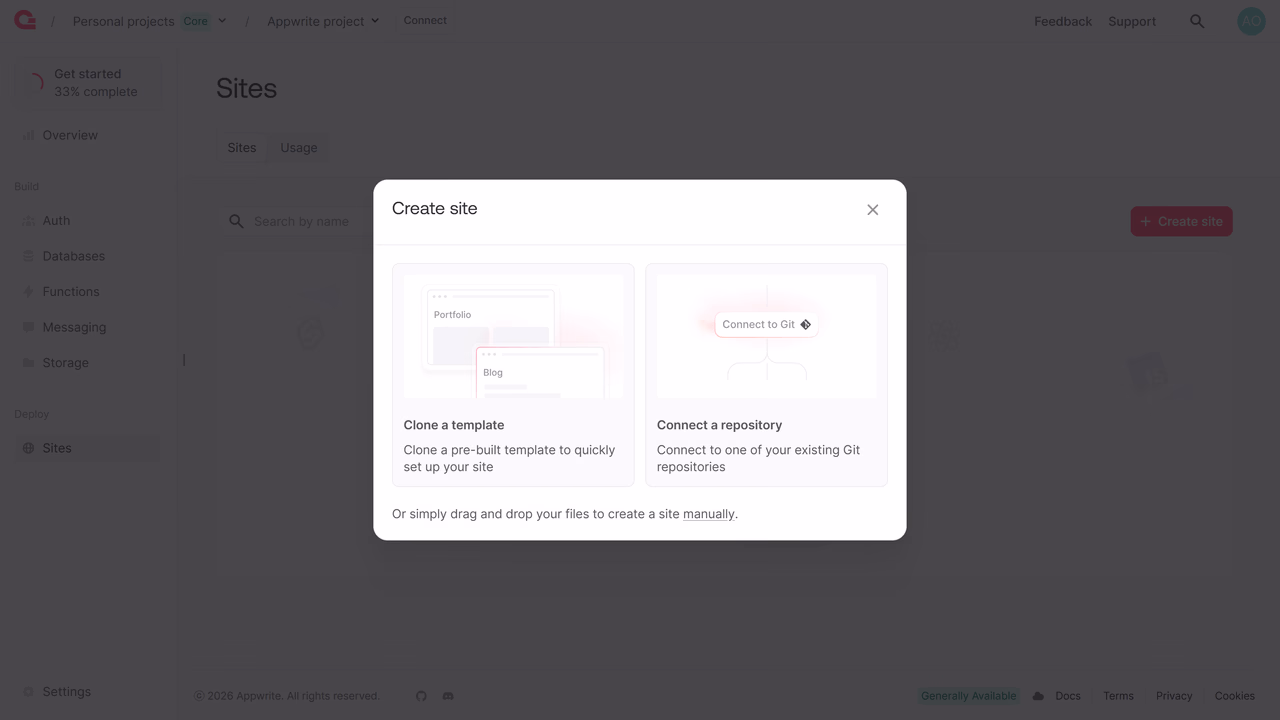
At this point, Appwrite offers two options: Clone a template or Connect a repository. For this guide, we will focus on cloning the CRM dashboard with React Admin template, which lets you quickly set up a CRM dashboard based on a pre-built project.
Finding the React Admin template
When you select Clone a template, you'll see a library of templates. To find the React Admin template:
- Filter by Use case and select Dashboard, or use the search bar at the top and type "React Admin"
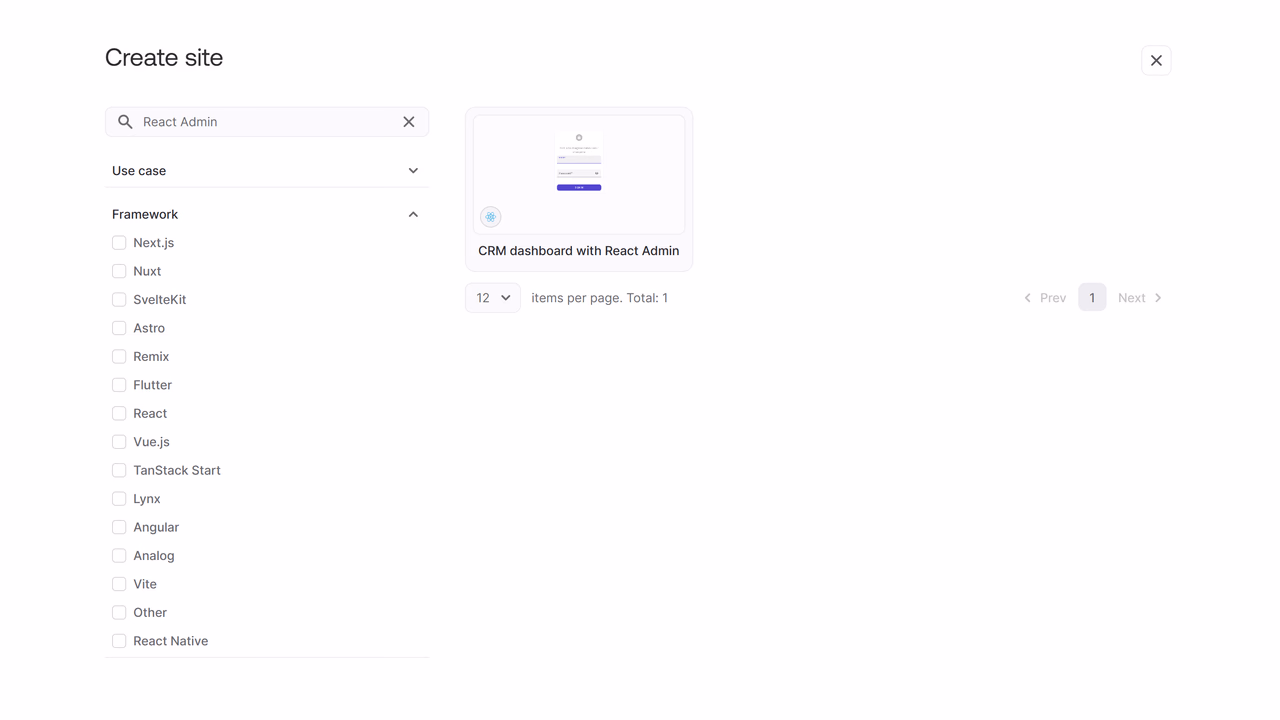
After selecting the template, click on CRM dashboard with React Admin to open a new page where you can configure your site.
Configuring your site
Setting up site details
Once you have selected the React Admin template, you will be prompted to enter basic details for your site.
You will need to provide a Site name and a Site ID. The Site ID becomes part of your site's URL, so it should be lowercase and use hyphens if necessary.
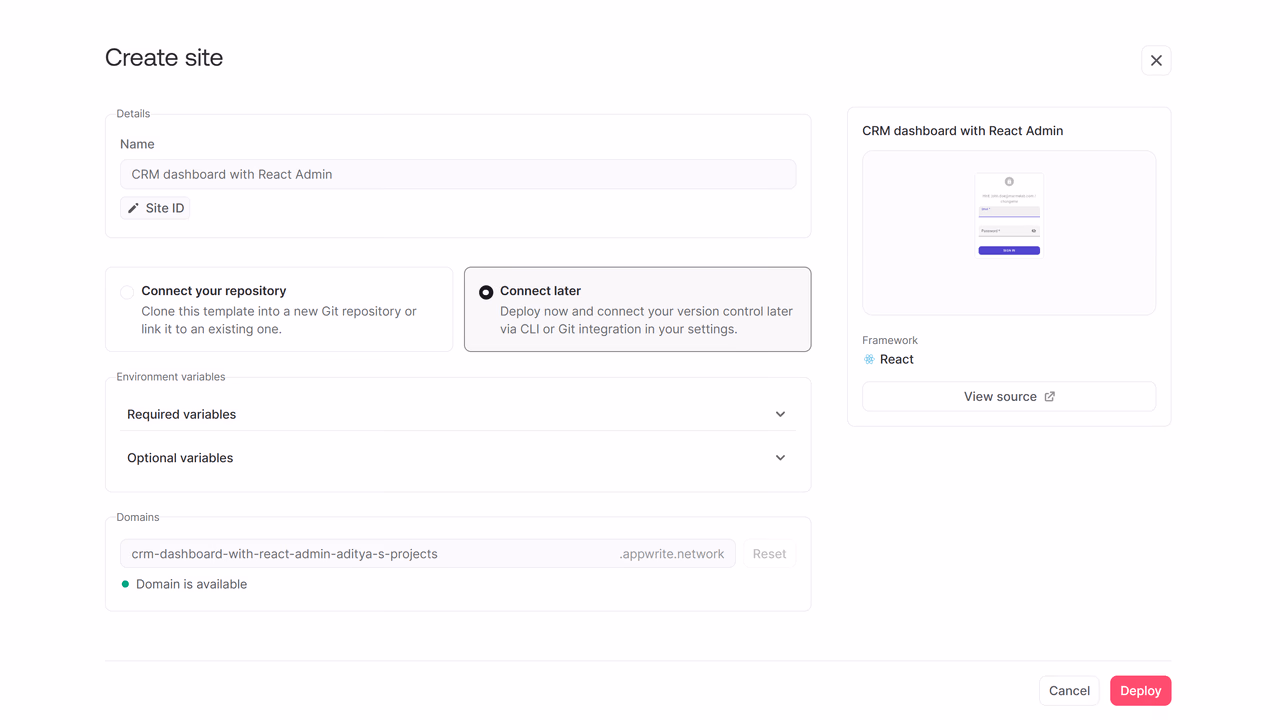
At this stage, you can choose whether to connect your repository now or later.
If you choose Connect your repository, you will be able to either create a new repository based on the template or link it to an existing one. If you prefer to skip this step for now, you can choose Connect later and connect your version control later using the CLI or through the settings page.
If you opt to connect a repository immediately, you will see the following options:
- Select whether to create a new repository or connect to an existing one
- (Optional) Choose a GitHub organization if you have access to multiple organizations
- Name your repository if you are creating a new one
- Decide whether to keep the repository private by ticking the checkbox
Additionally, you can define the domain for your site, using the Appwrite Sites domain.
Setting environment variables
The React Admin template requires a few environment variables to connect to your Appwrite project.
| Variable | Description | Required |
VITE_APPWRITE_ENDPOINT | Your Appwrite API endpoint | Yes |
VITE_APPWRITE_PROJECT_ID | Your Appwrite project ID | Yes |
APPWRITE_API_KEY | An Appwrite API key (used for seeding data during build) | Yes |
VITE_APPWRITE_DATABASE_ID | Database ID (defaults to admin) | No |
VITE_APPWRITE_TABLE_REVIEWS | Table ID for reviews (defaults to reviews) | No |
VITE_APPWRITE_TABLE_INVOICES | Table ID for invoices (defaults to invoices) | No |
VITE_APPWRITE_TABLE_ORDERS | Table ID for orders (defaults to orders) | No |
VITE_APPWRITE_TABLE_PRODUCTS | Table ID for products (defaults to products) | No |
VITE_APPWRITE_TABLE_CATEGORIES | Table ID for categories (defaults to categories) | No |
VITE_APPWRITE_TABLE_CUSTOMERS | Table ID for customers (defaults to customers) | No |
The VITE_APPWRITE_ENDPOINT and VITE_APPWRITE_PROJECT_ID variables will be pre-filled for you. For the APPWRITE_API_KEY, create an API key in your Appwrite project by navigating to the project overview page > Integrations > API keys and creating a key with the users and databases scopes.
Note: The API key is used only during the build step to seed the database, tables, and demo user. Since this is a static site built with Vite, the API key is not included in the final deployed assets and is not accessible to end users.
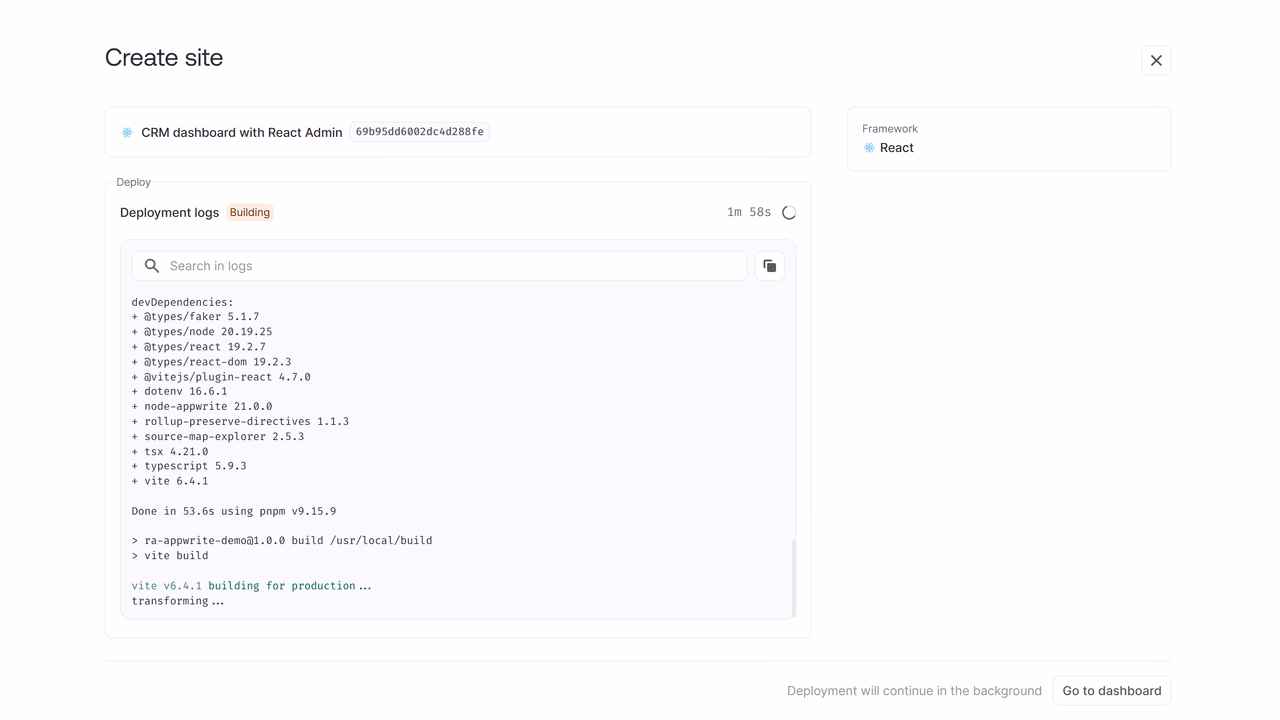
After reviewing your configuration, click Deploy.
Monitoring the deployment
Once you initiate the deployment, you will be taken to a progress page where you can monitor the build and deployment in real time.
The logs will show you the different stages of the build process, including the database seeding step. Depending on the size of your template and the dependencies involved, this process can take anywhere from a few seconds to a few minutes.
Access your site
After your site has been successfully deployed, Appwrite will show you a Congratulations page.
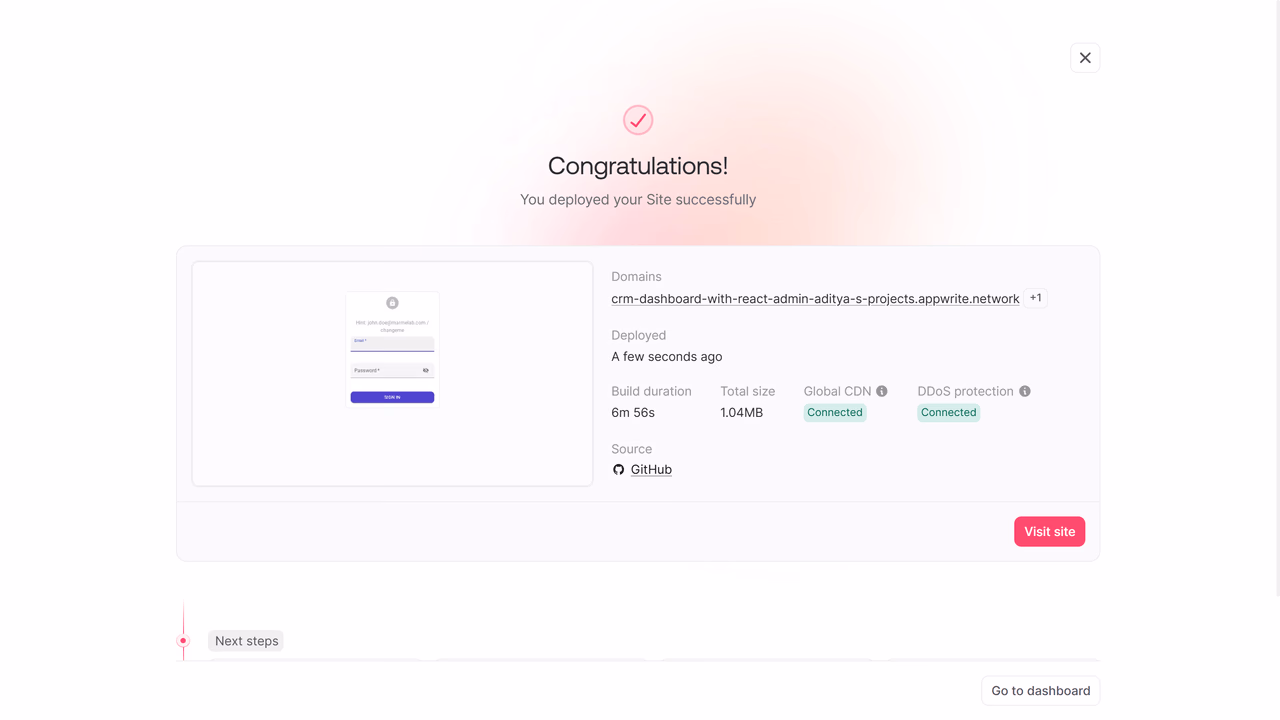
You can log in to the CRM dashboard using the demo credentials created by the seed script:
- Email:
john.doe@marmelab.com - Password:
changeme
Next step
Appwrite provides a few options to help you continue setting up or expanding your project.
You can Add domain, connecting an existing custom domain you own or registering a new one through the console.
You can Share site, allowing you to collaborate with your team by sharing access to your project.
You can also Open on mobile, previewing your live site directly from a mobile or tablet device to ensure everything looks and functions as expected across different screen sizes.
Wrapping up
And with that, the CRM dashboard with React Admin template is deployed to Appwrite Sites. Since the template creates a GitHub repository with the full source code, every push to your production branch will automatically trigger a rebuild and deployment. You can customize the dashboard by adding new resources, adjusting authentication, or connecting it to your own existing data.