
An Apple ID is a unique account that allows access to Apple services, including the App Store, iCloud, iTunes, Apple Music, and more. It serves as a key to the Apple ecosystem, allowing users to synchronize their data across Apple devices, download apps, purchase music, and access various features like FaceTime and iMessage. The Apple ID consists of an email address and a password, with options for added security through two-factor authentication. It is essential for managing personal information, subscriptions, and settings across all Apple products.
How does the integration work?
You can use the Apple OAuth adapter in Appwrite Auth for user authentication and management. This can be convenient for users because they can start using your app without creating a new account. It can also be more secure, because the user has one less password that could become vulnerable.
How to implement
To implement the Apple OAuth adapter in Appwrite Auth, there are several steps you must complete:
Step 1: Create an Apple Developer account
First, sign up for the Apple Developer program.
Before you configure any other details, you must create an App ID for our app. To do that, go to XCode and open the ios folder in your source code. Navigate to the Signing & Capabilities tab, click the ➕ Capability button, search for Sign in with Apple, and double-click the result to add it. Then, modify the Bundle Identifier to a unique string by prefixing it with any letters of your choice and change the Team to your Apple Developer team. This will automatically create an App ID for your app.
After that, you will also need to create a Services ID. Visit your Apple Developer account, head to Program resources > Certificates, Identifiers & Profiles > Identifiers, and register a new Service ID, setting your Bundle ID as the unique identifier.
View the service ID, enable Sign in with Apple, and in its configuration, select your primary App ID, input appwrite.io (or the domain of your self-hosted instance) under Domains and Subdomains, and temporarily add the URL https://temporary-endpoint.com/ under Return URLs. This temporary URI will be replaced with the final URI once the OAuth2 adapter is configured on Appwrite.
Head to your Apple Developer account and save the following details:
| Field name | |
Services ID Identifier | Head to Apple Developer account > Program resources > Certificates, Identifiers & Profiles > Identifiers and view the Services ID. |
Team ID | Head to Apple Developer account > Membership details > Team ID |
Authentication key (.p8 file) | Head to Apple Developer account > Program resources > Certificates, Identifiers & Profiles > Keys. Create a key and give it a name. Enable Sign in with Apple and register your key. Download the key, open it in a text editor, and copy the content. |
Authentication key ID | Head to Apple Developer account > Program resources > Certificates, Identifiers & Profiles > Keys. Click on your key to view details. |
Step 2: Add Apple OAuth adapter to your Appwrite project
For this step, you must create an account on Appwrite Cloud or self-host Appwrite if you haven’t already. In your Appwrite project, head over to the Auth page, open the Settings tab, and click on Apple under the OAuth2 Providers section.
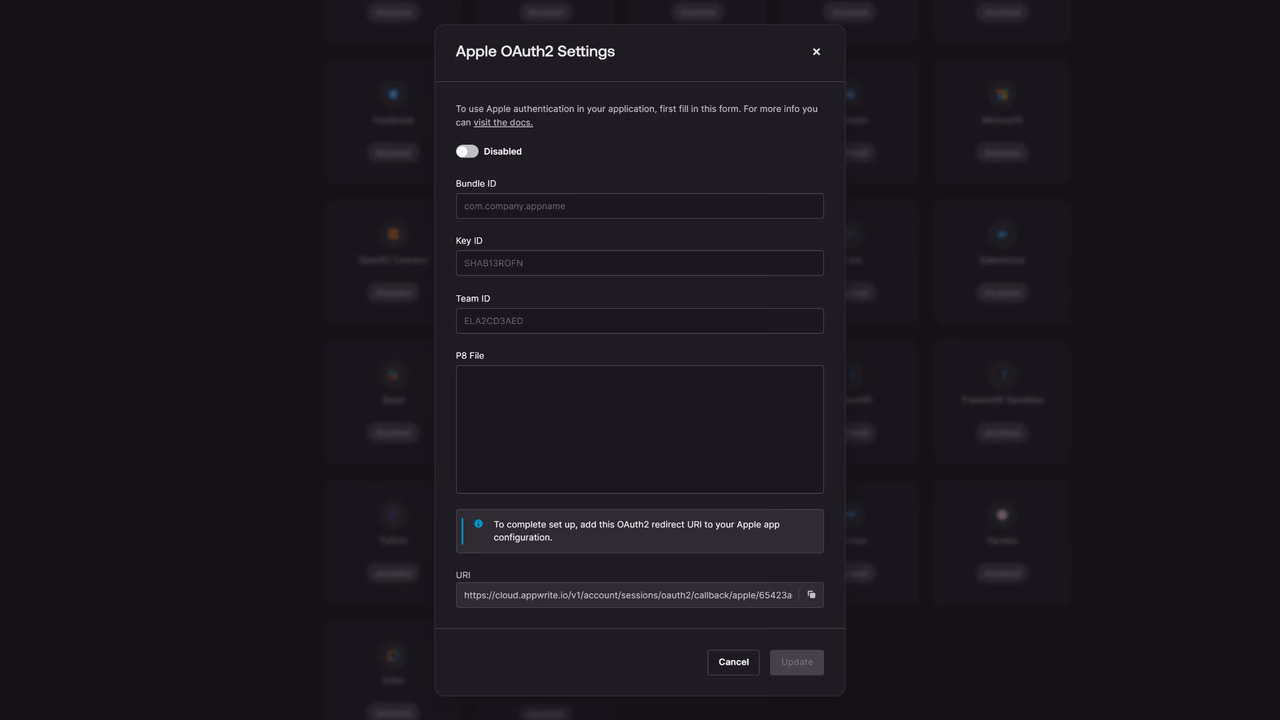
Add the Services ID Identifier (in the Bundle ID field), Key ID, Team ID, and P8 File content that you saved from your Apple Developer account. Copy the URI and add it to the Return URLs in the configuration of the Services ID you created in your Apple Developer account.
Step 3: Test the provider.
Follow the OAuth 2 login flow to test your provider.
Read more about Apple and Appwrite Auth
If you would like to learn more about Apple and Appwrite Auth, we have some resources that you should visit: