
An Apple ID is a unique account that allows access to Apple services, including the App Store, iCloud, iTunes, Apple Music, and more. It serves as a key to the Apple ecosystem, allowing users to synchronize their data across Apple devices, download apps, purchase music, and access various features like FaceTime and iMessage. The Apple ID consists of an email address and a password, with options for added security through two-factor authentication. It is essential for managing personal information, subscriptions, and settings across all Apple products.
How does the integration work?
You can use the Appwrite Function template for native authentication on Apple devices. This template provides a seamless way to integrate native Apple sign-in APIs with Appwrite Auth, allowing users to authenticate using their Apple ID directly within your app.
How to implement
To implement the Appwrite Function template for native authentication on Apple devices, there are several steps you must complete:
Step 1: Create an Apple Developer account
First, sign up for the Apple Developer program.
Before you configure any other details, you must enable the Sign in with Apple capability and set a Bundle ID. To do this, head to XCode and open your project directory. In the Project Navigator, select your project followed by the correct target. Then, navigate to the Signing & Capabilities tab, click the ➕ Capability button, search for Sign in with Apple, and double-click the result to add it. Then, modify the Bundle Identifier to a unique string by prefixing it with any letters of your choice and change the Team to your Apple Developer team. Save the Bundle ID for further usage.
Head to your Apple Developer account and save the following details:
| Field name | |
Team ID | Head to Apple Developer account > Membership details > Team ID |
Encoded authentication key (.p8 file) | Head to Apple Developer account > Program resources > Certificates, Identifiers & Profiles > Keys. Create a key and give it a name. Enable Sign in with Apple and register your key. Download the key, open it in a text editor, use a Base64 encoder to convert the file content to a Base64 string, and copy the result. |
Authentication key ID | Head to Apple Developer account > Program resources > Certificates, Identifiers & Profiles > Keys. Click on your key to view details. |
Step 2: Create the Appwrite Function
For this step, you must create an account on Appwrite Cloud or self-host Appwrite if you haven’t already. If you decide to self-host Appwrite, there are additional setup steps to use Appwrite Function templates.
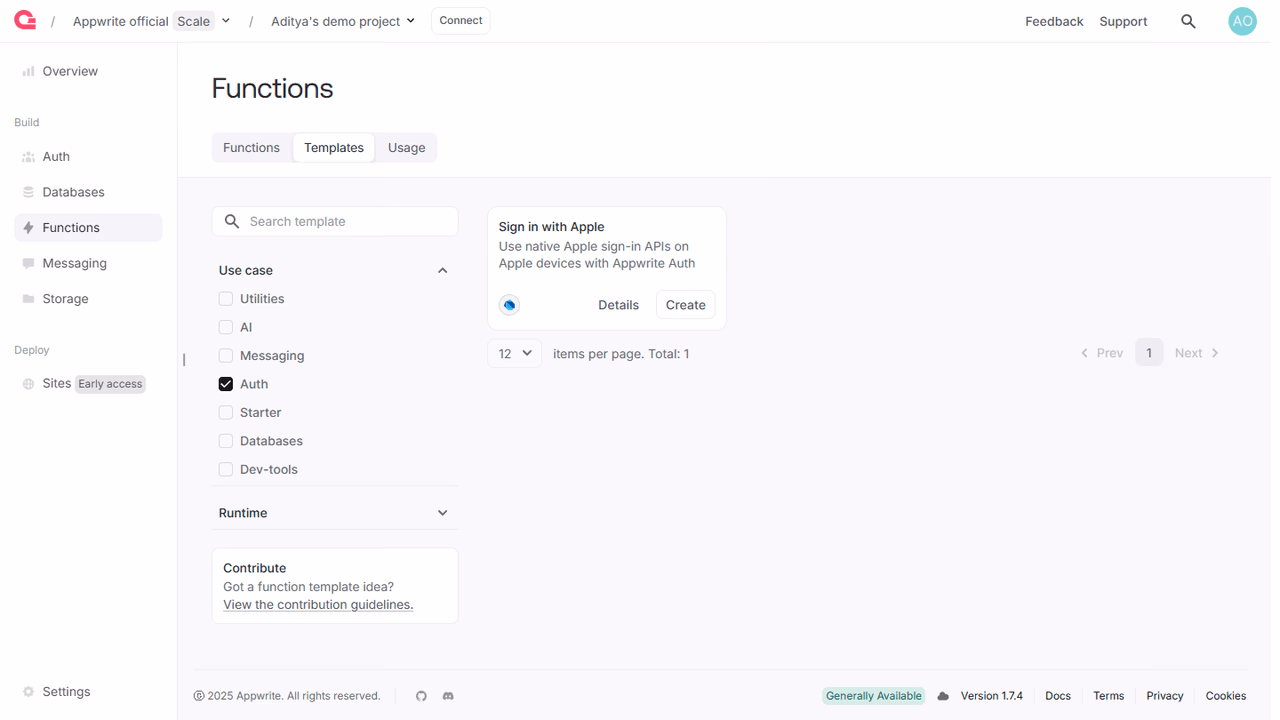
Head over to the Appwrite console, navigate to the Functions page, click the Templates tab, and search for the Sign in with Apple function template.
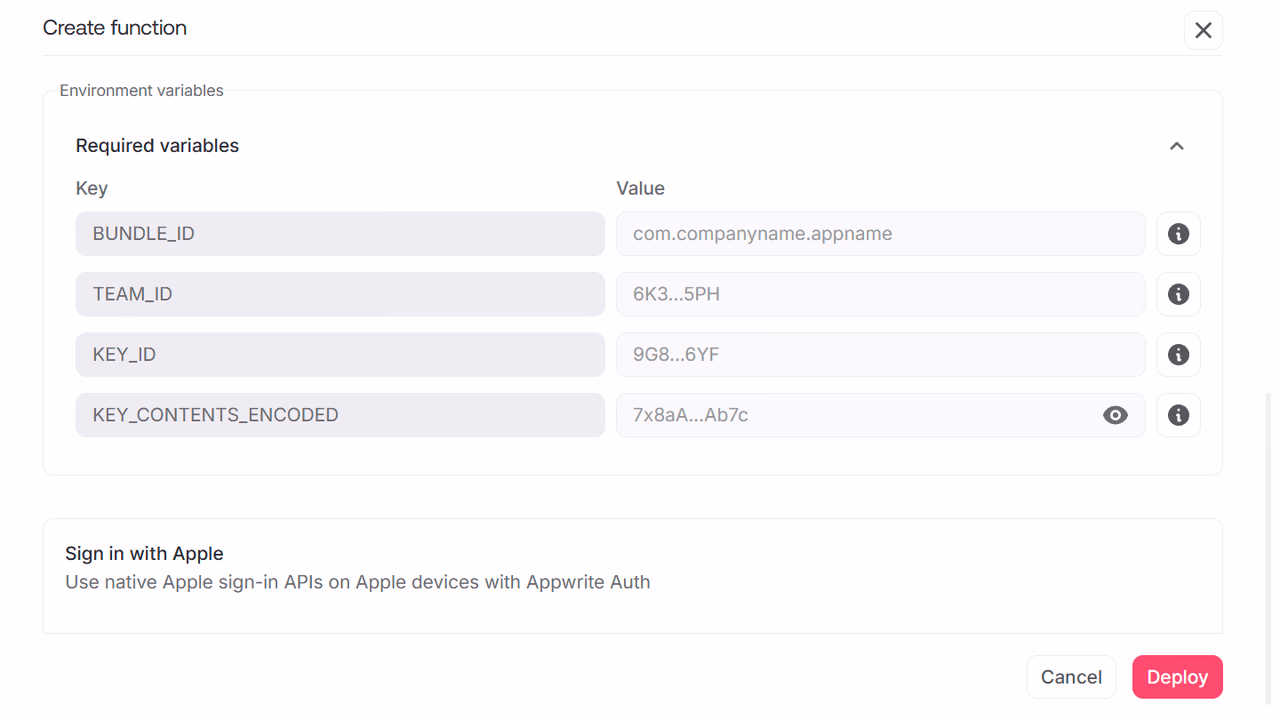
During the setup process, add the Bundle ID, Team ID, Authentication key ID, and Encoded authentication key in the Variables step..
Then, create a new repository with the default branch and root directory settings. You can edit this repository later to update the function logic.
Step 3: Integrate the function in your app
First, you must implement the Sign In with Apple button in your app.
Once implemented, you can handle the successful sign-in event and call the Appwrite Function to create and authenticate the user in Appwrite. Below is an example from Appwrite's SwiftUI playground:
func handleSignInWithAppleSuccess(with authorization: ASAuthorization) async throws {
    if let userCredential = authorization.credential as? ASAuthorizationAppleIDCredential {
        print(userCredential.authorizationCode)
        print(userCredential.user)

        if userCredential.authorizedScopes.contains(.fullName) {
            print(userCredential.fullName)
        }

        if userCredential.authorizedScopes.contains(.email) {
            print(userCredential.email)
        }

        do {
            // Create the request body with the authorization code and user information
            var body: [String: Any] = [
                "code": String(data: userCredential.authorizationCode!, encoding: .utf8)
            ]

            if userCredential.fullName != nil {
                if let givenName = userCredential.fullName?.givenName {
                    body["firstName"] = givenName
                }

                if let familyName = userCredential.fullName?.familyName {
                    body["lastName"] = familyName
                }
            }

            let jsonData = try JSONSerialization.data(withJSONObject: body, options: [])
            let jsonString = String(data: jsonData, encoding: String.Encoding.utf8)

            print(jsonString)

            // Call the Appwrite Function
            let functions: Functions = Functions(client);
            let execution = try await functions.createExecution(
                functionId: "sign-in-with-apple",
                body: jsonString,
                method: ExecutionMethod.pOST,
                headers: ["Content-Type": "application/json"]
            );

            print(execution.responseStatusCode)
            if (execution.responseStatusCode != 200) {
                dialogText = "Error executing sign-in-with-apple"
            } else {
                print(execution.responseBody)

                // Decode the response body
                let responseBodyData = execution.responseBody.data(using: .utf8)
                let token = try! JSONDecoder().decode([String : String].self, from: responseBodyData!)
                let secret = token["secret"]
                let userId = token["userId"]

                print(userId)
                print(secret)

                // Create a session for the user using Appwrite Auth
                try await account.createSession(userId: userId!, secret: secret!)

                try await getAccount()
            }
        } catch {
            dialogText = error.localizedDescription
        }

        isShowingDialog = true
    }
}
Once implemented, you can test the Sign in with Apple button in your app.
Read more about Apple and Appwrite
If you would like to learn more about Apple and Appwrite, we have some resources that you should visit: