Windsurf Editor is a next-gen IDE that embeds a powerful AI agent called Cascade directly into your coding workflow. Unlike tools limited to autocomplete or single-file assistance, Cascade understands your entire project context and can generate code across files, run terminal commands, debug issues, and even deploy applications, all triggered by natural language prompts. With features like Supercomplete, inline AI chat, memories, and live previews, Windsurf aims to keep you in a deep focus state by eliminating context switching and handling repetitive tasks automatically, while still giving you full control over what gets merged or executed.
How does the integration work?
The Appwrite MCP server integrates with Windsurf Editor's Cascade chat using the Model Context Protocol (MCP), allowing you to connect your Appwrite project to Windsurf Editor.
This integration enables you to perform various operations on your Appwrite resources, such as creating users, managing databases, and more, directly from the Windsurf Editor using natural language commands.
How to implement
To implement the MCP with Windsurf Editor integration, there are several steps you must complete:
Step 1: Create an Appwrite API key
First, you must create an account on Appwrite Cloud or self-host Appwrite if you haven't already.
Select your project (or create a new one), and head to the Overview page from the left sidebar. Under the Integrations section, click on the API Keys tab, and then click on Create API Key. Select the scopes for whichever Appwrite services you want to work with, set the duration, and create the API key. You must then copy it for future usage.

Then, head to the Settings page from the left sidebar, and copy the Project ID and API Endpoint for future usage.
Step 2: Configure the MCP server on Windsurf Editor
Pre-requisite: Install uv
You must install uv on your system to use the MCP server.
To configure the MCP server on Windsurf Editor, head to the Windsurf Editor Settings page, navigate to the Model Context Protocol (MCP) Servers section, and click on View raw config. This will open the mcp_config.json file, where you must add the following:
{
    "mcpServers": {
        "appwrite": {
            "command": "uvx",
            "args": [
                "mcp-server-appwrite"
            ],
            "env": {
                "APPWRITE_API_KEY": "<your-api-key>",
                "APPWRITE_PROJECT_ID": "<your-project-id>",
                "APPWRITE_ENDPOINT": "https://<REGION>.cloud.appwrite.io/v1"
            }
        }
    }
}
This configuration will set up the MCP server to connect to your Appwrite project using the API key, project ID, and endpoint, which you must update before saving and exiting the file.
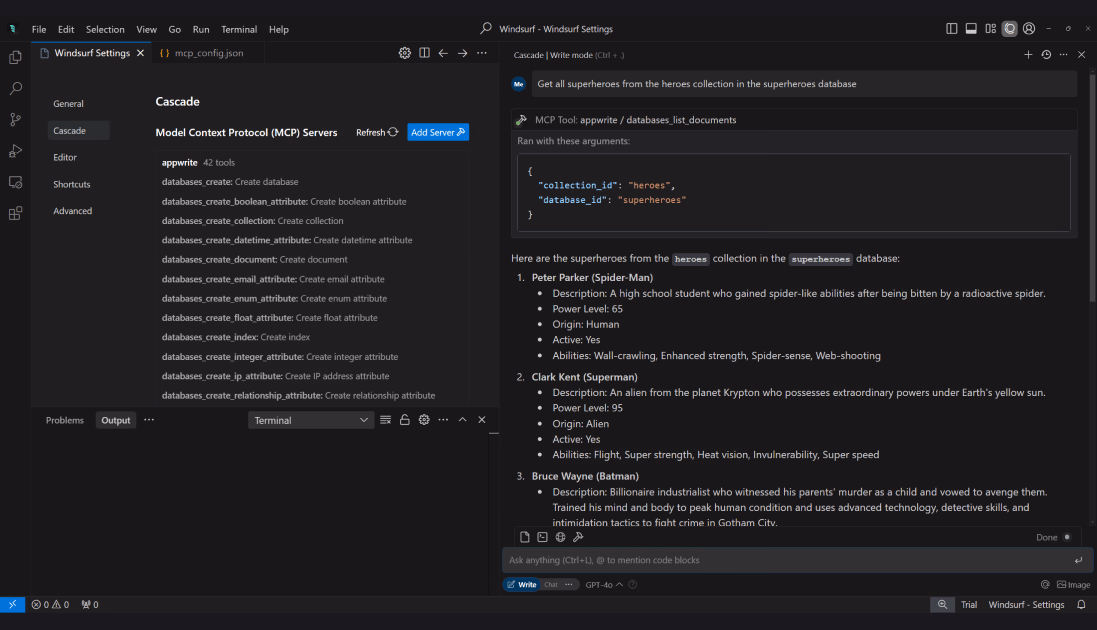
Once you have updated and saved the mcp_config.json file, return to the MCP Servers section in the Windsurf Settings and click on Refresh.
Step 3: Test the integration
Finally, you can test the integration by asking the Cascade chat in the Windsurf Editor to query your database.
Read more about MCP with Windsurf Editor
If you would like to learn more about MCP with Cursor, we have some resources that you should visit: