
FlutterFlow is a powerful visual builder that lets you create beautiful Flutter apps without writing much code. It's perfect for both beginners and experienced developers who want to build apps quickly. With its drag-and-drop interface and pre-built components, you can focus on creating great user experiences.
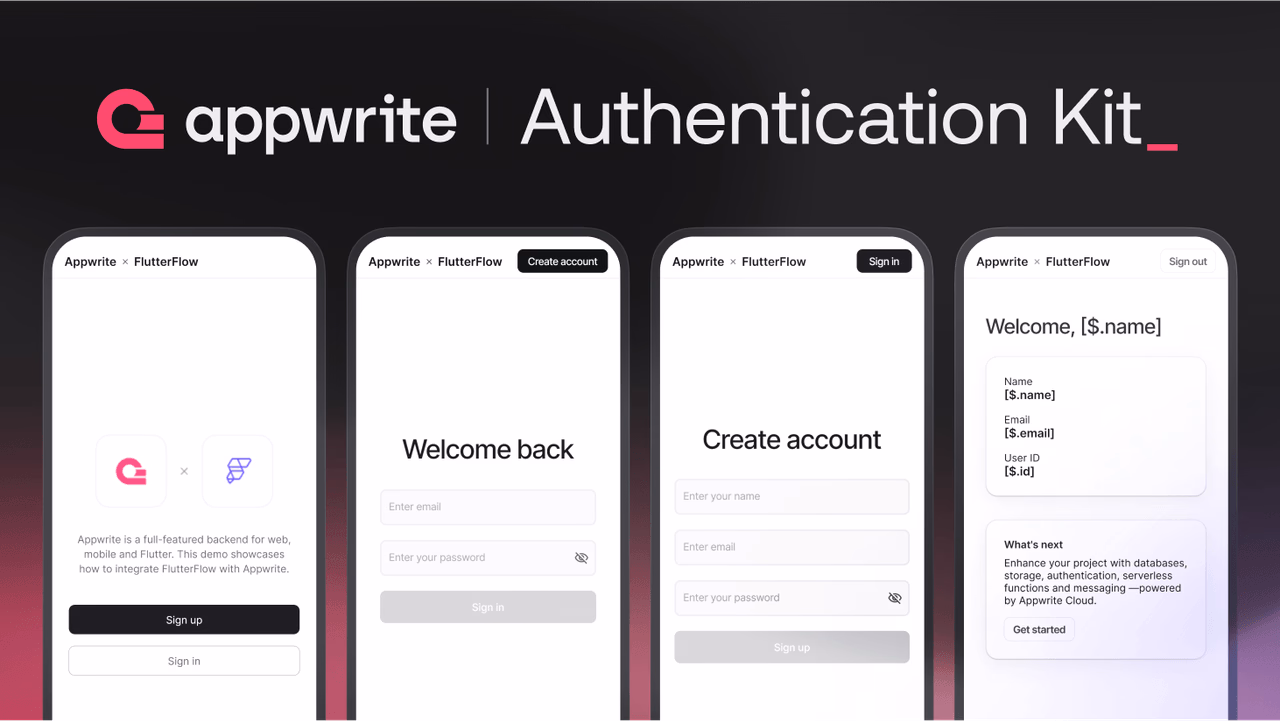
What you’ll build
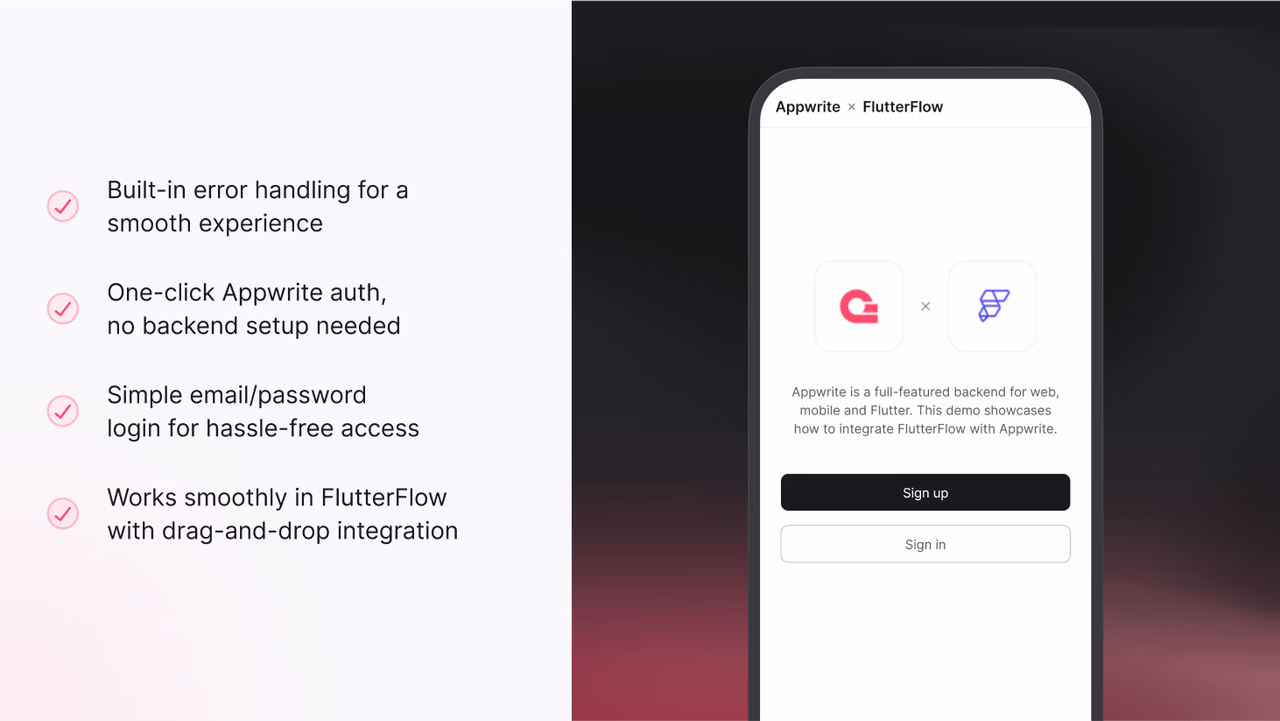
As you start creating your FlutterFlow app, you might want to add user accounts for things like social media features or task management. To help you with this, we've made it super easy to implement secure authentication using our official Authentication library. This guide will walk you through everything you need to know to get up and running with Appwrite authentication in your FlutterFlow project.
By the end of this guide, you’ll have a fully functional authentication system with:
- Email/password sign-up and login.
- Secure session management.
- User profile handling.
- Error handling with user feedback.
- Protected routes for authenticated users.
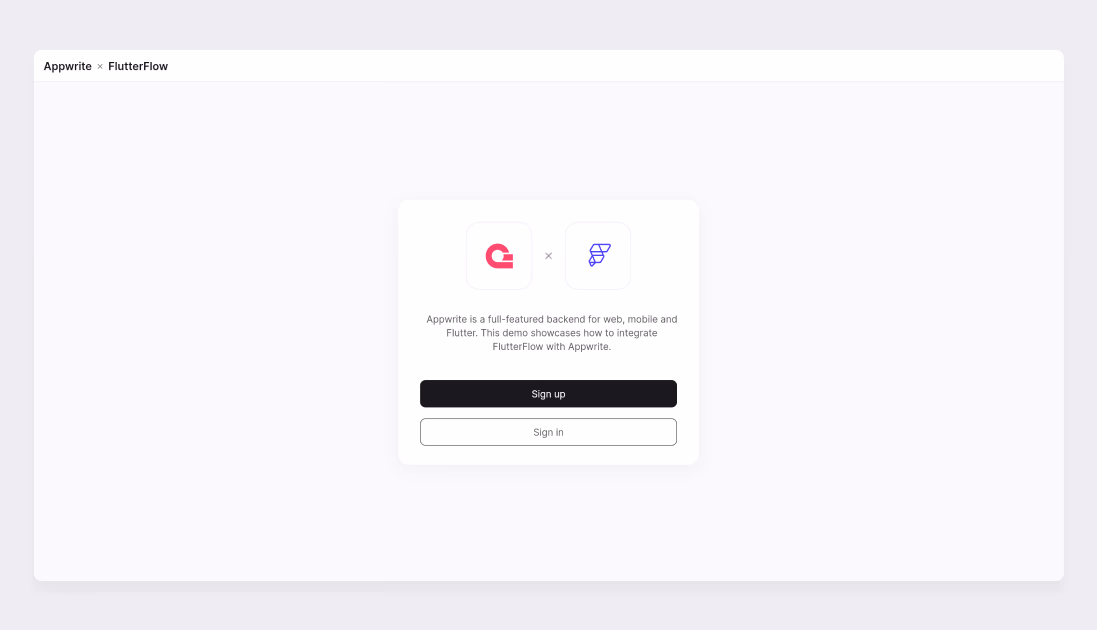
Want to see the final result first? Check out our Appwrite Flutterflow Demo App to experience all these features in action! Then follow along to build your own custom version.
Before you start
Here’s what you’ll need to have ready:
- Appwrite account.
- FlutterFlow account.
- FlutterFlow Marketplace account (must use the same email as your FlutterFlow account).
- Basic understanding of FlutterFlow’s interface.
Step 1: Setting up your Appwrite project
Let’s start by setting up your Appwrite project (you can use a new or an existing one):
- Head over to the Appwrite Console.
- Select your project (or create a new one).
- Under Add a platform, add a Flutter platform.
- In the platform setup, choose the platforms you want to support under Flutter App - Web, Android, and/or iOS - and enter the required values as shown below:
| Platform | Required Info |
Web | Hostnames: localhost, *.web.app, *.run.app (Used for FlutterFlow Web Testing) |
Android | Package Name (e.g. com.company.appname) |
iOS | Bundle ID (e.g. com.company.appname) |
- Go to Settings > Overview to copy the following values:
- API Endpoint
- Project ID
📌 You’ll need these in the next step to configure the authentication library.
Step 2: Adding the authentication library
The Authentication library provides essential core functionality:
- Pre-configured Custom Actions for authentication.
- App States for session management.
- Built-in Error Handling.
- User Session Management.
- Custom Data Types for type-safe responses.
Here’s how to add it to your project:
Visit the FlutterFlow Marketplace.
Search for “Appwrite Authentication Kit” or visit Appwrite Authentication Kit.
Click “Add” to add it to your marketplace account.
In your FlutterFlow project:
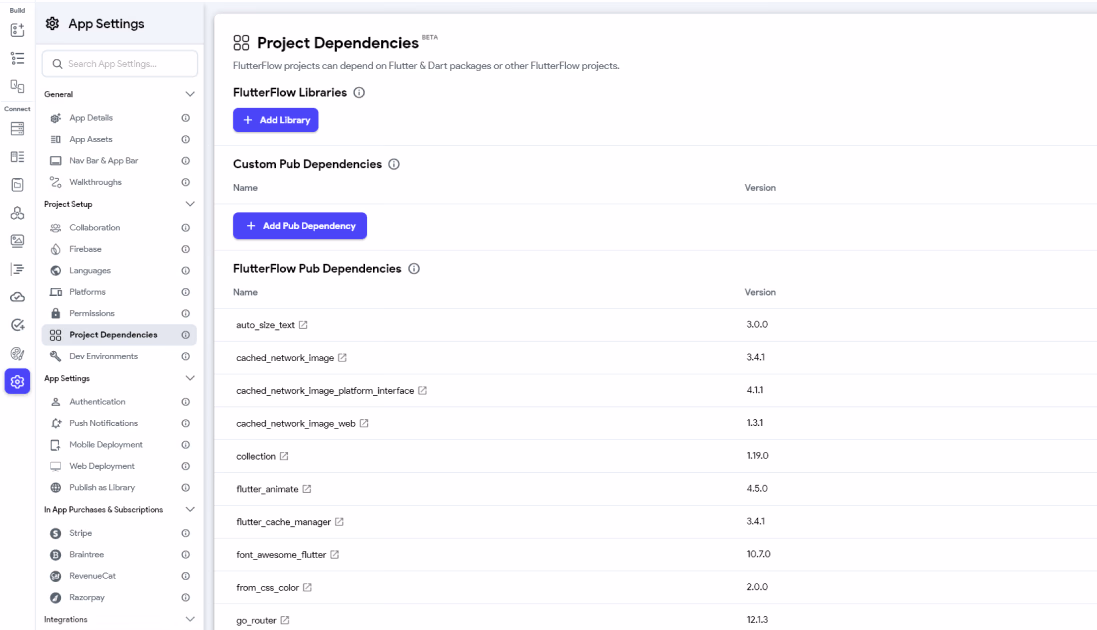
- Navigate to
Project Settings > Project Dependencies. - Find “Appwrite Authentication Kit” under FlutterFlow Libraries.
- Click “Add Library”.
- Navigate to
Configure the Authentication Library
Once the library is added, you can configure it without writing any code:
- Navigate to
Settings > Project Dependenciesin your FlutterFlow project. - Under the Appwrite Authentication Kit entry, click on View Details.
- Update the environment values directly in the panel that opens:
- API Endpoint:
Your Appwrite Project Endpoint - Project ID:
Your Appwrite Project ID
Note: This view opens automatically the first time a user adds the library - making it super easy to update values right away.
Step 3: Understanding the components
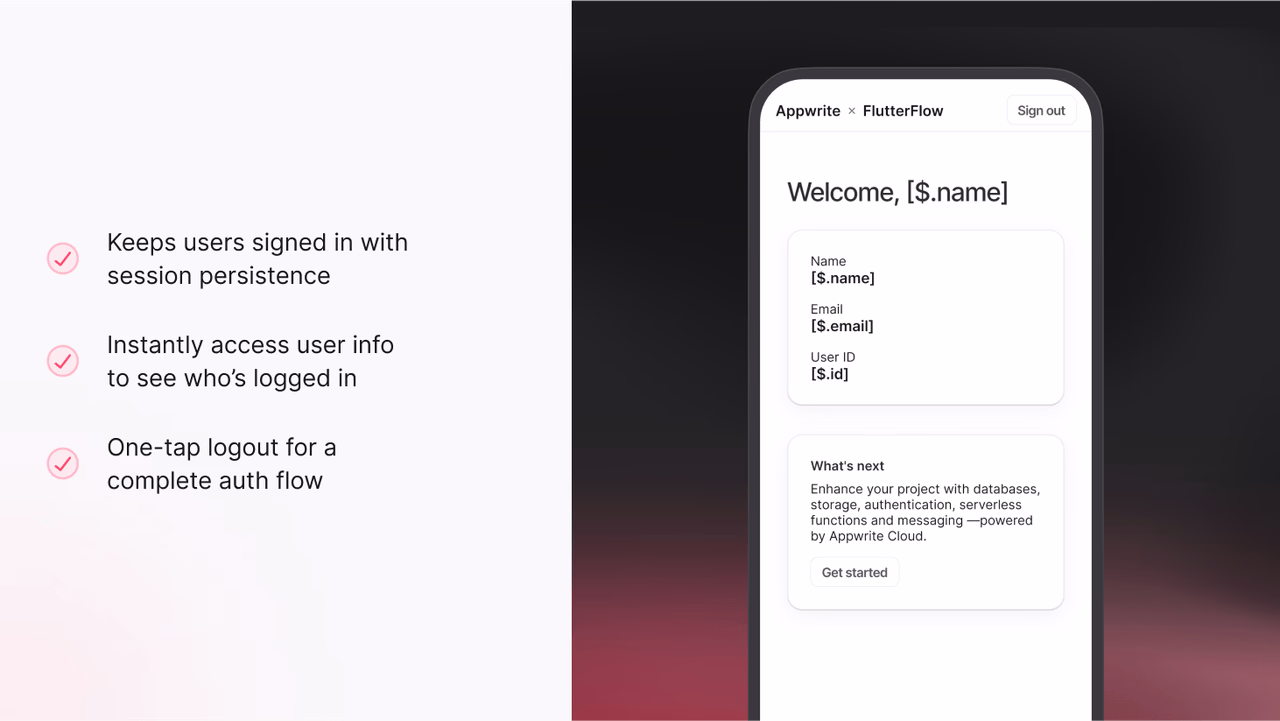
The library sets up two essential app states:
appwriteConfig: Stores configuration details securely.appwriteUser: Manages user session information.
Both states are automatically configured with:
- String data type.
- Persistence enabled.
- Authentication flow readiness.
Custom Data Types:
The library provides two custom data types for type-safe responses:
AppwriteUser: Represents user data.- Fields: id, email, name, emailVerified, status.
- Used for: Storing and passing user information.
AppwriteUserResponse: Standard response format.- Fields: success, error, errorCode, errorType, formattedError, user.
- Used for: Consistent error handling and success responses.
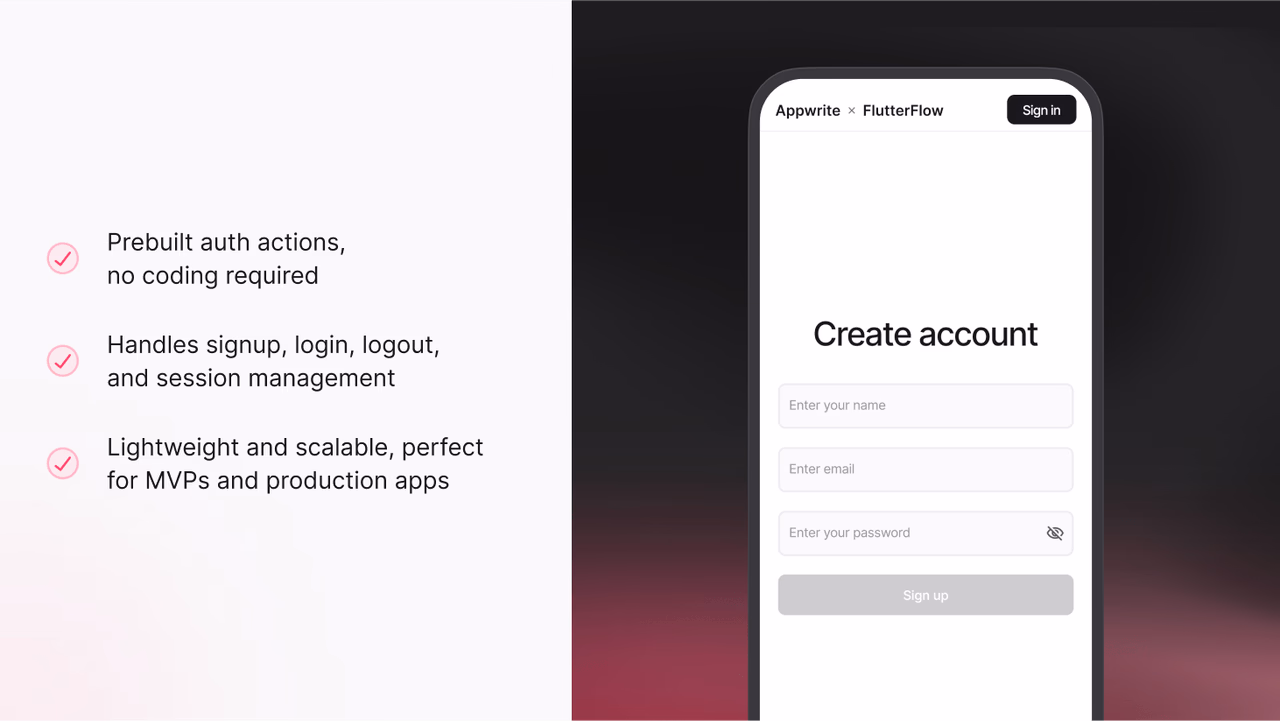
Authentication actions:
The library provides five essential custom actions:
initialize- Purpose: Sets up your Appwrite configuration.
- Returns:
AppwriteUserResponsewith initialization status. - Must be called before any other authentication action.
signUpWithEmailAndPassword- Parameters: email, password.
- Returns:
AppwriteUserResponsewith user data. - Handles: Account creation and session setup.
signInWithEmail- Parameters: email, password.
- Returns:
AppwriteUserResponsewith session data. - Manages: User login process.
signOut- No parameters required.
- Returns:
AppwriteUserResponsewith success status. - Handles: Complete session cleanup.
getCurrentUser- No parameters required.
- Returns:
AppwriteUserResponsewith current user data. - Perfect for: Authentication state checks.
Understanding action flows:
Each authentication action follows this consistent pattern:
- Action execution.
- Response handling using
AppwriteUserResponse. - Success/failure conditions based on
response.success. - Error handling using
response.formattedError.
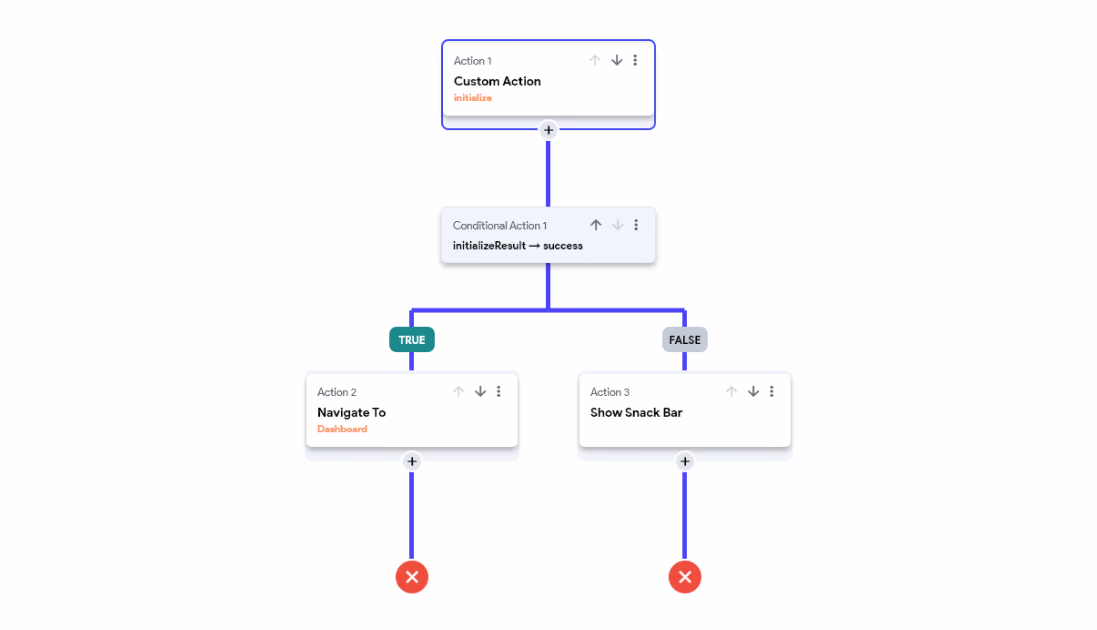
Example: Sign Up flow
- Use the
signUpWithEmailAndPasswordaction. - Check
signUpResult.success. - Success? → Dashboard.
- Failure? → Show
signUpResult.formattedError.
You can use response.error for internal logging and response.formattedError to display user-friendly messages. Similarly, you can implement flow patterns for other authentication actions (signInWithEmail, signOut, getCurrentUser), following the similar structure of checking results and handling success/failure scenarios appropriately.
See it in action
Check out our Appwrite FlutterFlow Demo App to explore the complete auth flow in action - from sign-up to session management.
Troubleshooting common issues
Library Not Found
- Verify marketplace account email matches FlutterFlow account.
- Check if library is properly added in Project Dependencies.
Authentication Failures
- Confirm
initializeaction is called first. - Verify endpoint and projectId values.
- Check Appwrite console for platform settings.
- Confirm
Session Management Issues
- Ensure app states are properly configured.
- Verify persistence settings.
This completes our guide on setting up Appwrite authentication in your FlutterFlow app. You now have a solid foundation for managing user accounts and secure sessions.
Now that you have the basics in place, you can enhance your app by implementing more advanced authentication features using Appwrite. If you run into any issues or have questions, the Appwrite community on Discord and the FlutterFlow Community are always ready to help. Don't hesitate to reach out!
More resources
If you would like to learn more about Appwrite and FlutterFlow, we have some resources that you should visit: