Have you ever wondered what you would be doing as a developer 5 years from now? I, for sure, have, which is why recently I developed an AI Crystal Ball to use information from my GitHub account and predict what my destiny as a developer would look like. This project picked up a lot more attention than anticipated as well as a number of requests asking how this project was developed.
Therefore, in this blog, we’ll discuss how the AI Crystal Ball project was built in the first place.
Prerequisites
In order to build this application, we have a few prerequisites. We must set up the following:
OpenAI API key
GitHub OAuth app
Appwrite OAuth adapter for GitHub
Appwrite collections to store GitHub data and destinies
OpenAI
Since we are using GPT-4 to generate developer destinies, we will need an OpenAI API key to communicate with their platform.
To create an OpenAI API key, we must first create an account on the OpenAI platform. Once the account is set up and a project is created, we can visit their API keys page and create an API key. Ensure you copy and save this key in a safe place, as the OpenAI platform will not let you view the key after it is created.
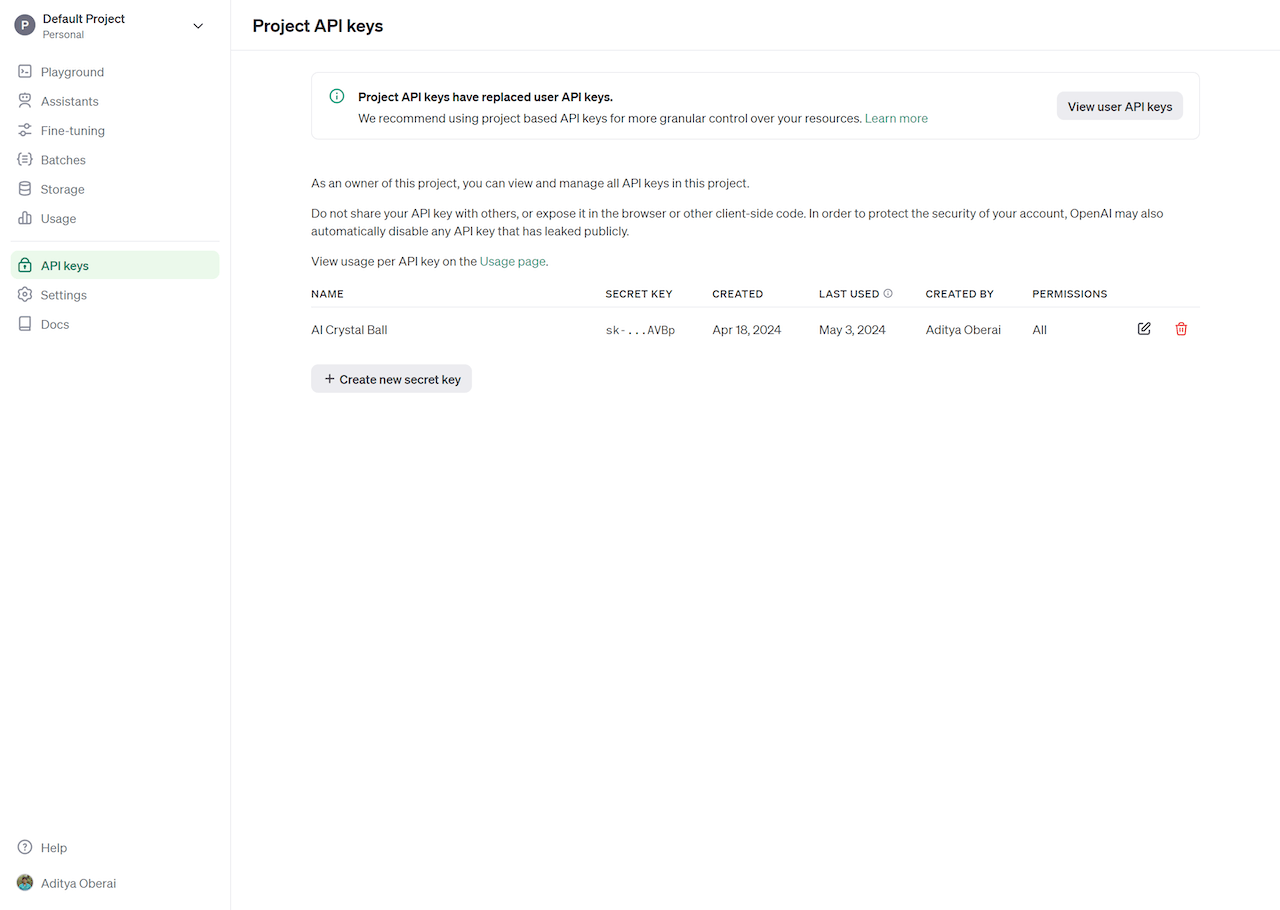
Note: To use the GPT-4 API, your account must be upgraded to the Usage tier 1. To learn more, visit their Usage tiers documentation.
GitHub
To generate personalized developer destinies, we are using information such as a user’s GitHub username, follower and following count, and the top 5 used programming languages in their most recently created repositories. For this, we will need them to sign into GitHub OAuth to get their access tokens.
To create a GitHub OAuth application, we must visit the Settings page on GitHub and click on the Developer Settings tab. From here, we can register an OAuth app. While registering the app, you can add any temporary URL, such as https://temporary-endpoint/, in the Authorization callback URL field (we will update this in the next step). Ensure you save your Client ID and Client Secret when you visit this page, as we will need them in the next step.

Appwrite
In this app, we primarily need Appwrite for the following:
Managing GitHub OAuth login
Saving the information we get from the GitHub API, so we don’t need to call it repeatedly
Saving developer destinies if a user wants to create a shareable link
The only prerequisite here was creating an Appwrite Cloud account, followed by creating a new project and adding your hostname as a web app to the project.
GitHub OAuth
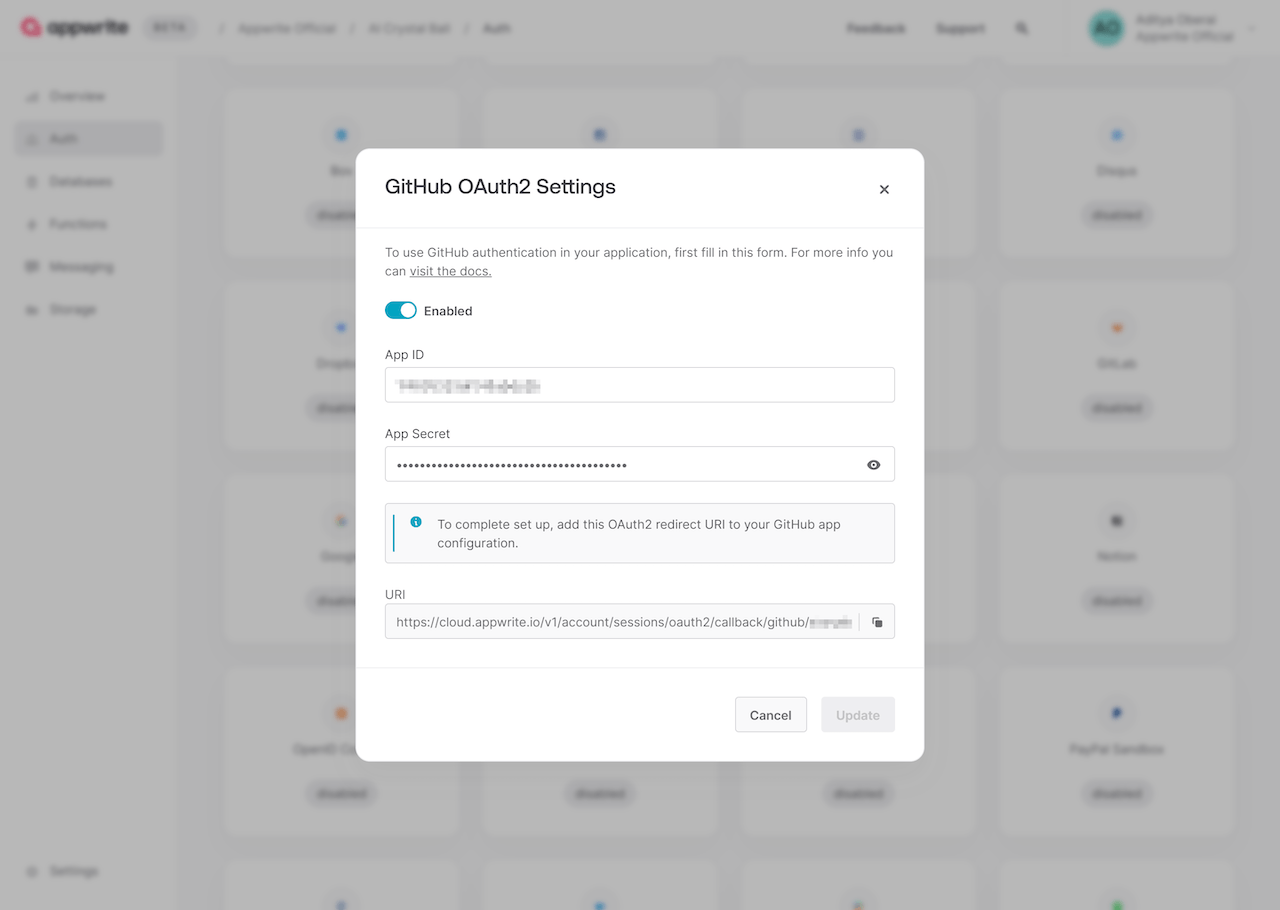
To implement GitHub OAuth, we must visit the Auth page on the Appwrite project, go to the Settings tab, click on GitHub from the list of OAuth adapters, and paste the Client ID and Secret we saved from the GitHub OAuth app. Ensure that copy the redirect URI and paste it into your GitHub OAuth app in the Authorization callback URL field.
Appwrite Database
We must create a database with the ID crystalball and two collections with the IDs githubData and destiny in the Appwrite project with the following details:
The githubData collection
Create the collection and add the following attributes:
| Key | Type | Size | Required | Array |
| languages | String | 2000 | - | Yes |
| followers | Integer | - | Yes | - |
| following | Integer | - | Yes | - |
| username | String | 255 | Yes | - |
Visit the collection settings, enable Document security, and set the following (collection-level) Permissions:
| Role | Create | Read | Update | Delete |
| Users | Yes | - | - | - |
The destiny collection
Create the collection and add the following attributes:
| Key | Type | Size | Required |
| destiny | String | 25000 | Yes |
| username | String | 255 | Yes |
Visit the collection settings, enable Document security, and set the following (collection-level) Permissions:
| Role | Create | Read | Update | Delete |
| Any | - | Yes | - | - |
| Users | Yes | - | - | - |
Building the web app
To build this app, we used SvelteKit, a framework to build web applications using JavaScript. There are some prerequisites, however, that must be completed before building out the features themselves.
Note: The code snippets will focus only on the application logic. All CSS or styling-related information as well as any other miscellaneous features will be accessible in the final project repository at the end of the blog.
Prerequisites
We first set up a skeleton SvelteKit project (without TypeScript):
npm create svelte@latest ai-crystal-ball
cd ai-crystal-ball
npm i
Once that is done, install the following NPM packages we need to develop the project:
npm i appwrite openai
Lastly, we must create a .env file at the root of the directory and add the following:
PUBLIC_APPWRITE_ENDPOINT=
PUBLIC_APPWRITE_PROJECT_ID=
PUBLIC_APPWRITE_DATABASE_ID=
PUBLIC_APPWRITE_COLLECTION_ID_GITHUBDATA=
PUBLIC_APPWRITE_COLLECTION_ID_DESTINY=
SECRET_OPENAI_API_KEY=
After the environment variables are created, we can set up the Appwrite SDK by creating a file ./src/lib/appwrite.js and adding the following:
import { Client, Account, Databases } from 'appwrite';
import { env } from '$env/dynamic/public';

const client = new Client()
    .setEndpoint(env.PUBLIC_APPWRITE_ENDPOINT)
    .setProject(env.PUBLIC_APPWRITE_PROJECT_ID);

export const account = new Account(client);
export const databases = new Databases(client);
Also, since this app is created without SSR, we will go to the ./src/routes directory and creates a file +layout.js to add the following:
export const csr = true;
export const ssr = false;
Login using GitHub OAuth
First, we must use the Appwrite Web SDK to set up our Auth library in the application. We will create a file .src/lib/user.js to create a user store with the necessary auth-related functions.
import { writable } from 'svelte/store';
import { account } from './appwrite';

const isBrowser = typeof window !== 'undefined';

const createUser = () => {
    const store = writable(null);

    async function init() {
        try {
            let session = await getSession();
            if(!session) throw new Error('No session found');
            store.set(await account.get());
            return true;
        } catch (error) {
            store.set(null);
            return false;
        }
    }

    init();

    function login() {
        if(!isBrowser) return;
        account.createOAuth2Session('github', `https://${window.location.hostname}/app`, `https://${window.location.hostname}`);
    }

    async function getSession() {
        try {
            return await account.getSession('current');
        } catch(err) {
            return null;
        }
    }

    return {
        subscribe: store.subscribe,
        init,
        login,
        getSession
    }
}

export const user = createUser();
We will call the login function from the index page at ./src/routes/+page.svelte.
<script>
    import { user } from '$lib/user';
    import crystalBall from '$lib/assets/crystalball.png'; // An image of a crystal ball

    function login() {
        user.login();
    }
</script>

<div class="mainContainer">
    <h1>AI Crystal Ball</h1>
    <h2>Find your developer destiny!</h2>
    <img src={crystalBall} alt="crystal ball">
    <button on:click={login}>Login with GitHub</button>
</div>
Getting data from the GitHub API
After the user successfully logs in using GitHub, we will use the GitHub API to get a user’s top 5 languages from the last 30 repositories they created on their personal account. For that, we will first create our GitHub library in the file ./src/lib/github.js.
export const github = {
    getUser: async (token) => {
        const url = 'https://api.github.com/user';
        var response = await fetch(url, {
            headers: {
                'Authorization': `Bearer ${token}`,
                'X-GitHub-Api-Version': '2022-11-28'
            }
        });
        return await response.json();
    },

    getRepos: async (username, token) => {
        const url = `https://api.github.com/users/${username}/repos?sort=created&direction=desc`;
        const response = await fetch(url, {
            headers: {
                'Authorization': `Bearer ${token}`,
                'X-GitHub-Api-Version': '2022-11-28'
            }
        });
        return await response.json();
    },

    getLanguages: async (username, repo, token) => {
        const url = `https://api.github.com/repos/${username}/${repo}/languages`;
        const response = await fetch(url, {
            headers: {
                'Authorization': `Bearer ${token}`,
                'X-GitHub-Api-Version': '2022-11-28'
            }
        });
        return await response.json();
    }
}
At this point, we also want to create our Database library using the Appwrite SDK, so that we can store the information from the GitHub API. For that, we shall create a file ./src/lib/databases.js and add the following:
import { Permission, Role, ID } from 'appwrite';
import { databases } from './appwrite';
import { env } from '$env/dynamic/public';

const databaseId = env.PUBLIC_APPWRITE_DATABASE_ID;
const githubDataCollectionId = env.PUBLIC_APPWRITE_COLLECTION_ID_GITHUBDATA;

export const db = {
    getUserData: async(documentId) => {
        try{
            return await databases.getDocument(
                databaseId,
                githubDataCollectionId,
                documentId
            );
        } catch(err){
            return false;
        }
    },

    addUserData: async(userId, username, followers, following, languages) => {
        return await databases.createDocument(
            databaseId,
            githubDataCollectionId,
            userId,
            {
                username,
                followers,
                following,
                languages
            },
            [
                Permission.write(Role.user(userId)), Permission.read(Role.user(userId))
            ]
        )
    }
};
We will be calling these functions for our main application page in the file ./src/routes/app/+page.svelte
<script>
import { user } from '$lib/user';
import { db } from '$lib/databases';
import { github } from '$lib/github';
import { onMount } from 'svelte';
import { goto } from '$app/navigation';
import crystalball from '$lib/assets/crystalball.png';
let destiny = '';
let loadingMessage = 'Fetching GitHub data...';
let githubLoading = true;
let destinyLoading = '';
let userData = {};
async function getTopFiveLanguages(username, token) {
let languageUsage = {};
const repositories = await github.getRepos(username, token);
loadingMessage = `Checking 30 most-recently created repos...`;
for (let repo of repositories) {
const languages = await github.getLanguages(username, repo.name, token);
for (let [language, bytesCount] of Object.entries(languages)) {
if (language in languageUsage) {
languageUsage[language] += bytesCount;
} else {
languageUsage[language] = bytesCount;
}
}
}
loadingMessage = `Confirmed top 5 used languages...`;
return Object.entries(languageUsage).sort((a, b) => b[1] - a[1]).slice(0, 5).map(a => a[0]);
}
function resetDestiny() {
destiny = '';
destinyLoading = '';
document.getElementById("ballClick").disabled = false;
}
async function initCrystalBall(userId) {
// Check if GitHub data is already stored in Appwrite DB or not
userData = await db.getUserData(userId);
if(userData === false){
// Get GitHub token from Appwrite session
const session = await user.getSession();
const githubToken = session.providerAccessToken;
// Get GitHub user details
const githubUser = await github.getUser(githubToken);
const githubUsername = githubUser.login;
loadingMessage = `Received user data ${githubUsername} from GitHub`;
// Get top 5 languages using GitHub user details and add to Appwrite
let languages = await getTopFiveLanguages(githubUsername, githubToken);
userData = await db.addUserData($user.$id, githubUsername, githubUser.followers, githubUser.following, languages);
}
githubLoading = false;
}
onMount(async () => {
let loggedIn = await user.init();
console.log($user);
if(!loggedIn) {
goto('/');
}
let userId = $user.$id;
await initCrystalBall(userId);
})
</script>
{#if githubLoading}
<div class="mainContainer">
<div class="loadingContainer">
<h1>Loading your Profile</h1>
<div class="loadingContainerBox">
<img src={crystalball} alt="Crystal Ball">
<p>{loadingMessage}</p>
</div>
</div>
</div>
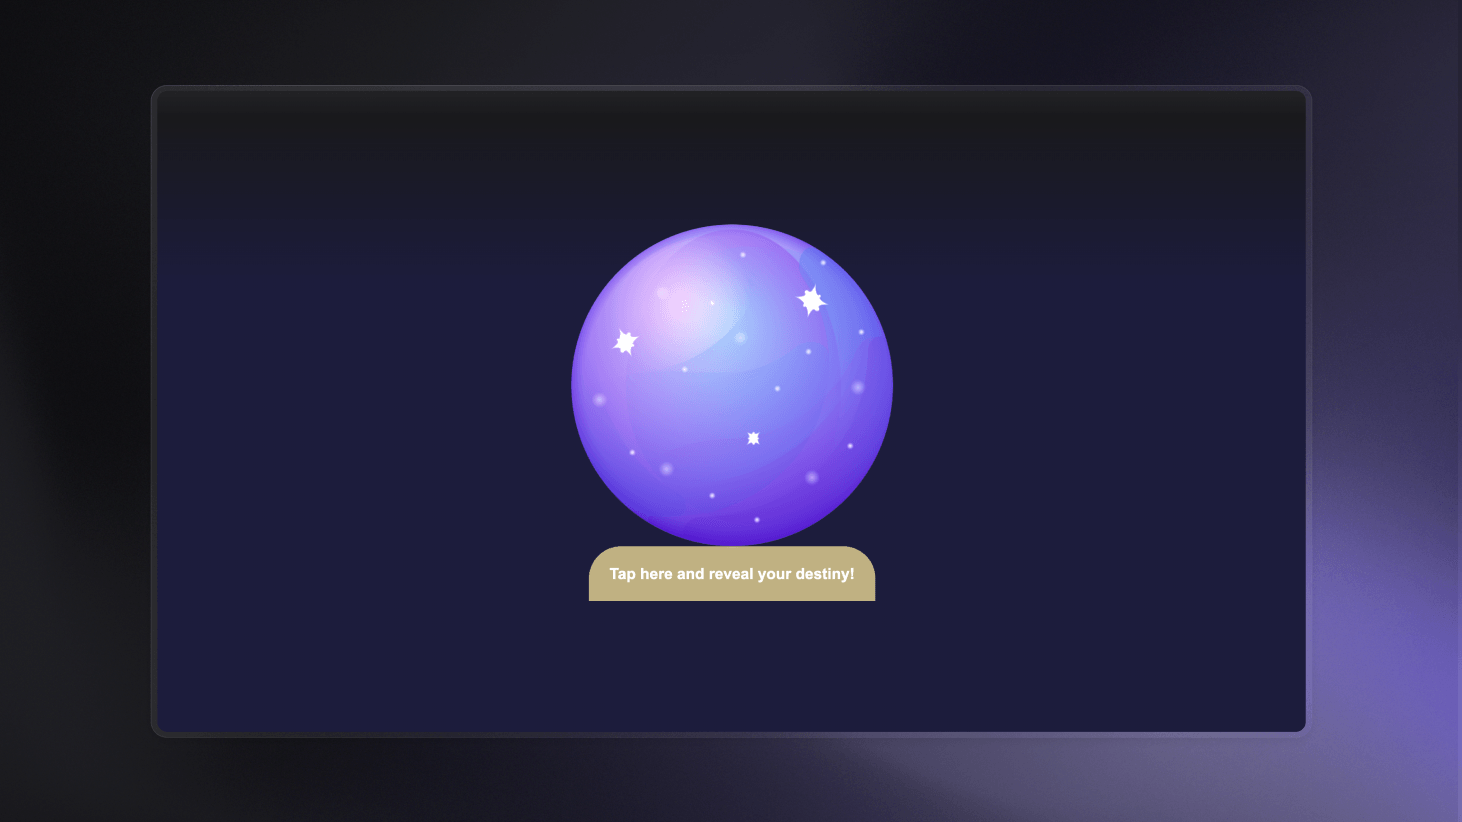
{:else}
<div class="crystalballContainer mainContainer">
<div class="crystalball">
{#if destinyLoading === ''}
<img src={crystalball} alt="Crystal Ball">
<button id="ballClick" on:click={getDestiny}>Tap here and reveal your destiny!</button>
{:else if destinyLoading === 'loading'}
<img src={crystalball} alt="Crystal Ball">
<button on:click={getDestiny}>Reading your future...</button>
{:else if destinyLoading === 'complete'}
<div class="destiny">
<div class="destinyMessage">
<h1>Five Years from Today</h1>
<div class="destinyMessageBox">
<p>{destiny}</p>
</div>
</div>
<div class="destinyButtons">
<button class="copyButton" on:click={getLink}>Get Link to Destiny</button>
<button class="resetButton" on:click={resetDestiny}>Want a new destiny?</button>
</div>
</div>
{/if}
</div>
</div>
{/if}
Generating destiny with the OpenAI GPT-4 API
Once we have our GitHub data, it is time to generate our destiny using the OpenAI GPT-4 API. For that, we will create an API route using SvelteKit’s server-only functions in the file ./src/routes/api/destiny/+server.js and add the following code:
import { error } from '@sveltejs/kit';
import { env } from '$env/dynamic/private';
import { OpenAI } from 'openai';

export async function POST({ request }) {
    try{
        const requestBody = await request.json();

        const openai = new OpenAI({
            apiKey: env.SECRET_OPENAI_API_KEY
        });

        const userData = requestBody.userData;

        const prompt = `You have the following data on a developer from their GitHub account:\n\nGitHub username: ${userData.username}\nFollowers: ${userData.followers}\nFollowing: ${userData.following}\nTop 5 languages:\n${userData.languages.join(',')}\n\nBased on this data, create a humourous, realistic prediction to lightly roast the individual about what they'll be doing in 5 years from now. Do not explicitly include their GitHub data in the final message. Only use gender-neutral pronouns.`;
        const response = await openai.chat.completions.create({
        model: 'gpt-4',
        max_tokens: 250,
        messages: [{ role: 'user', content: prompt }],
        });
        const completion = response.choices[0].message?.content;
        console.log(completion);

        return new Response(
            JSON.stringify({
                destiny: completion
            }),
            {
                headers: {
                    'Content-Type': 'application/json'
                },
                status: 200
            }
        )
    } catch(err){
        console.error(err);
        throw error(500, err.message);
    }
}
We will send this request by adding the following function to the file./src/routes/app/+page.svelte
async function getDestiny() {
    destinyLoading = 'loading';
    document.getElementById("ballClick").disabled = true;
    const destinyRequest = await fetch('/api/destiny', {
			method: 'POST',
			headers: {
				'Content-Type': 'application/json'
			},
			body: JSON.stringify({
				userData
			})
		})
    destinyLoading = 'complete';
    let destinyRequestBody = await destinyRequest.json();
    if(destinyRequest.status == 200){
        destiny += `${destinyRequestBody.destiny}`;
    } else {
        destiny += `Error occured:\n\n${destinyRequestBody.error}`;
    }
}
Since our UI has already been prepared in the previous step, we need not make any additional changes.
Storing and sharing the destiny
Lastly, to share our destiny with the rest of the world, we must create an additional page that gets destiny data from the Appwrite Database and displays it. For this, we must first add functions to add and get destinies from the Appwrite Database to our Database library. To do so, we visit ./src/lib/databases/js and add the following functions to our export:
.
.
.
const destinyCollectionId = env.PUBLIC_APPWRITE_COLLECTION_ID_DESTINY;

export const db = {**
.
.
.
		addDestiny: async(username, destiny) => {
		    return await databases.createDocument(
		        databaseId,
		        destinyCollectionId,
		        ID.unique(),
		        {
		            username,
		            destiny
		        }
		    )
		},

		getDestiny: async(documentId) => {
		    try{
		        return await databases.getDocument(
		            databaseId,
		            destinyCollectionId,
		            documentId
		        );
		    } catch(err){
		        return {
		            username: 'Not found',
		            destiny: 'Not found'
		        }
		    }
		}
.
.
.
After that, we will create a new directory ./src/routes/destiny/[slug] and add the following
A +page.server.js file
Since this page has no reactive logic, we will render this page on the server side and send it to the user. We will also get our destiny via a load function here:
import { db } from '$lib/databases';

export const ssr = true;
export const csr = false;

export async function load({ params }) {
    let destiny = await db.getDestiny(params.slug);

    return {
        destiny
    };
}
A +page.svelte file
We will render our page using the pre-fetched destiny here:
<script>
    export let data;

    let destiny = data.destiny.destiny;
    let username = data.destiny.username;

    function discoverDestiny() {
        window.open(`https://${window.location.hostname}`, '_self');
    }
</script>

<div class="mainContainer">
    <div class="destiny">
        <div class="destinyMessage">
            <h1>{username}'s Destiny</h1>
            <div class="destinyMessageBox">
                <p>{destiny}</p>
            </div>
        </div>
        <div class="destinyButtons">
            <button on:click={discoverDestiny}>Discover your developer destiny!</button>
        </div>
    </div>
</div>
Lastly, we need to add a function in ./src/routes/app/+page.svelte to store the destiny in the Appwrite Database using our library function and open the destiny link in a new tab for our user. For that, we add the following code in the <script> tags:
async function getLink() {
    let destinyToSave = await db.addDestiny(userData.username, destiny);
    let url = `https://${window.location.hostname}/destiny/${destinyToSave.$id}`;
    window.open(url, '_blank');
}
Next steps
And with that, our AI Crystal Ball project is ready! So far, since launching this application, over 375 users have signed up and created their destinies.
The web app is still live and can be tried at the following link: aicrystalball.oberai.dev
You can find the application’s complete source code at this GitHub Repo.
Join us on Discord to be the first to get updates and to be part of a vibrant community!