In this article, we'll explore how to set up Google authentication in a React application using Appwrite. Appwrite is an open-source backend solution that provides a wide array of integrated tools and services, covering everything from server-side logic to user management and data storage. While this tutorial focuses on Google OAuth2, Appwrite supports many authentication methods, including passwordless authentication, magic URL, email OTP, phone number OTP, email/password and various OAuth2 providers.
By the end of this tutorial, you'll have a React app that allows users to log in with their Google account seamlessly. Let's get started!
Prerequisites
Before diving in, ensure you have the following:
Basic knowledge of React
An Appwrite project set up - Learn how to create an Appwrite project here
Access to a Google Cloud account
Node.js and npm installed on your machine
Setting up Google OAuth2 in Appwrite
First, we need to configure Appwrite to support Google OAuth2. Log in to your Appwrite console and navigate to the Auth section on your left sidebar.
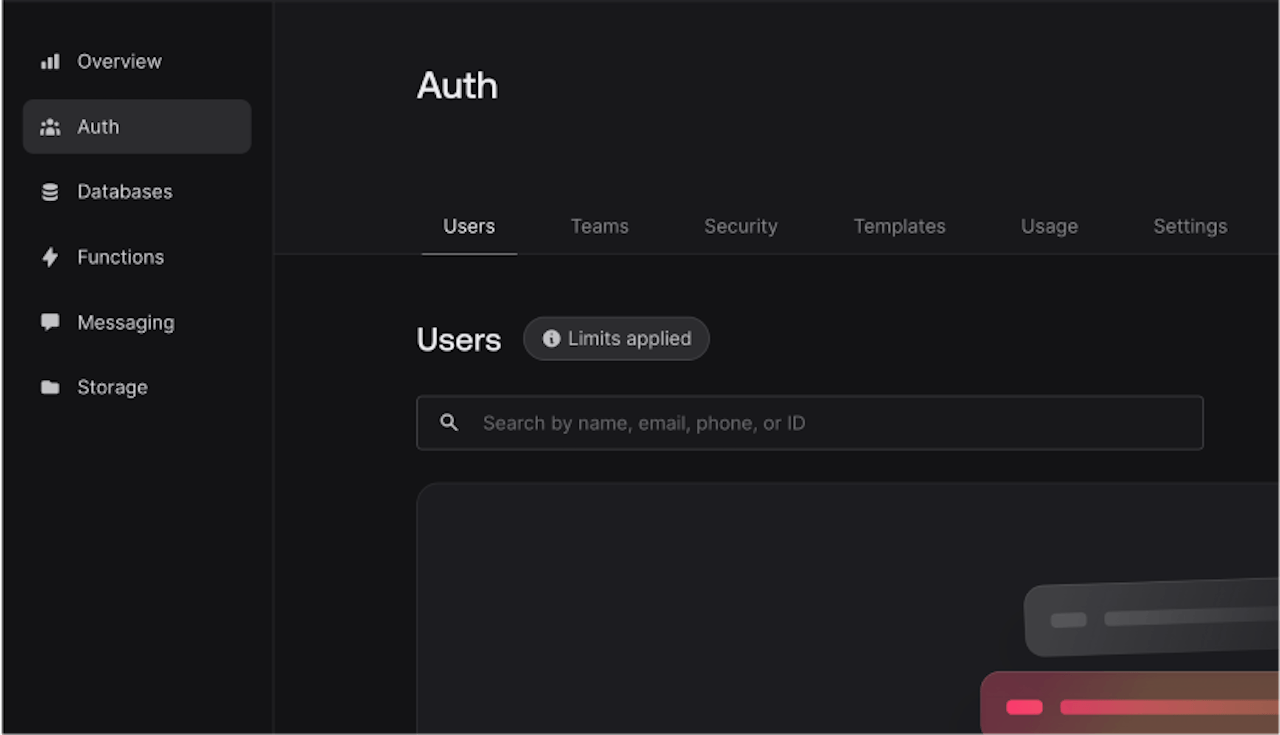
Click the settings tab and scroll down to the OAuth2 Providers section. The OAuth2 providers are arranged alphabetically, so you'll find Google OAuth2 when you scroll to 'G'.
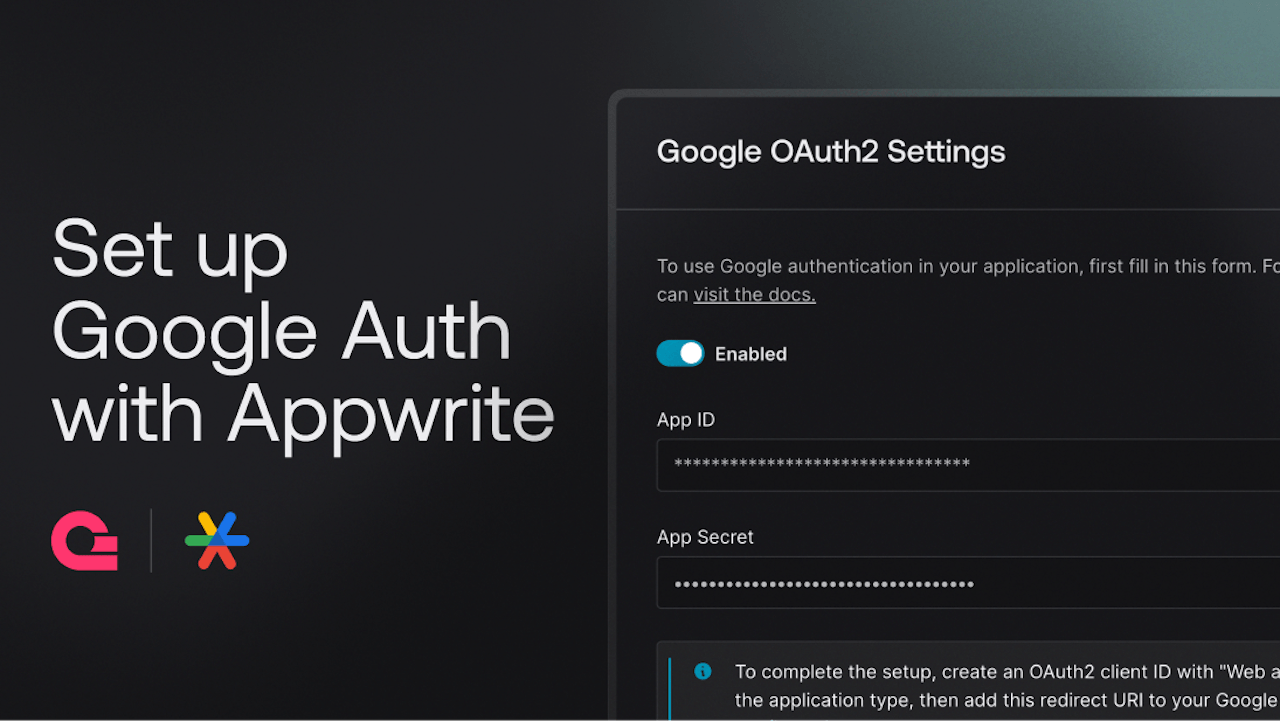
Click it, and a popup will appear with a toggle button and a form to enter your Google OAuth2 credentials.

At the bottom of the form, you'll see a "URI" field. Click the copy button beside the URI to save it for later use. This URI is required to set up your Google OAuth client.
Appwrite simplifies OAuth2 integration by supporting multiple providers out of the box, such as Facebook, GitHub, and Twitter. This flexibility makes it easy to extend your authentication methods as your application grows.
Creating OAuth2 client ID in Google cloud
Let's set up an OAuth2 Client ID in the Google Cloud Console to allow our Appwrite project to communicate with Google for authentication.
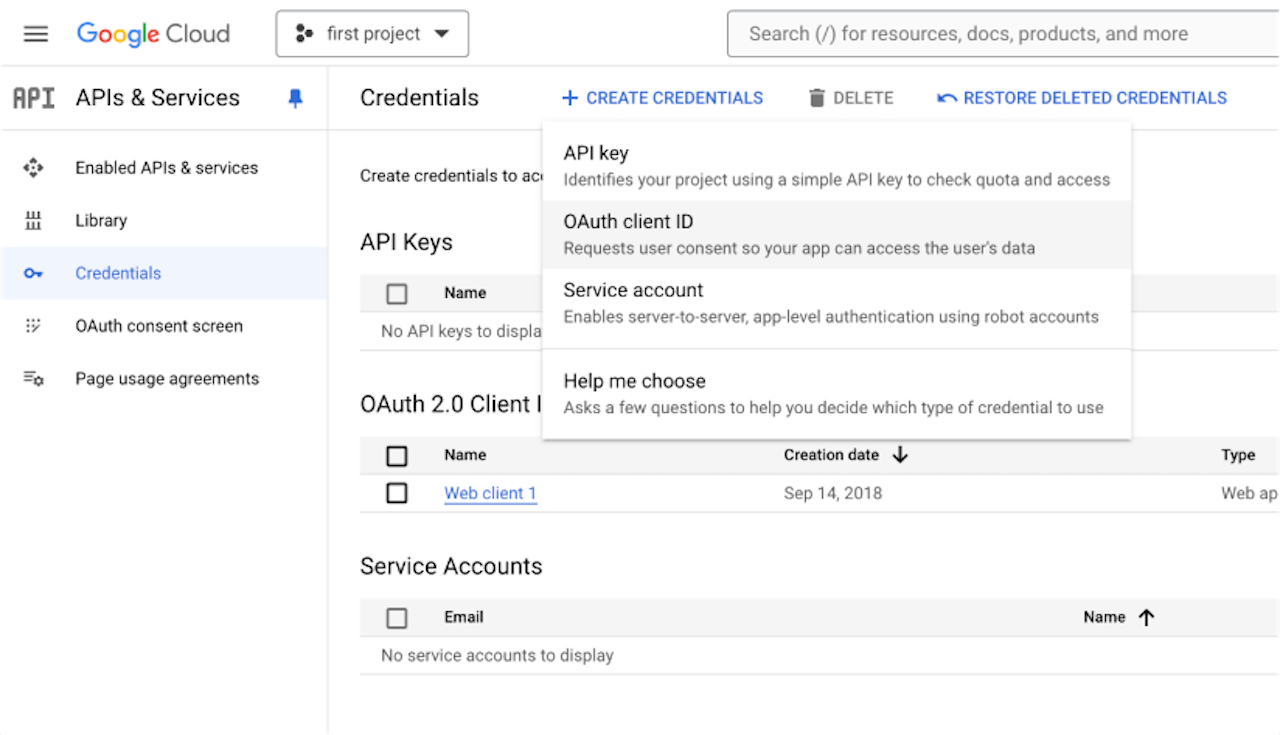
Log in to the Google Cloud Console. From the projects list, select a project or create a new one. If the APIs & Services page isn't already open, open the console's left-side menu and select APIs & Services. On the left, click Credentials, then “Create credentials,” and select OAuth client ID.

If this is your first time creating a client ID, you need to set up your consent screen. Go to the Google API Console OAuth consent screen page and add the required information like your user type, product name, and support email address.
Click Add Scope, and select the scopes your project uses on the dialog that appears. Sensitive scopes display a lock icon next to the API name. When you're finished adding details to the OAuth consent screen, click Save and Continue. For the purposes of this tutorial, you don't need to submit your app for verification immediately. Google Auth will work for your dev environment even if you skip the verification steps, which include submitting a video demonstration of your app.
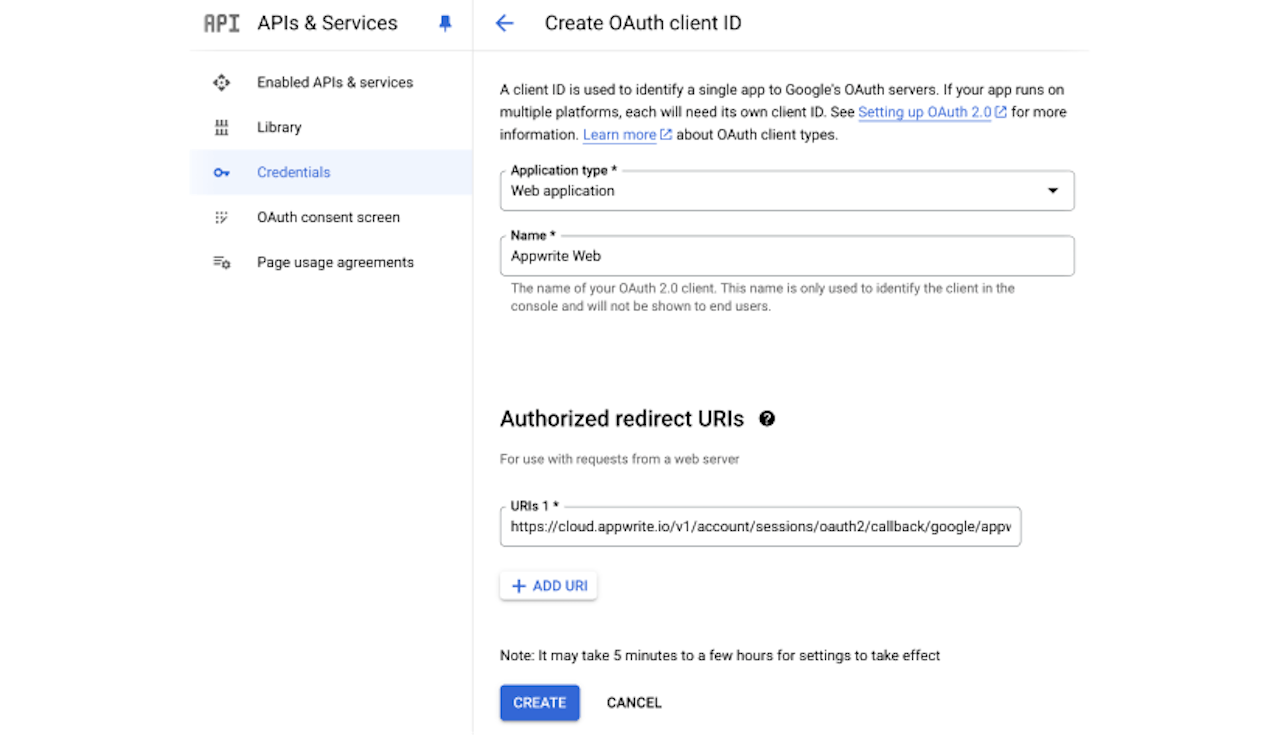
Select "Web application" as the application type and add the redirect URI provided by Appwrite. Click Create and save your credentials. Note down the Client ID and Client Secret. You'll need these credentials back in the Appwrite console.
Configuring Appwrite with Google OAuth2 credentials
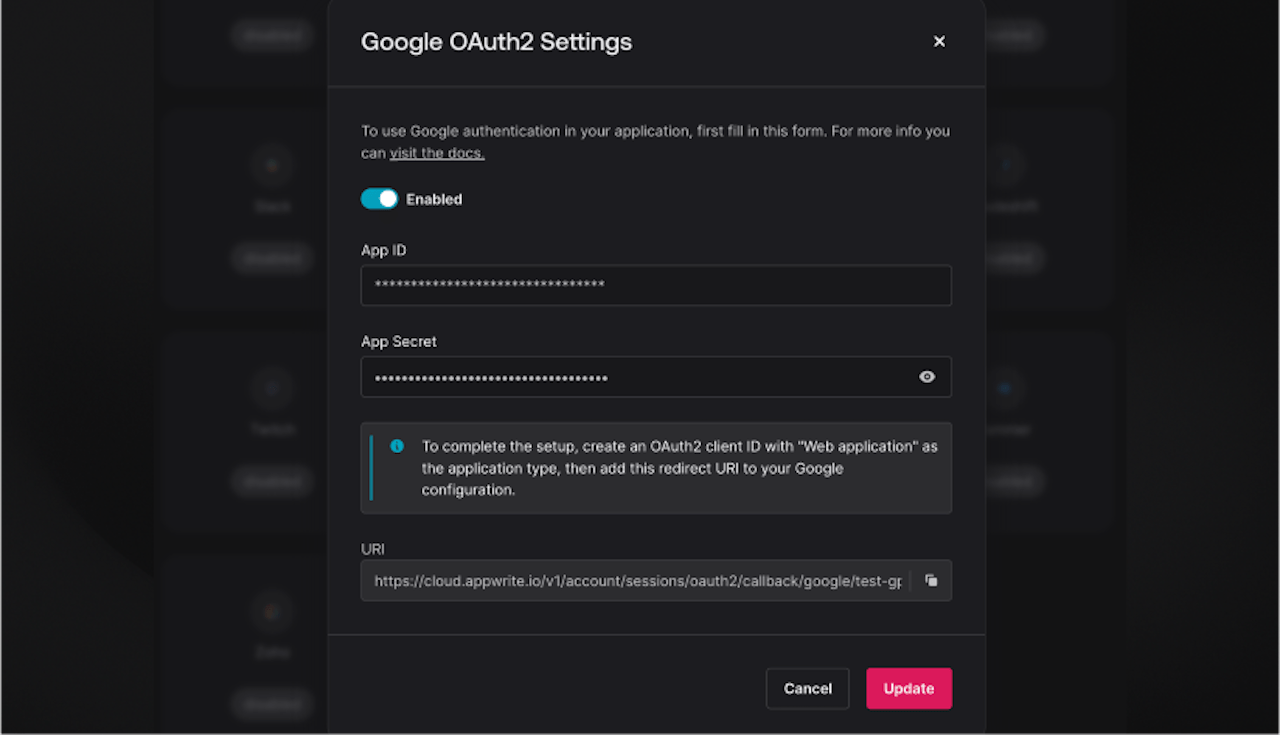
With your Google Cloud credentials ready, let's complete the setup in the Appwrite console. Return to your Appwrite console and navigate to the Auth section where you enabled Google OAuth2. In the popup, you'll see two fields for "App ID" and "App Secret."
Enter your Google OAuth Client ID into the "App ID" field and your Google OAuth Client Secret into the "App Secret" field. Finally, toggle the "Disabled" button to enable Google OAuth2 authentication and save your changes.
You now have Google OAuth2 set up in your Appwrite console! With Appwrite configured and your Google Cloud credentials integrated, let's move on to setting up your React project.
Setting up your React project
To start, open your terminal and run the following command to create a new React application:
npx create-react-app appwrite-google-auth
Feel free to use any other method you prefer to create your React application, like Vite for example.
Navigate into your project directory and install the default dependencies:
cd appwrite-google-auth && npm install
Next, install the Appwrite SDK:
npm install appwrite
Create a new file named appwrite.js in the src directory. Here, we'll initialize the Appwrite client and account service:
// src/appwrite.js
import { Client, Account, OAuthProvider } from 'appwrite'

const client = new Client()
client
  .setEndpoint('https://cloud.appwrite.io/v1')// The Appwrite API endpoint
  .setProject('project-id')// Your Appwrite project IDexport const account = new Account(client)
export { OAuthProvider }
In the appwrite.js file, the Client object, used to interact with Appwrite services, is initialized with the Appwrite API endpoint and your project ID. The account object is created using the client to interact with the Appwrite account service, while the OAuthProvider is an enum that contains the OAuth2 providers supported by Appwrite. We are exporting it from this file so you don't have to import both from appwrite and appwrite.js when you need to use both account and OAuthProvider in a component.
Create authentication functions
With your React project and Appwrite client set up, you can now create functions to handle login and logout. Create a new file named auth.js in the src directory. Add the following functions to handle login and logout:
// src/auth.js
import { account, OAuthProvider } from './appwrite'

export const loginWithGoogle = async () => {
  try {
    await account.createOAuth2Session(OAuthProvider.Google)
  } catch (error) {
    console.error(error)
  }
}

export const logoutUser = async () => {
  try {
    await account.deleteSession('current')
  } catch (error) {
    console.error(error)
  }
}

export const getUser = async () => {
  try {
    return await account.get()
  } catch (error) {
    console.error(error)
  }
}
In the auth.js file, we've created three functions: loginWithGoogle, logoutUser and getUser.
The loginWithGoogle function uses the createOAuth2Session method to initiate a Google OAuth2 session. The OAuthProvider object is imported from the ./appwrite.js file, which contains the Google OAuth2 provider.
The logoutUser function uses the deleteSession method to log out the current user. The deleteSession method expects the session ID to be deleted as an argument. In this case, we're passing 'current' to delete the current session.
The getUser function uses the get method to retrieve the current user's account details. This function will be used to display the user's information after they log in or to check if the user is already logged in.
Set up component for authentication
Next, create a new component named Auth.js (this time, with a capital 'A') in the src directory. This component will handle the login and logout functionality using the functions we created earlier.
// src/Auth.js
import React, { useState, useEffect } from 'react'
import { loginWithGoogle, logoutUser, getUser } from './auth'

const Auth = () => {
  const [user, setUser] = useState(null)

  useEffect(() => {
    const checkUser = async () => {
      try {
        const userData = await getUser()
        setUser(userData)
      } catch (error) {
        setUser(null)
      }
    }

    checkUser()
  }, [])

  return (
    <div>
      {user ? (
        <>
          <p>Welcome, {user.name}!</p>
          <button onClick={logoutUser}>Logout</button>
        </>
      ) : (
        <button onClick={loginWithGoogle}>Login with Google</button>
      )}
    </div>
  )
}

export default Auth
In the Auth.js file, we've created a functional component named Auth. This component uses the useState and useEffect hooks to manage the user's authentication state. The checkUser function is called when the component mounts to check if the user is already logged in.
If the user is logged in, the component displays a welcome message with the user's name and a logout button, which triggers the logoutUser function when clicked. If the user is not logged in, the component displays a login button that triggers the loginWithGoogle function when clicked.
You've now set up the basic structure for Google authentication using Appwrite in your React application. Next, we will integrate and test our authentication flow in the React app.
Integrate and test Google auth in your React app
With your authentication component set up, it's time to integrate it into your main application and test the Google OAuth2 authentication flow.
Step 1: Add the Auth Component to Your Main Application
Open the src/App.js file and add the Auth component:
// src/App.js
import React from 'react'
import Auth from './Auth'

const App = () => {
  return (
    <div className="App">
      <header className="App-header">
        <h1>Appwrite Google Auth Example</h1>
        <Auth />
      </header>
    </div>
  )
}

export default App
This integration will display the Auth component within your main application, providing Google authentication functionality to your users.
Step 2: Run your React application
To see everything in action, start your React development server by running the following command in your terminal:
npm start
Open your browser and navigate to http://localhost:3000. You should see your application with the login button.
Step 3: Test the authentication flow
Testing login
Click on the "Login with Google" button.
You will be redirected to the Google login page.
After logging in with your Google account, you should be redirected back to your application.
If successful, you should see a welcome message with your Google account name and a "Logout" button.
Testing logout
Click on the "Logout" button.
The welcome message should no longer be there, and the "Login with Google" button should show.
Step 4: Verify user authentication
Every request made through the Appwrite SDK after the user is logged in will include their authentication details automatically. This ensures that actions like reading from or writing to the database will be authenticated without requiring additional credentials.
Conclusion
You've successfully integrated Google OAuth2 authentication into your React application using Appwrite. With this setup, users can log in with their Google accounts, and you can securely manage their authentication state and data access within your application.
Appwrite supports many OAuth2 providers, including GitHub, Microsoft, Apple, Facebook, and more. This flexibility allows you to easily integrate various authentication options based on your application's needs. Additionally, Appwrite offers a variety of other authentication flows, such as Magic URL, phone authentication, anonymous sessions, team invites, and more. You can explore these options and learn how to implement them in your applications by checking out the Appwrite Auth Documentation.
Feel free to explore further and build on this foundation to create even more sophisticated and secure applications. If you need any help, don't hesitate to reach out to the Appwrite community on Discord for support and guidance.