I downloaded a personal finance app a few weeks ago to help me track my expenses. I uninstalled that app about five minutes later.
All it took to lose interest was the giant form I had to fill out to add a receipt.
With over 30+ apps installed on a typical user's phone on average, fighting for engagement and retention is tougher than ever. Users are sensitive to friction, with a reported 50% of users opting for new online merchants just for lowered friction and Shoppify reporting low-friction payment methods and flows can lead to >50% increase in conversion.
No one has time to fill out giant forms. To help you and your users avoid filling out giant forms, we're going to build a simple receipt processing endpoint with Appwrite that will extract the total amount from a receipt image using a Hugging Face model.
Prerequisites
Before you start, you'll need to know the basics of working with Appwrite Cloud and Appwrite Functions. We're going to be using Appwrite Functions to run our receipt processing code, which calls a Hugging Face model to extract data from a receipt image. Make sure you also have a Hugging Face API key to use the model.
Scanning receipts
We're going to use the Hugging Face Donut Receipts Extract model to extract relevant information from the receipt image.
Hugging Face's API makes this pretty simple. We'll send a POST request to the model's endpoint with the image data, and it will return the extracted information.
Our script can be as simple as:
import requests

# define the URL and image path
API_URL = "https://api-inference.huggingface.co/models/AdamCodd/donut-receipts-extract"
headers = {"Authorization": "Bearer hf_<HF_API_KEY>"}
IMAGE = "./test.jpg"

def scan_receipt(filename):
    # read the image data
    with open(filename, "rb") as f:
        data = f.read()
    # Post the image data to the model
    response = requests.post(API_URL, headers=headers, data=data)
    return response.json()
The response comes back as a set of XML-like tags, we can use Regex to extract the relevant information from the model response.
import re

def parse_receipt(text):
    # Use regular expressions to manually extract data between tags
    data = {}

    # Extract fields using regular expressions
    data['store_name'] = re.search(r'<s_store_name>(.*?)</s_store_name>', text).group(1)
    data['store_address'] = re.search(r'<s_store_addr>(.*?)</s_store_addr>', text).group(1)
    data['phone'] = re.search(r'<s_phone>(.*?)</s_phone>', text).group(1)
    data['date'] = re.search(r'<s_date>(.*?)</s_date>', text).group(1)
    data['time'] = re.search(r'<s_time>(.*?)</s_time>', text).group(1)
    data['subtotal'] = re.search(r'<s_subtotal>(.*?)</s_subtotal>', text).group(1)
    data['service_charge'] = re.search(r'<s_svc>(.*?)</s_svc>', text).group(1)
    data['tax'] = re.search(r'<s_tax>(.*?)</s_tax>', text).group(1)
    data['total'] = re.search(r'<s_total>(.*?)</s_total>', text).group(1)
    data['tips'] = re.search(r'<s_tips>(.*?)</s_tips>', text).group(1)
    data['discount'] = re.search(r'<s_discount>(.*?)</s_discount>', text).group(1)
    return data
And putting it all together:
# Call the function and parse the receipt using regex
parsed_receipt = parse_receipt(
    scan_receipt(IMAGE)[0]['generated_text']
)
print(parsed_receipt)
Let's also quickly save our dependencies in a requirements.txt file by running these commands:
pip install pipreqs
pipreqs .
The outputted file for me just looks like this:
appwrite==5.0.2
Requests==2.31.0
Integrating with Appwrite Functions
This script is great for running locally, but we want to run it in the Cloud so we can call it from our app. We also want to make sure we're not exposing our Hugging Face API key in our app and add user based permissions to our endpoint.
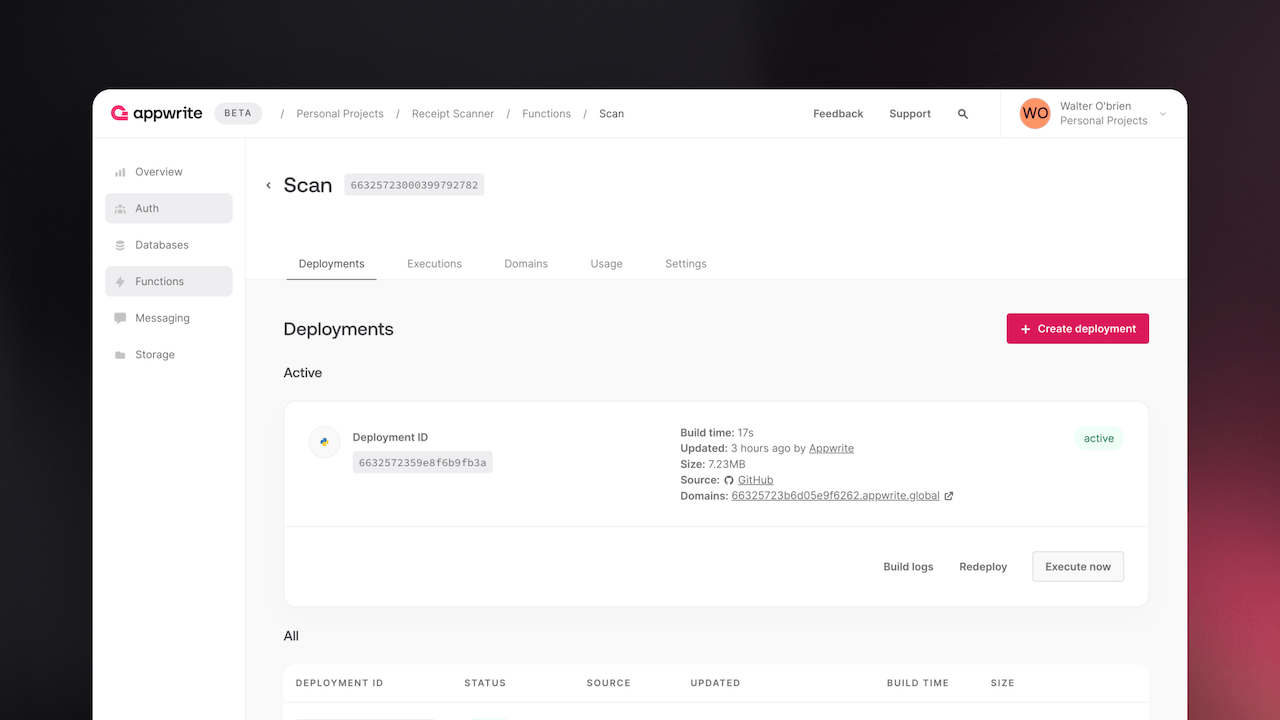
Let's create a new function in Appwrite Functions to run our script. We'll use the Python starter template, which will automatically create a repo on your account, add boilerplate code, and deploy the function to Appwrite Cloud.
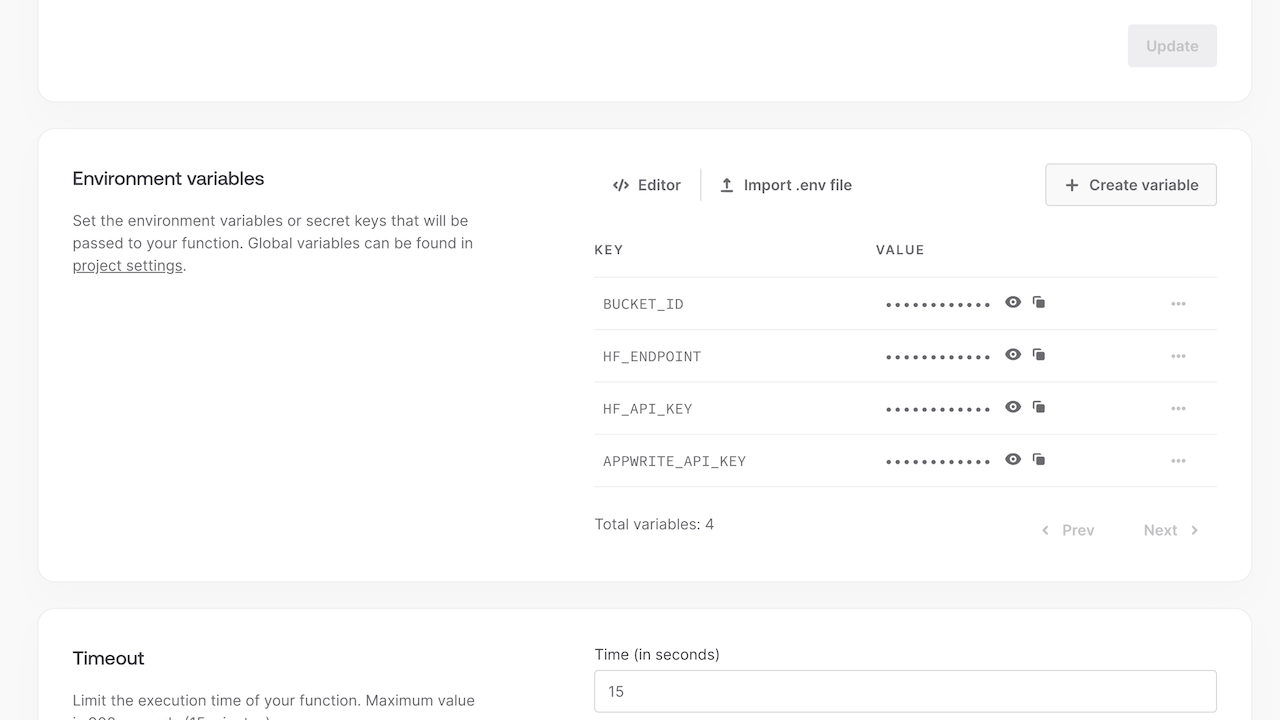
Navigate to the settings tab of the function and add the following environment variables:
The generated starter code will look like this when you clone the repo:
from appwrite.client import Client
import os


# This is your Appwrite function
# It's executed each time we get a request
def main(context):
    # Why not try the Appwrite SDK?
    #
    # Set project and set API key
    # client = (
    #     Client()
    #        .set_project(os.environ["APPWRITE_FUNCTION_PROJECT_ID"])
    #        .set_key(context.req.headers["x-appwrite-key"])
    # )

    # You can log messages to the console
    context.log("Hello, Logs!")

    # If something goes wrong, log an error
    context.error("Hello, Errors!")

    # The `ctx.req` object contains the request data
    if context.req.method == "GET":
        # Send a response with the res object helpers
        # `ctx.res.text()` dispatches a string back to the client
        return context.res.text("Hello, World!")

    # `ctx.res.json()` is a handy helper for sending JSON
    return context.res.json(
        {
            "motto": "Build like a team of hundreds_",
            "learn": "https://appwrite.io/docs",
            "connect": "https://appwrite.io/discord",
            "getInspired": "https://builtwith.appwrite.io",
        }
    )
We will update the function to accept a file ID from Appwrite Storage, download the file, and run our receipt scanning script on it.
First, setup the Appwrite SDK in the function.
import os
import requests
import re
from appwrite.client import Client
from appwrite.services.storage import Storage

def main(context):
    HF_API_KEY = os.environ['HF_API_KEY']
    HF_ENDPOINT = os.environ['HF_ENDPOINT']
    BUCKET_ID = os.environ['BUCKET_ID']
    headers = {'Authorization': HF_API_KEY}

    # Set project and set API key
    # client = new Client()
    #   .set_project(os.environ['APPWRITE_FUNCTION_PROJECT_ID'])
    #   .set_key(context.req.headers['x-appwrite-key']);

    storage = Storage(client)

    # ... rest of the code
Next, we'll download the file from Appwrite Storage and run our receipt scanning script on it.
    # ... still in main()
    file_id = context.req.body["$id"]

    def scan_receipt(data):
        response = requests.post(HF_ENDPOINT, headers=headers, data=data)
        return response.json()

    def parse_receipt(text):
        data = {}
        data['store_name'] = re.search(r'<s_store_name>(.*?)</s_store_name>', text).group(1)
        data['store_address'] = re.search(r'<s_store_addr>(.*?)</s_store_addr>', text).group(1)
        data['phone'] = re.search(r'<s_phone>(.*?)</s_phone>', text).group(1)
        data['date'] = re.search(r'<s_date>(.*?)</s_date>', text).group(1)
        data['time'] = re.search(r'<s_time>(.*?)</s_time>', text).group(1)
        data['subtotal'] = re.search(r'<s_subtotal>(.*?)</s_subtotal>', text).group(1)
        data['service_charge'] = re.search(r'<s_svc>(.*?)</s_svc>', text).group(1)
        data['tax'] = re.search(r'<s_tax>(.*?)</s_tax>', text).group(1)
        data['total'] = re.search(r'<s_total>(.*?)</s_total>', text).group(1)
        data['tips'] = re.search(r'<s_tips>(.*?)</s_tips>', text).group(1)
        data['discount'] = re.search(r'<s_discount>(.*?)</s_discount>', text).group(1)
        return data

    image = storage.get_file_download(bucket_id=BUCKET_ID, file_id=file_id)
    parsed_receipt = parse_receipt(
        scan_receipt(image)[0]['generated_text']
    )

    # Return the data we got as a JSON response
    return context.res.json({
        "receipt": parsed_receipt
    }, 200)
Make a request
Now that our function is set up, we can make a request to it from our app to scan a receipt.
Using a CURL request on the function's domain:
curl -X POST https://66325723b6d05e9f6262.appwrite.global \
     -H "Content-Type: application/json" \
     -d '{"$id": "66328472002415a37392"}'
Which might return something like:
{
  "receipt": {
    "store_name": " Boutique",
    "store_address": " 4143 STATE STREET LOS ANGELES, CA",
    "phone": "213-555-1234",
    "date": "2022-03-05",
    "time": "13:05PM",
    "subtotal": " $183,87",
    "service_charge": "",
    "tax": " $22,98",
    "total": " $206,85",
    "tips": "",
    "discount": ""
  }
}
Next steps
There are a few things you can do to integrate this into your app. For example, you could integrate this with a web app by uploading the receipt image to Appwrite Storage and calling the function with the file ID.
const file = await storage.createFile(
    '6632844900292d283610', // bucketId
    '66328472002415a37392', // fileId
    document.getElementById('uploader').files[0] // file from html input
);

const result = await functions.createExecution(
    '66325723000399792782', // functionId
    JSON.stringify({$id: file.$id}), // data
    false, // async (optional)
    '/', // path (optional)
    sdk.ExecutionMethod.POST, // method
    {"Content-Type": "application/json"} // headers
);
Another option is to trigger the function with a webhook when a new file is uploaded to Appwrite Storage.
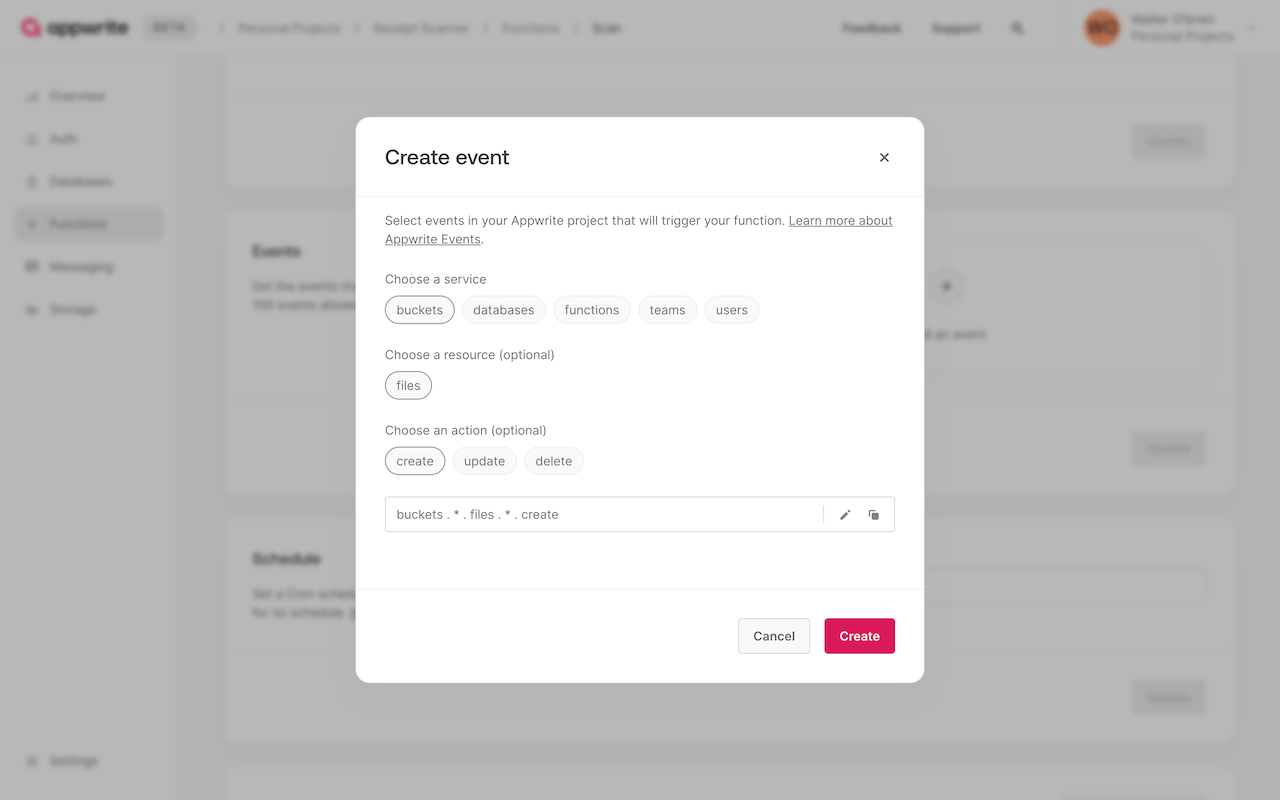
The function will already have the file ID in the request body, you'll just need to store the returned data in a collection instead of returning it as a response.
Resources
Visit our documentation to learn more about Appwrite, join us on Discord to be part of the discussion, view our blog and YouTube channel, or visit our GitHub repository to see our open-source code.