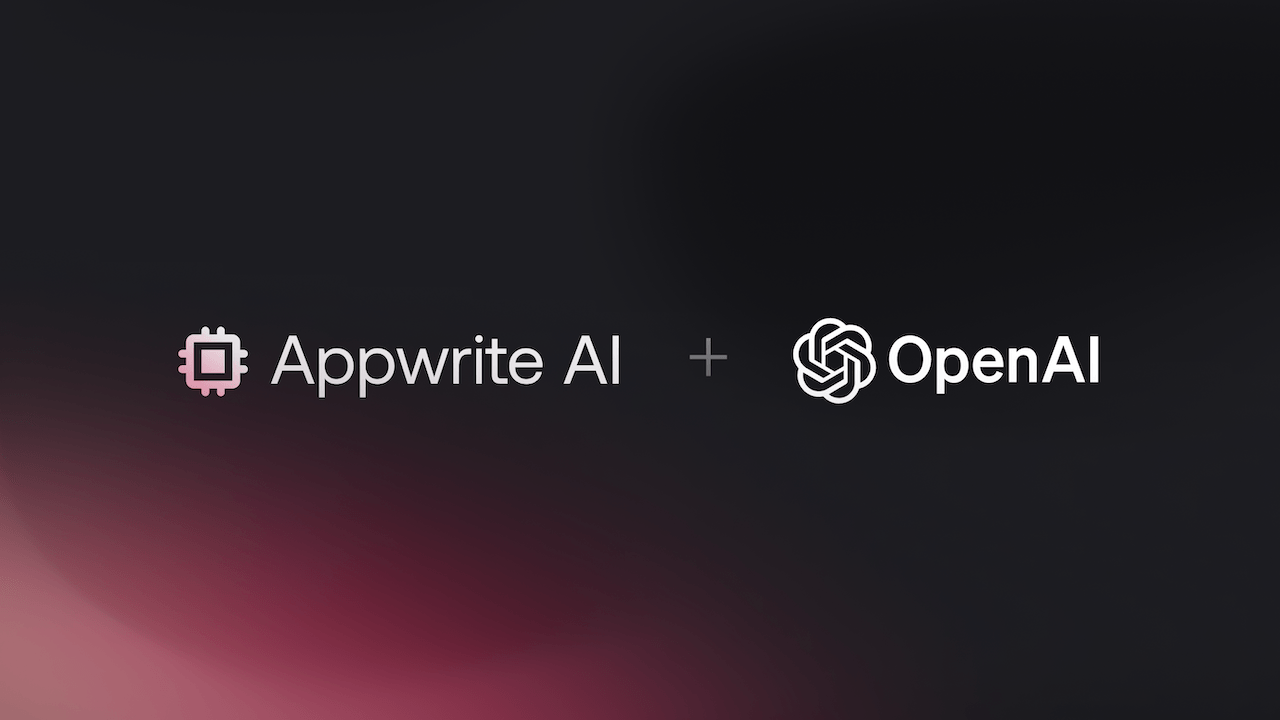
Recently, at the OpenAI Spring Update, OpenAI CTO Mira Murati announced the launch of their new flagship model, GPT-4o. GPT-4o happens to be OpenAI's fastest and most affordable model so far, which led us to wonder if we could use it to build our very own chatbot.
Therefore, in this blog, we will learn how to use Appwrite Functions and the OpenAI GPT-4o API to build a personal chatbot.
Setting up the OpenAI Platform
To use the OpenAI GPT-4o API, we must first create an API key on their platform. To do that, we must first create an account on the OpenAI platform. Once the account is set up and a project is created, we can visit their API keys page and create an API key. Ensure you copy and save this key in a safe place, as the OpenAI platform will not let you view the key after it is created.
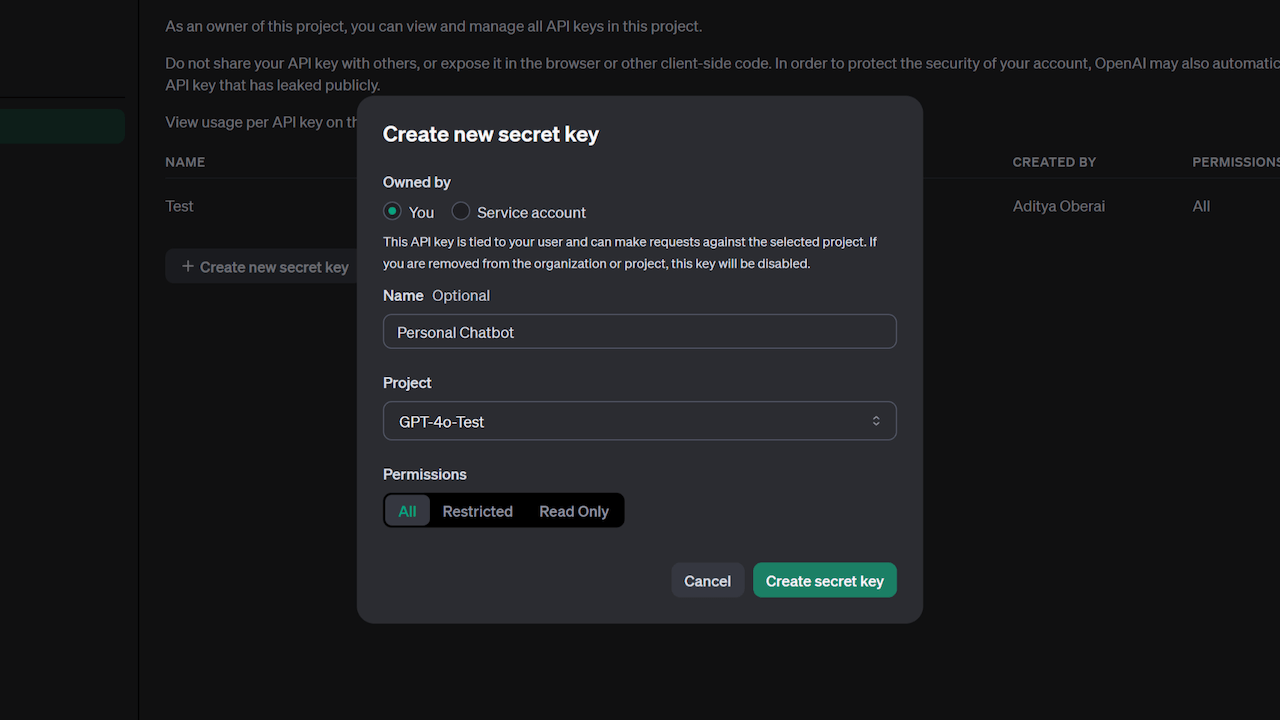
Note: To use the GPT-4o API, your account must be upgraded to Usage tier 1 (you must purchase at least $5 worth of credits). To learn more, visit their Usage tiers documentation.
Initializing the Appwrite Function
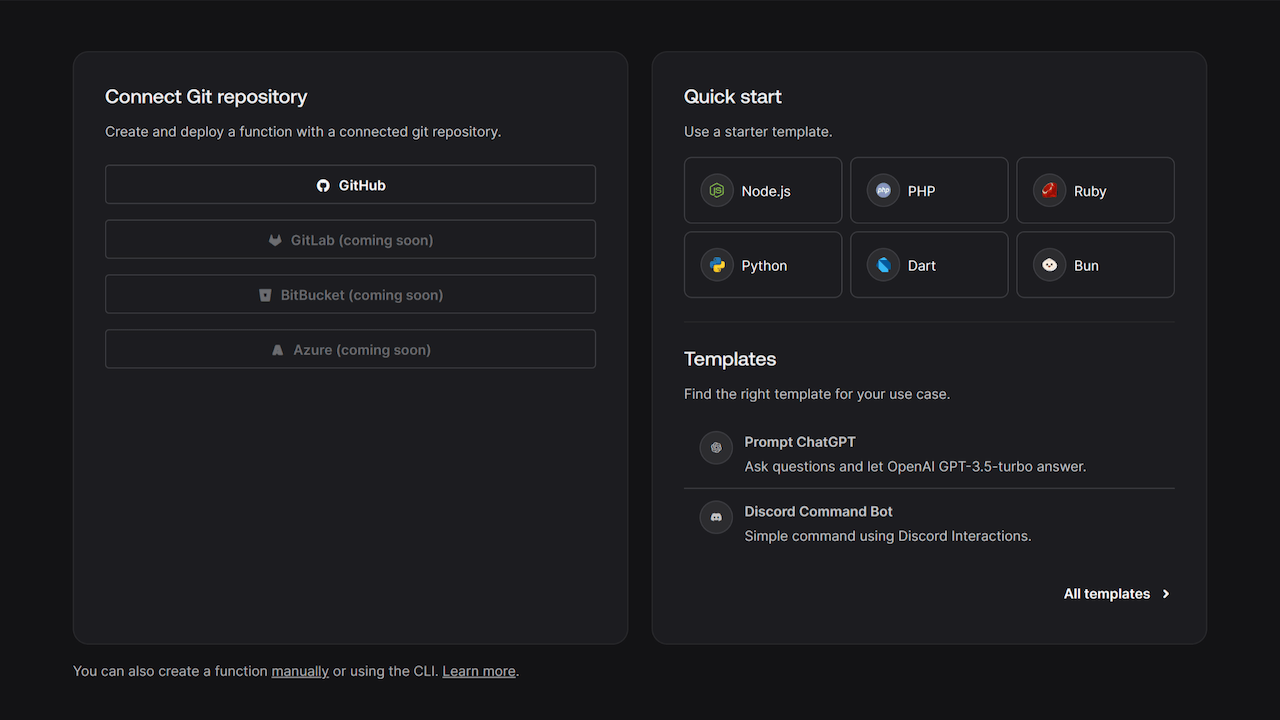
Now that we have our OpenAI API Key, let's prepare the function on Appwrite. Go to your Appwrite project and visit the Functions page. From there, we will create a function using the Node.js starter template.
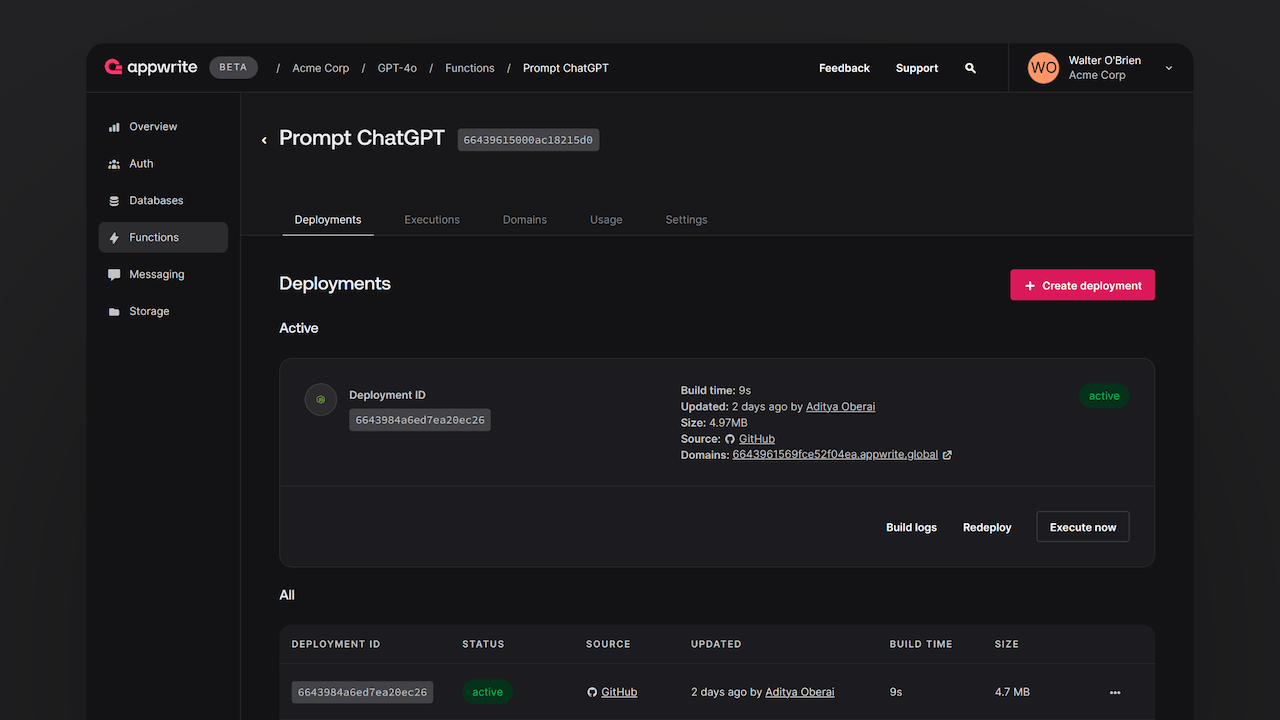
Once the function is ready, we must visit the Settings tab on the Function page and add the following environment variables:
OPENAI_API_KEY: API Key from our OpenAI account
OPENAI_MAX_TOKENS: Maximum number of tokens that the OpenAI response should contain (we'll set this as 512)
Once that is done, visit the function's GitHub repository and clone the project.
Developing the project
Once your function's GitHub repository is ready, clone it to your local device and enter the directory. You will notice a directory structure as follows:
.
├── src/
│   └── main.js
├── README.md
├── package-lock.json
└── package.json
Preparing the UI
To get our chatbot up and running, we must first develop a UI you can interact with. We will create a folder static at the root level of our project directory and add a file index.html. We will then add the following HTML to this file:
<!doctype html>
<html lang="en">
  <head>
    <meta charset="UTF-8" />
    <meta http-equiv="X-UA-Compatible" content="IE=edge" />
    <meta name="viewport" content="width=device-width, initial-scale=1.0" />
    <title>Prompt ChatGPT demo</title>

    <script>
      async function onSubmit(prompt) {
        const response = await fetch('/', {
          method: 'POST',
          body: JSON.stringify({ prompt }),
          headers: {
            'Content-Type': 'application/json',
          },
        });

        const json = await response.json();

        if (!json.ok || json.error) {
          alert(json.error);
        }

        return json.completion;
      }
    </script>

    <script src="//unpkg.com/alpinejs" defer></script>

    <link rel="stylesheet" href="https://unpkg.com/@appwrite.io/pink" />
    <link rel="stylesheet" href="https://unpkg.com/@appwrite.io/pink-icons" />
  </head>
  <body class="dark">
    <main class="main-content">
      <div class="top-cover pb-14">
        <div class="container">
          <div
            class="flex gap-4 justify-center mt-4"
          >
            <h1 class="heading-level-1">Prompt ChatGPT demo</h1>
            <code class="u-un-break-text"></code>
          </div>
          <p
            class="body-text-1 u-normal mt-2"
            style="max-width: 50rem"
          >
            Use this page to test your implementation with OpenAI GPT-4o API. Enter
            text and receive the model output as a response.
          </p>
        </div>
      </div>
      <div
        class="container u-margin-block-start-negative-56"
        x-data="{ prompt: '', answer: '', loading: false }"
      >
        <div class="card flex gap-6 flex flex-col">
          <div class="flex items-center gap-2">
            <div
              class="input-text-wrapper is-with-end-button w-full"
            >
              <input x-model="prompt" type="search" placeholder="Question" />
              <div class="icon-search" aria-hidden="true"></div>
            </div>

            <button
              class="button"
              x-bind:disabled="loading"
              x-on:click="async () => { loading = true; answer = ''; try { answer = await onSubmit(prompt) } catch(err) { console.error(err); } finally { loading = false; } }"
            >
              <span class="text">Submit</span>
            </button>
          </div>
          <template x-if="answer">
            <div class="flex flex-col gap-3">
              <div class="flex flex-col gap-3 card">
                <div class="flex gap-3">
                  <h5 class="eyebrow-heading-2">ChatGPT:</h5>
                </div>

                <div style="overflow-x: hidden; line-break: anywhere; white-space: pre-line;">
                  <p class="u-color-text-gray" x-text="answer"></p>
                </div>
              </div>
            </div>
          </template>
        </div>
      </div>
    </main>
  </body>
</html>
Preparing our utility functions
To simplify the function logic, we create additional utility functions to
return the contents of a file in the static folder as a string (to send our UI to the client browser)
throw an error if any of the keys are missing from the object (to check for missing environment variables)
For that, we shall enter the src folder and create a file utils.js with the following code:
import path from 'path';
import { fileURLToPath } from 'url';
import fs from 'fs';

const __filename = fileURLToPath(import.meta.url);
const __dirname = path.dirname(__filename);
const staticFolder = path.join(__dirname, '../static');

/**
 * Returns the contents of a file in the static folder
 * @param {string} fileName
 * @returns {string} Contents of static/{fileName}
 */
export function getStaticFile(fileName) {
  return fs.readFileSync(path.join(staticFolder, fileName)).toString();
}

/**
 * Throws an error if any of the keys are missing from the object
 * @param {*} obj
 * @param {string[]} keys
 * @throws {Error}
 */
export function throwIfMissing(obj, keys) {
  const missing = [];
  for (let key of keys) {
    if (!(key in obj) || !obj[key]) {
      missing.push(key);
    }
  }
  if (missing.length > 0) {
    throw new Error(`Missing required fields: ${missing.join(', ')}`);
  }
}
Creating the function logic
Now that our chatbot UI and utility functions are ready, we can develop our final function logic. For that, we must first install the openai NPM package. Open your terminal in the project directory and run the following command:
npm i openai
After that is done, we must visit the src/main.js file and replace the existing code with the following:
import OpenAI from 'openai';
import { getStaticFile, throwIfMissing } from './utils.js';

export default async ({ req, res }) => {
  throwIfMissing(process.env, ['OPENAI_API_KEY']);

  if (req.method === 'GET') {
    return res.text(getStaticFile('index.html'), 200, {
      'Content-Type': 'text/html; charset=utf-8',
    });
  }

  try {
    throwIfMissing(req.body, ['prompt']);
  } catch (err) {
    return res.json({ ok: false, error: err.message }, 400);
  }

  const openai = new OpenAI();

  try {
    const response = await openai.chat.completions.create({
      model: 'gpt-4o',
      max_tokens: parseInt(process.env.OPENAI_MAX_TOKENS ?? '512'),
      messages: [{ role: 'user', content: req.body.prompt }],
    });
    const completion = response.choices[0].message.content;
    return res.json({ ok: true, completion }, 200);
  } catch (err) {
    return res.json({ ok: false, error: 'Failed to query model.' }, 500);
  }
};
This function will return our chatbot UI on any GET request to the function and will use the prompt sent in the request body and use the OpenAI GPT-4o API to generate and return a response otherwise.
At this point, our project directory structure should look as follows:
.
├── src/
│   ├── main.js
│   └── utils.js
├── static/
│   └── index.html
├── README.md
├── package-lock.json
└── package.json
Testing the function
Once you've completed all the aforementioned steps, you can push the code to our GitHub repository, at which point Appwrite Cloud will automatically deploy the changes to your function.
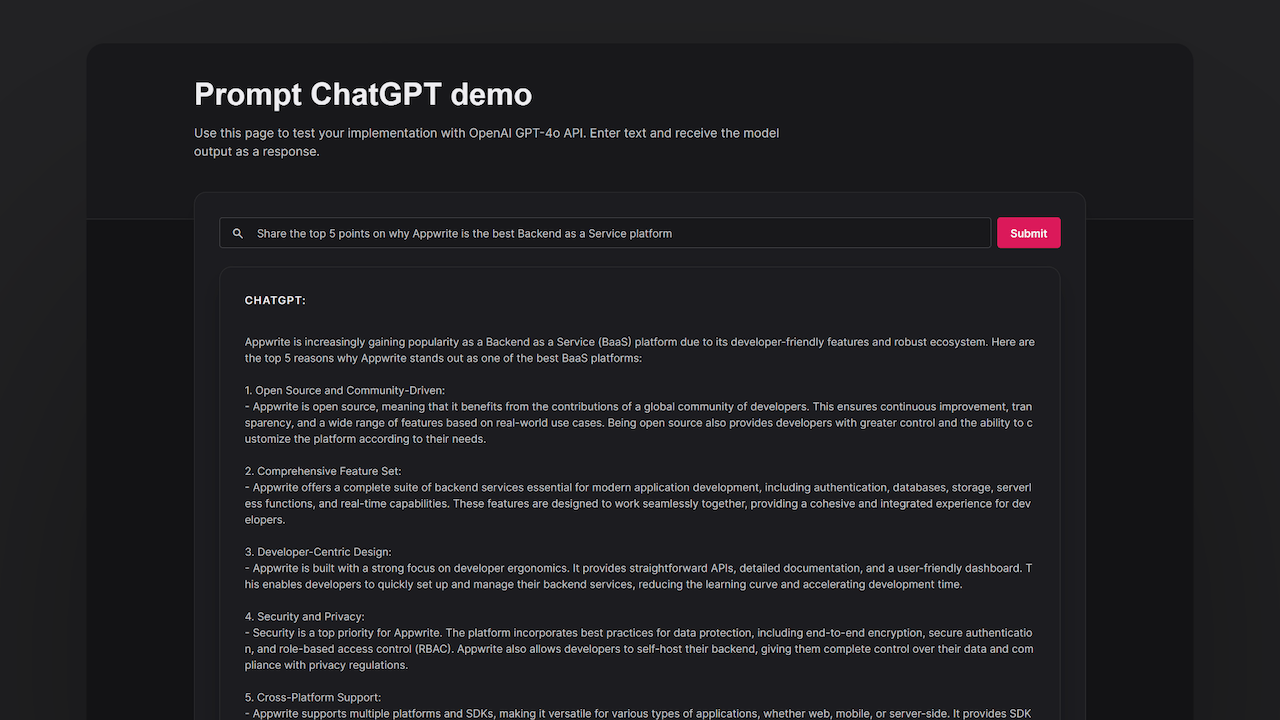
You can then go ahead and test your function by opening the function domain in your browser.
Here is what an example of this looks like: apwr.dev/gpt-4o-demo
Next steps
And with that, you have successfully deployed your personal chatbot powered by GPT-4o and Appwrite Functions. If you liked this project or want to investigate the full project code, visit our GitHub repository.
Additionally, if you would like to learn more about Appwrite Functions, here are some resources:
Appwrite Functions docs: These documents provide more information on how to use Appwrite Functions.
Appwrite Discord: Connect with other developers and the Appwrite team for discussion, questions, and collaboration.