Images are a core part of any modern web or mobile application. Whether you're displaying user avatars, product thumbnails, or full-screen backgrounds, images need to be optimized for performance, aesthetics, and consistency. Loading large, uncompressed images can slow down your app, and mismatched styles can break your UI. This is why dynamic image transformation should be a part of your app.
Instead of manually editing images before uploading them or storing multiple variations of the same file, Appwrite lets you manipulate images on the fly using the Storage preview endpoint. With a simple API call, you can resize, crop, compress, change formats, add borders, round corners, adjust opacity, and even apply background colors. The best part is that Appwrite automatically caches the transformed images, speeding up repeat requests.
This guide will walk you through everything you need to know about image transformation with Appwrite, and how to use the Storage preview endpoint to transform images. By the end, you'll be able to integrate image transformations into your app without touching an image editor.
Why dynamic image transformations?
Here are some of the benefits of transforming images dynamically:
Optimize performance - Uncompressed images can slow down your app and increase bandwidth usage. Appwrite allows you to dynamically resize and compress images, improving load times and reducing network costs.
Maintain a consistent UI - By adjusting borders, border-radius, and background color, you can ensure images match your app's theme and display correctly across different screen sizes.
Improve user experience - You can crop, rotate, and adjust opacity to fine-tune how images appear. This is useful for dynamic UI elements like profile pictures, cards, and galleries.
Built-in caching - Appwrite caches transformed images, which reduces processing time and ensures faster repeat requests.
How image transformation works in Appwrite
Appwrite's Storage preview endpoint applies transformations dynamically when retrieving an image. The original file remains unchanged, while Appwrite generates a modified version on-the-fly and returns the transformed image.
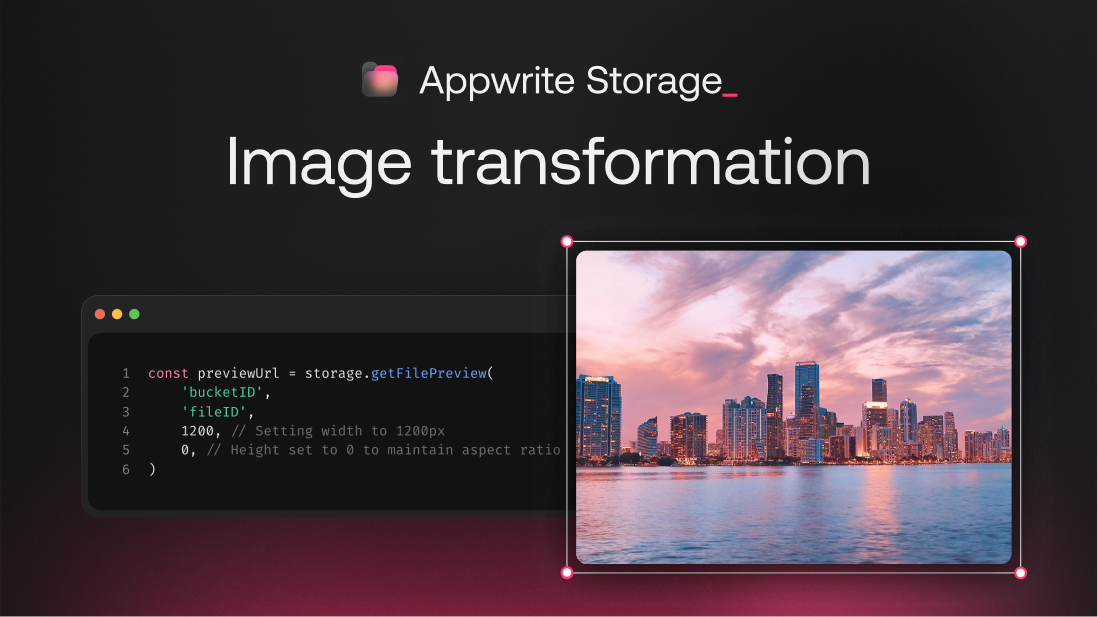
Here's an example of how to transform an image. With each example, we'll use the Appwrite Storage SDK to show the actual result:
import { Client, Storage } from 'appwrite'

const client = new Client()
const storage = new Storage(client)

client
  .setEndpoint('<https://cloud.appwrite.io/v1>') // API Endpoint
  .setProject('<PROJECT_ID>') // Project ID

const result = storage.getFilePreview(
  'photos', // Bucket ID
  'sunset.png', // File ID
  1600, // Width
  0, // Height (ignored if 0)
  'center', // Cropping gravity
  90, // Quality (1-100)
  5, // Border width
  'FD346E', // Border color (hex)
  15, // Border radius
  1, // Opacity (0-1)
  0, // Rotation (degrees)
  'FFFFFF', // Background color
  'webp', // Output format
)

This returns a new URL for the transformed image, which can be used directly in your app. Let's break down the parameters:
1. Resizing the image
Resizing is one of the most common transformations. Whether you're displaying thumbnails, profile pictures, or high-resolution banners, controlling the width and height ensures that images fit well within your design. Appwrite allows you to set:
width: 0-4000 pixels (Resizes while maintaining aspect ratio if height is not provided)
height: 0-4000 pixels (Resizes while maintaining aspect ratio if width is not provided)
If only one dimension is set, Appwrite adjusts the other proportionally.
Example:
const previewUrl = storage.getFilePreview(
	'bucketID',
	'fileID',
	1600, // Width
	600, // Height
)

2. Cropping with gravity
Cropping allows you to remove unnecessary parts of an image and focus on the important area. The gravity parameter controls which part of the image remains visible when cropping.
Common use cases
Ensuring a profile picture always centers on a face
Keeping product images aligned in an e-commerce store
Removing excess background in UI components
Gravity options
center (default)
top-left, top, top-right
left, right
bottom-left, bottom, bottom-right
Example:
const previewUrl = storage.getFilePreview(
  'bucketID',
  'fileID',
  1600,
  1600,
  'top-left', // Setting gravity to focus on top-left portion
)

3. Adjusting image quality
The quality parameter controls image compression, helping to balance clarity and file size.
Higher values (80-100): Retain more detail but result in larger file sizes.
Lower values (10-50): Reduce file size significantly but may introduce visible compression artifacts.
Example:
const compressedImage = storage.getFilePreview(
    'bucketID',
    'fileID',
    1600,
    800,
    'center',
    10, // Quality
)

4. Adding borders and border radius
Borders help separate images from the background, while border radius adds rounded corners for a softer appearance.
borderWidth: 0-100px
borderColor: Hex color code (without #)
borderRadius: 0-4000px (Higher values create more rounded corners)
Example:
const previewUrl = storage.getFilePreview(
    'bucketID',
    'fileID',
    1600,
    1000,
    'center',
    100,
    8, // border width
    'FF3366', // border color
    80 // border radius
)

5. Controlling opacity
Setting opacity allows images to blend into backgrounds or appear as overlays.
0 = Fully transparent
1 = Fully opaque
Example:
const overlayImage = storage.getFilePreview(
    'bucketID',
    'fileID',
    1600,
    1000,
    'center',
    100,
    0,
    '',
    0,
    0.3, // Opacity
)

6. Rotating an Image
The rotation parameter allows you to rotate an image by a specified number of degrees.
0-360 degrees
Example:
// 45-degree rotation with padding
const rotatedImage = storage.getFilePreview(
    'bucketID',
    'fileID',
    400,
    400,
    'center',
    100,
    0,
    '',
    0,
    1,
    45,        // Rotation
)

7. Changing background color
For transparent images (like PNGs), you can set a background color.
Hex color code (without #)
Example:
const previewUrl = storage.getFilePreview(
    'bucketID',
    'fileID',
    1600,
    800,
    'center',
    100,
    0,
    '',
    0,
    0.7, // Partial transparency to show background
    0,
    'FF9900' // Bright orange background
)

8. Configure output format
The output parameter lets you convert images between different formats on the fly, regardless of the original image format.
Example:
const webpImage = storage.getFilePreview(
    'bucketID',
    'fileID',
    1600,
    800,
    'center',
    90,
    0,
    '',
    0,
    1,
    0,
    '',
    'webp' // Output format
)

The above image is originally a PNG file. However, by setting the output format to WebP, Appwrite automatically converts the image to WebP format and returns the transformed image. You can confirm this by downloading the image or inspecting its source.
The output parameter supports png, jpeg, webp, gif, heic, and avif.
Choosing the right format can significantly impact your application's performance. For example, WebP and AVIF are modern formats that offer better compression and quality than JPEG and PNG. However, while these are compatible with most modern browsers, it's good practice to implement a fallback for older browsers.
Final thoughts
With just a few lines of code, Appwrite's image transformations eliminate the need for:
Multiple image versions cluttering your storage
Complex client-side image processing
Manual image editing for each use case
Third-party image processing services
Try replacing your next image processing task with a single API call, and you might be surprised how much time and performance you can gain.
Check out the docs for more information on how to use Appwrite Storage.