As your Appwrite project scales, performance and resource management become critical, not just to keep your app running smoothly, but also to avoid unexpected usage spikes. While Appwrite is designed to scale effortlessly, it's important to proactively optimize your usage so you don't reach resource limits prematurely. Effective optimization helps reduce costs, improves performance, and enhances user experience without compromising on functionality.
This guide provides a detailed overview of techniques to optimize your Appwrite project, covering API request management, caching strategies, file compression, image optimization, and other methods to ensure your app performs well while staying within your desired resource limits.
1. Reducing API requests: Smart querying and consolidation
Every API request consumes resources, and when requests are made inefficiently, they can consume substantial resources and increase usage costs. Here are strategies to help reduce unnecessary API calls:
Efficient use of listDocuments with queries
In Appwrite, fetching multiple documents from a database is made easy with the listDocuments method. This method allows you to retrieve all documents in a collection or apply filters using the Query API. Instead of making multiple requests for each document, you can fetch only the relevant data with a single request.
For example, in a content management system where you need to load blog posts written by a particular author, rather than making individual requests for each document, use Appwrite's listDocuments method with a filter:
const blogPosts = await databases.listDocuments(
  '<DATABASE_ID>',
  '<COLLECTION_ID>',
  [Query.equal('author', 'Michael Scott')],
)
By fetching all the documents you need in one go and applying filters, you reduce the number of requests and improve performance. However, as we'll see in the next section, you should use the listDocuments method carefully to avoid fetching unnecessary data, else you might end up with a large dataset that could slow down your application.
Optimize pagination and filtering
For applications with large datasets (e.g., e-commerce platforms with thousands of products), retrieving all data at once can overwhelm your system. Use Appwrite's pagination and filtering feature to only fetch what's immediately needed.
For example, if you're loading products from a database, instead of fetching all products, fetch them in batches using pagination.
const firstPage = await databases.listDocuments(
  '<DATABASE_ID>',
  '<COLLECTION_ID>',
  [
    Query.equal('author', 'Meredith Palmer'),
    Query.limit(20),
    Query.offset(0),// Fetch the first 20 records
  ],
)

const secondPage = await databases.listDocuments(
  '<DATABASE_ID>',
  '<COLLECTION_ID>',
  [
    Query.equal('author', 'JaneDoe'),
    Query.limit(20),
    Query.offset(20),// Fetch the next 20 records
  ],
)
This strategy will not only conserve bandwidth but will ensure that your queries return faster results, improving your user experience.
For more information on querying documents, the Appwrite Queries documentation provides detailed examples and options.
WebSockets for real-time data
When building real-time applications (e.g., chat apps or collaborative tools), polling APIs frequently can result in unnecessary usage and increased server load. Appwrite's Realtime API solves this by allowing you to subscribe to events and receive updates in real time via WebSockets. This ensures that your app remains responsive without the need for constant polling.
For example, you can subscribe to file upload events in real-time:
const unsubscribe = client.subscribe('files', (response) => {
  if (response.events.includes('buckets.*.files.*.create')) {
    console.log('New file uploaded:', response.payload)
  }
})
In addition to handling real-time updates, Appwrite's Realtime API can help decide when further requests are needed. Instead of continuously fetching data to check for updates, you can create a versioning system.
Versioning Document: Create a document with a single column, version, to track updates.
Subscribe to Changes: Use the Realtime API to monitor changes in this document. If the version field updates, it signals that the data has changed and needs re-fetching.
Appwrite's Realtime API supports multiple channels, such as files, account, and specific collections, ensuring updates from any part of your app. To learn more about the Realtime API, refer to the Appwrite Realtime documentation.
By using Appwrite's real-time feature, you drastically reduce API request overhead, especially for high-traffic apps like live dashboards or messaging platforms, while maintaining instant, event-driven updates.
2. Effective caching: Reducing redundant data fetching
Caching is one of the most important strategies for improving both performance and resource management in your Appwrite project. By caching frequently accessed data, you reduce the number of redundant requests sent to your Appwrite instance.
Client-side caching with localStorage or IndexedDB
For non-sensitive or rarely changing data, client-side caching can significantly reduce server load and improve application responsiveness. Use the browser's localStorage or IndexedDB to store data that users frequently access, such as user settings, app configurations, or product lists.
For instance, in a to-do list app, user preferences (e.g., preferred task view) can be cached locally so that the app doesn't need to retrieve this data from Appwrite on every page load.
// Cache user preferences in localStorage
localStorage.setItem('userPreferences', JSON.stringify(preferences))

// Retrieve user preferences from cache
const cachedPreferences = JSON.parse(localStorage.getItem('userPreferences'))
This reduces unnecessary API requests and allows for instant access to cached data, improving performance.
Optimized cache expiry and invalidations
Caching data on the client side is effective, but it must be combined with intelligent cache expiry strategies to avoid serving stale data. Ensure that the cache is invalidated and refreshed when necessary, such as when the data changes or after a certain time period.
// Cache with expiration (using localStorage)
const saveToCache = (key, data) => {
  const item = {
    data,
    expiry: Date.now() + 1000 * 60 * 60, // Cache for 1 hour
  }
  localStorage.setItem(key, JSON.stringify(item))
}

const getFromCache = (key) => {
  const cachedItem = localStorage.getItem(key)
  if (!cachedItem) return null

  const item = JSON.parse(cachedItem)
  if (Date.now() > item.expiry) {
    localStorage.removeItem(key) // Invalidate stale cachereturn null
  }

  return item.data
}
This ensures your users get up-to-date data while reducing the number of requests made to the server.
Server-side caching with Redis
Redis is a widely-used, high-performance in-memory data store that can be an excellent choice for server-side caching in your Appwrite projects. Redis can be deployed alongside your Appwrite backend to cache frequently accessed data, reducing the load on your Appwrite instance and speeding up response times for users.
For example, in an e-commerce application, you could cache product categories, prices, or frequently queried data in Redis. This way, instead of hitting the database for every request, your application can retrieve data directly from Redis, which significantly improves performance for repeated requests. You can learn more about Redis in the Redis documentation.
3. Optimizing file storage: Compression and efficient file delivery
Managing large files can be a significant source of resource consumption. Optimizing file storage and delivery can help keep storage costs down and ensure faster data transfers.
Bucket compression
One of the most important optimizations for file storage is bucket compression. Appwrite allows you to compress files in your buckets using either the gzip or zstd compression algorithms. Enabling compression reduces the file size and conserves storage space, which is particularly useful for large files and media-heavy apps.
Gzip is a widely-used compression algorithm that offers good compression ratios for many types of files.
Zstd (Zstandard) is a modern, high-performance compression algorithm that provides better compression efficiency and decompression speed compared to gzip, making it a great choice for high-performance applications.
To enable compression for a bucket, you can set this up via the Appwrite Console or programmatically using the SDK:
const promise = storage.createBucket('bucketId', 'bucketName', {
  compression: 'zstd',
})
Keep in mind that files larger than 20MB are not compressed, even if compression is enabled. This is done to prevent performance bottlenecks when handling large files. Enabling compression at the bucket level not only helps reduce storage usage but also speeds up file transfers by reducing the amount of data sent over the network.
Optimizing image delivery with the Preview API
Appwrite allows you to serve compressed and optimized versions of your images to reduce bandwidth usage and improve performance. You can use the preview endpoint to adjust image quality, resolution, format, and more, without needing to modify the original file. This is useful for serving responsive images on the web, where you might want to reduce file sizes for faster load times.
// Serve an optimized image preview
const optimizedImage = storage.getFilePreview(
  'bucketId', // The bucket ID where the file is stored
  'fileId',   // The file ID of the uploaded image
  800,        // Resize the width to 800px
  0,          // Keep the original height (aspect ratio preserved)
  'center',   // Crop the image centered if cropping is needed
  80,         // Set image quality to 80%
  0,          // No border
  '',         // No border color
  0,          // No border radius
  1,          // Full opacity
  0,          // No rotation
  '',         // No background color
  'webp',     // Convert the image to WebP format for better compression
)
While this example shows how to serve an optimized image preview, and will greatly improve load times, it will not affect the original file size in your storage. So if you want to save storage space, consider compressing and optimizing files at the time of upload. A good practice for image optimization is to use formats like WebP, which offer better compression than JPEG or PNG.
Optimizing file delivery with CDNs and regional project deployment
For improved file delivery performance, especially in media-heavy applications, you can leverage a domain-level CDN like Cloudflare. A CDN caches files and serves them from locations closer to your users, reducing load times and improving the overall experience without overburdening your Appwrite server.
In addition, deploying your Appwrite project in a region near your user base can further reduce latency. Currently, Appwrite supports the FRA (Frankfurt) region, which is great for users in Europe. We're also expanding to more regions soon, giving you even more options to optimize performance based on your audience's location.
By combining CDNs and regional project deployments, you can enhance file delivery speeds, reduce latency, and ensure a more responsive user experience.
4. Using serverless functions for optimized workflows
Serverless functions in Appwrite are a powerful tool for optimizing resource usage. Instead of handling complex, resource-heavy operations on the client or in your core backend, offload these tasks to serverless functions that can execute asynchronously and on-demand.
Tasks like generating reports, processing data, or transforming files can be offloaded to serverless functions. This approach frees up the client and backend from performing expensive computations and ensures that heavy workloads don't slow down your core application.
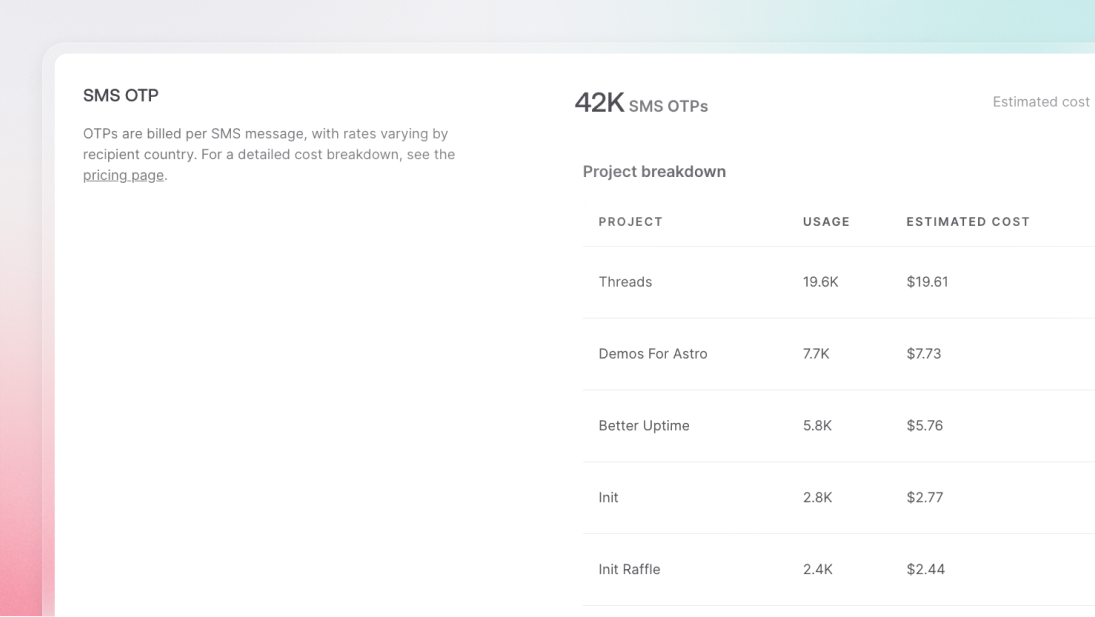
5. Setting up usage limits, alerts, and budget controls
Proactively managing your resource usage in Appwrite is key to avoiding unexpected overages and optimizing costs. Appwrite offers built-in tools for setting up usage alerts and budget controls to help developers manage their consumption.
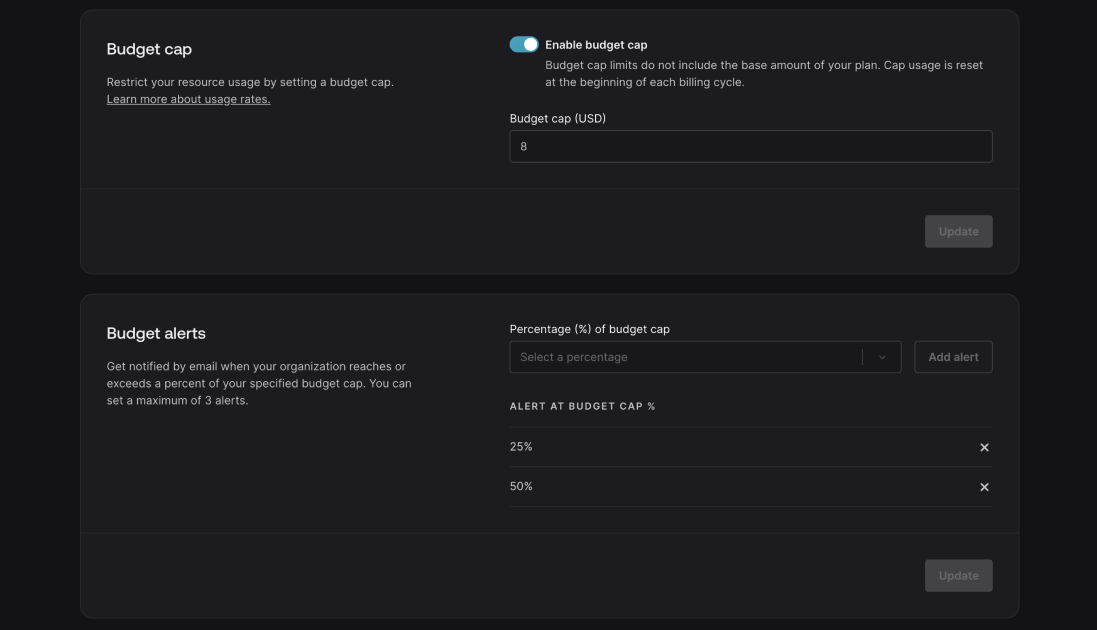
Budget controls
You can also enable budget alerts to monitor your spending and prevent unexpected charges. For teams managing larger projects or multiple clients, setting budget limits ensures you stay within financial expectations.
To configure budget alerts, start by navigating to the Appwrite Cloud Console, then go to the Organisation section and select Billing. Here, you'll find options to manage your budget. You can set a budget cap to define a hard limit on your spending, and in the Budget Alerts section, you can enable notifications that trigger when your spending reaches a certain threshold. This ensures you are alerted before exceeding your desired budget.
6. Monitoring and scaling your Appwrite project
Appwrite handles scalability efficiently, particularly in its cloud environment. Appwrite Cloud automatically scales resources as needed, ensuring that your application can handle increased traffic or workloads without requiring manual intervention. This automatic scaling allows you to focus on building your app, while Appwrite dynamically adjusts the resources behind the scenes to maintain optimal performance during traffic spikes.
While this is a significant advantage of using Appwrite Cloud, self-hosted instances also provide flexibility for custom scaling configurations. By monitoring your Appwrite project's resource usage, you can identify bottlenecks, optimize your app, and scale horizontally as needed.
Automatic scaling in Appwrite
Appwrite's infrastructure is built on top of Docker, which allows for containerized scaling. Each service in Appwrite is containerized, meaning services like databases, storage, or functions can be scaled horizontally as demand increases. This happens automatically in the cloud version of Appwrite, making it easier for developers to handle surges in user traffic without experiencing downtime or performance degradation. For self-hosted Appwrite, scaling is also possible but requires setting up and managing Docker containers manually.
In Appwrite's cloud environment, you don't have to worry about manually configuring load balancers or managing server instances to scale your application. Appwrite automatically distributes workloads, ensuring smooth operation regardless of traffic volumes.
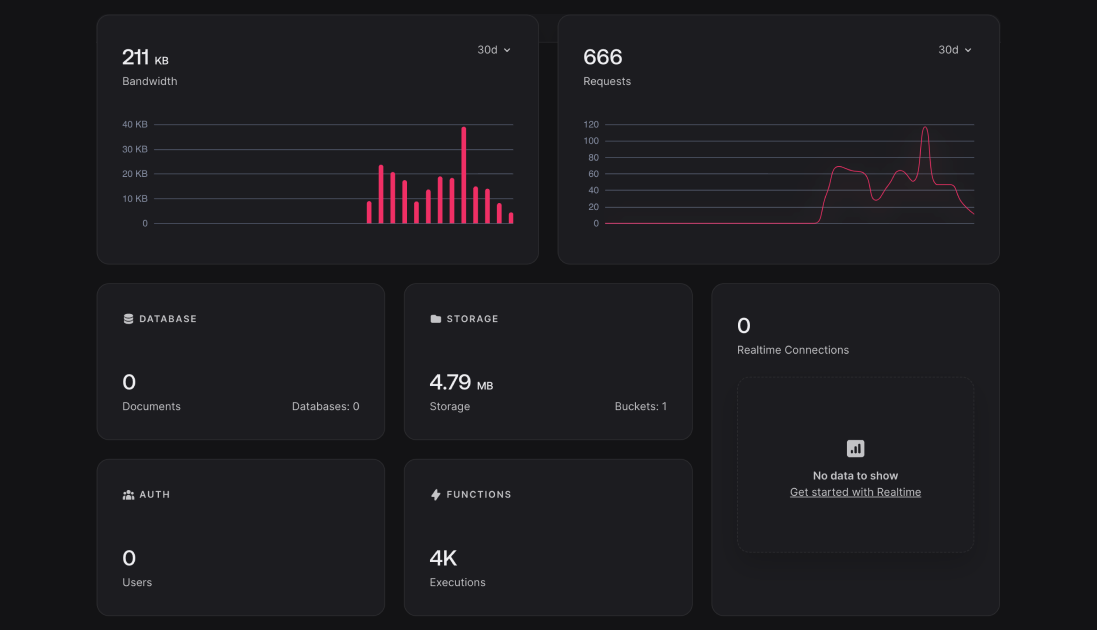
Monitoring resource usage
Appwrite provides built-in monitoring to help track API usage, database operations, storage, and other key metrics. This monitoring allows you to identify potential inefficiencies, such as high API request volumes or unnecessary data fetches, before they escalate into larger issues. While Appwrite handles automatic scaling, regular monitoring can help you optimize your application to avoid overuse of resources and prevent unnecessary costs.
You can monitor your Appwrite project's performance via the dashboard, which gives insights into your API request count, database operations, and storage usage. This data helps you manage your plan limits more effectively and optimize your app to avoid unexpected scaling needs.
Horizontal scaling
For self-hosted environments, Appwrite can be scaled horizontally by replicating containers across multiple servers. Stateless containers like those running functions or workers can be easily replicated to distribute workloads. However, for stateful services like databases, manual scaling configurations may be required.
Horizontal scaling ensures that the load is distributed evenly across multiple instances, making your application more resilient during high-traffic periods.
Conclusion
Optimizing your Appwrite project ensures you not only provide a better experience to your users but also prevent unnecessary resource overuse. By applying the techniques discussed in this guide, you can keep your project running smoothly while staying within your plan limits.
These optimizations aren't just about cost savings—they are about making your app more scalable, efficient, and reliable as it grows. Rather than waiting until you hit plan limits, taking a proactive approach builds trust and ensures your users always experience the best possible performance, even as your app scales.
Further reading and resources: