OAuth2 server quick start_
Enable Appwrite's OAuth2 server, register a client, and run your first authorization code sign-in end to end.
7 min read
This guide turns your project into an OAuth2 provider and runs one sign-in through it. By the end you will have an enabled server, a registered client, and an access token issued by your project.
The examples follow two apps, the same pair the tutorials build out in full:
- TaskFlow (
https://taskflow.localhost): your product and the OAuth2 provider, also called the authorization server. It authenticates users, presents the consent screen, and issues tokens. - Vantage (
https://vantage.localhost): the third-party consumer, called the client in OAuth2. It sends users to TaskFlow for authorization and receives tokens after they approve access.
Enable the server
In the Console, open Auth, select the OAuth2 server tab, and turn on Enable OAuth2 server.
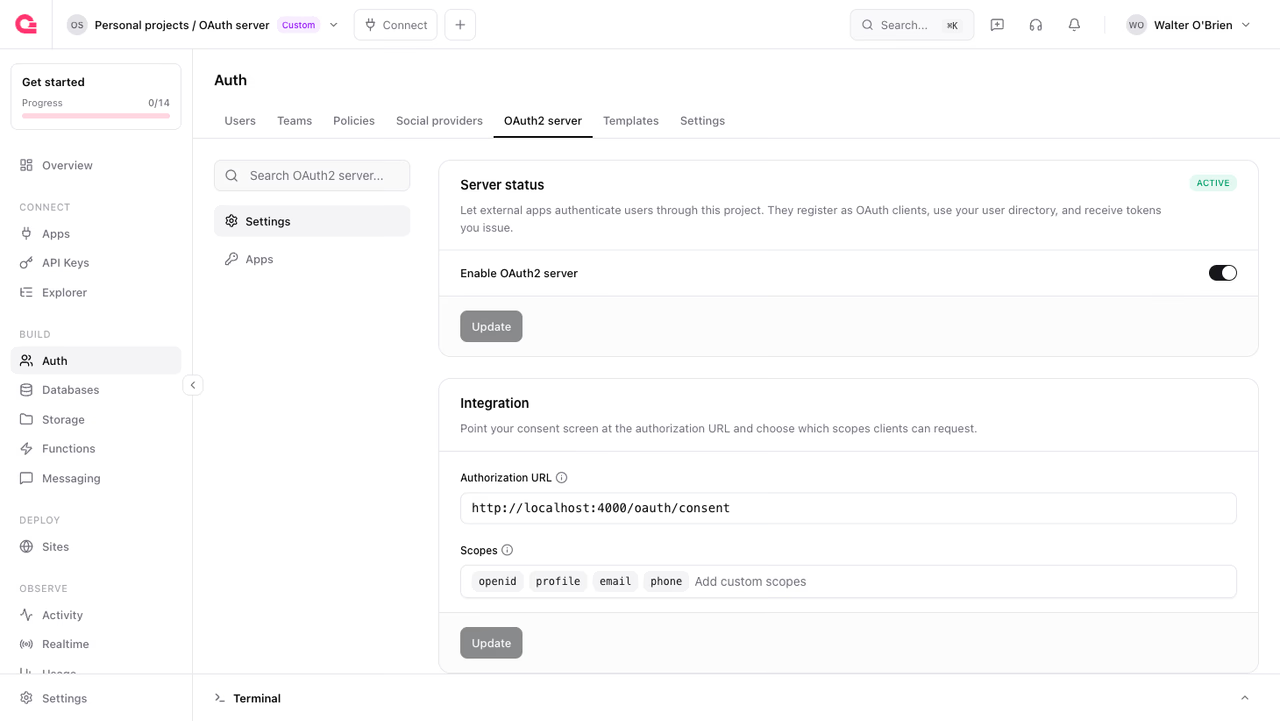
Set the Authorization URL to the page you will host the consent screen on. This is where Appwrite redirects users during authorization, and where you present them the details of the request so they can approve or reject. Point it at https://taskflow.localhost/consent, where TaskFlow will host its consent screen. Nothing needs to run there yet. The openid, profile, email, and phone scopes are always included. Add any scopes your custom APIs will support.
You can also enable and configure the server with a Server SDK using the updateOAuth2Server method.
The API key used for this call needs the project.write scope.
Copy the discovery URL
Once enabled, the server publishes an OpenID Connect discovery document. Integrators point their OAuth or OIDC library at this URL and it learns every endpoint automatically. If the integrating platform supports OIDC sign-in out of the box, this URL is all it needs: it can skip most of the steps below instead of building the flow from scratch.
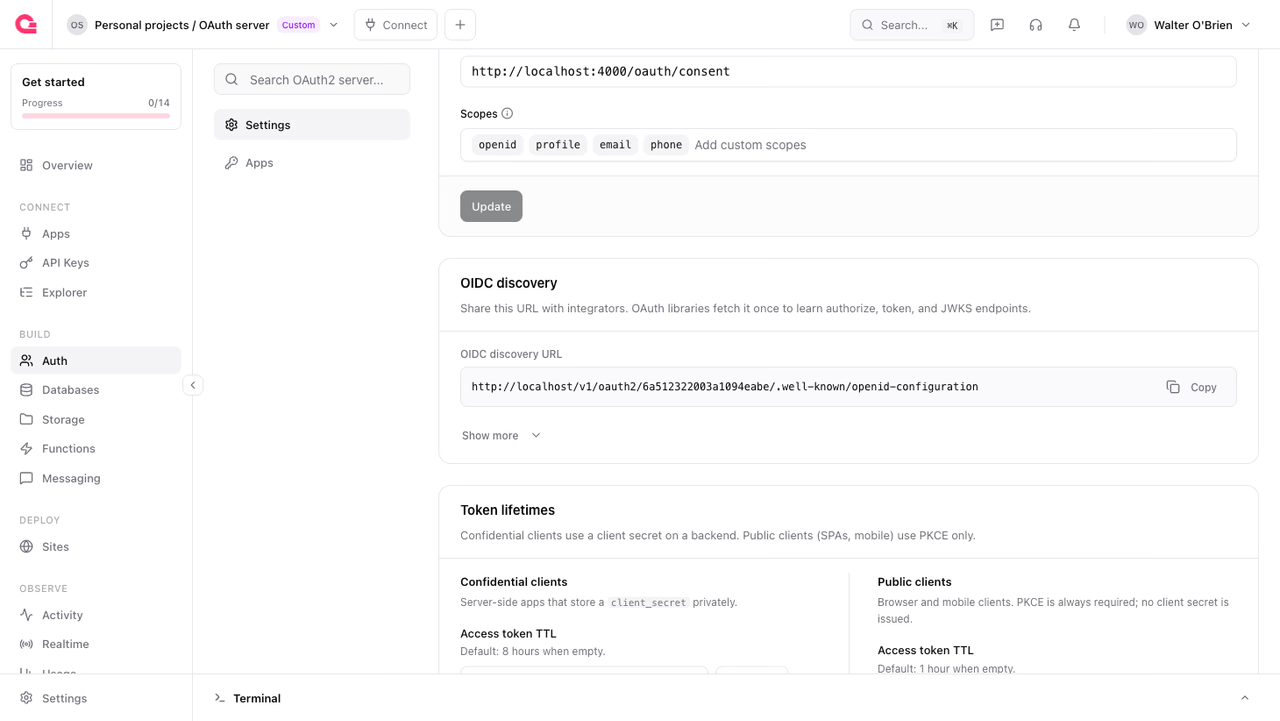
Open it in a browser to confirm the server is live. It returns JSON describing the authorization, token, userinfo, and JWKS endpoints, and more.
Register a client
Each app that integrates with your project registers as a client. Here that is Vantage. The redirect URI it declares is a URL on Vantage, https://vantage.localhost/auth/redirect, where the OAuth2 server sends users back with the authorization code. For security, redirect URIs must use HTTPS. There are two exceptions: loopback addresses like localhost, 127.0.0.1, and [::1] can use HTTP during development, and native apps can register a private-use scheme URI such as com.example.app:/oauth. No redirect URI may contain a fragment.
Open the Apps sub-tab and create a client. Name it Vantage, add the redirect URI, and choose a type. Pick Confidential for this walkthrough so you get a secret to authenticate the token exchange. Copy the secret when it is shown, because it appears only once. For a mobile or single-page app that cannot hold a secret, pick Public instead: the token exchange then uses PKCE in place of the secret, and the client types comparison shows what else changes.
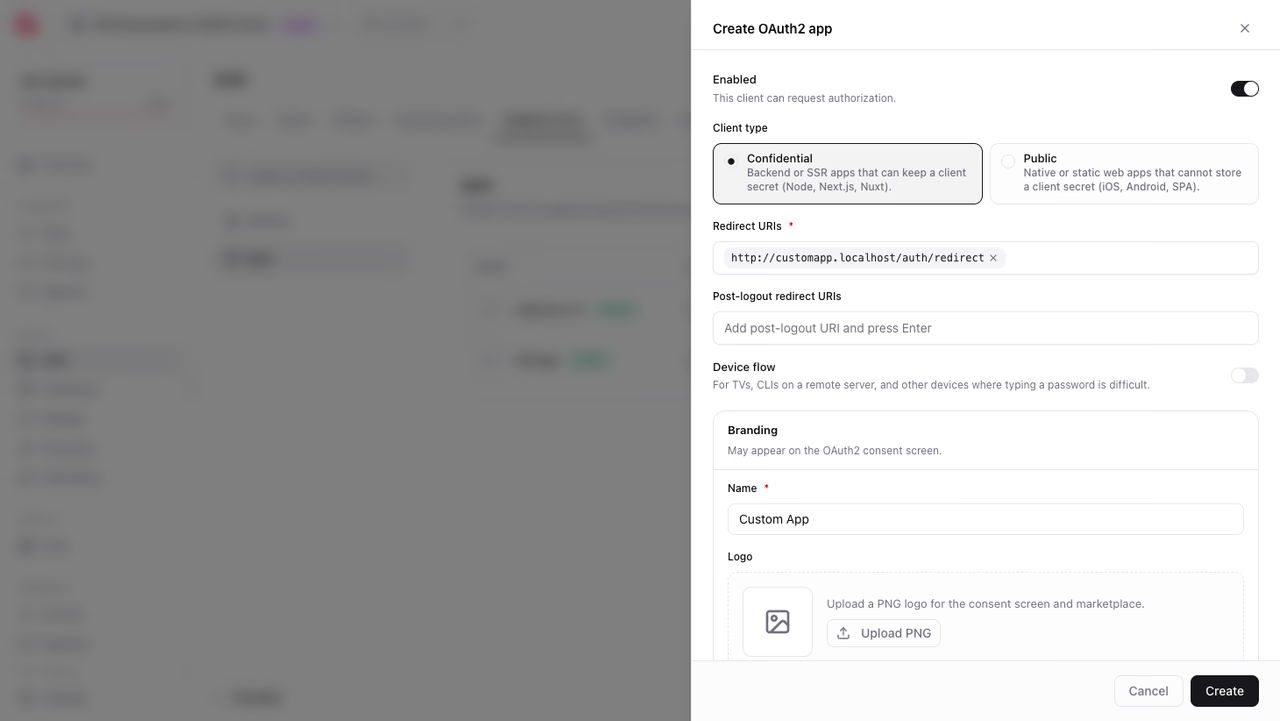
Clients can also be registered from code with the apps service in the Client SDKs. Any signed-in user on your project can register an app, which enables self-serve registration for integrators. Creating a client needs an app ID, a name, and a redirect URI:
Updating a client accepts the full set of options, from consent screen branding to logout URIs and the device flow:
The same apps service is available in the Server SDKs with an API key. See Clients for the full set of options.
Run the authorization code flow
With the server enabled and a client registered, you can run a sign-in. The flow has four steps: send the user to authorize, approve the grant, exchange the returned code for tokens, and use the access token to read their profile.
1. Send the user to the authorization endpoint
Vantage begins the sign-in by sending the user's browser to TaskFlow's authorization endpoint. This is the URL behind Vantage's Sign in with TaskFlow button.
The URL uses TaskFlow's Appwrite API endpoint because its Appwrite project is acting as the authorization server. Replace <REGION> with the region from your API endpoint, <PROJECT_ID> with TaskFlow's Appwrite project ID, and <CLIENT_ID> with the ID generated when you registered Vantage:
Each query parameter tells TaskFlow how to handle the request:
| Parameter | Meaning |
|---|---|
client_id | Identifies Vantage as the client requesting access. |
redirect_uri | Tells TaskFlow where to return the browser after the user approves or rejects. It must match a URI registered for Vantage. |
response_type=code | Requests an authorization code. The browser receives this temporary code, then Vantage's server exchanges it for tokens in step 3. |
scope | Lists the access Vantage is requesting. openid starts an OpenID Connect sign-in, while profile and email request the user's basic profile and email claims. |
When you open this URL, Appwrite validates the request and checks for an active TaskFlow user session.
2. Review and approve Vantage's request
When Vantage opens the authorization endpoint for a signed-in user, Appwrite creates a pending authorization request called a grant. The grant connects the user, Vantage, the requested scopes, and Vantage's redirect URI. Appwrite then redirects the browser to TaskFlow's authorization URL, the consent page, with the grant_id in the query string. A complete consent screen uses that grant ID to show what Vantage is asking for and lets the user approve or reject; the Authorization guide shows how to build it.
This quick start does not build TaskFlow's consent screen, so the browser lands on https://taskflow.localhost/consent and finds nothing there. That is fine: copy the grant_id from the address bar and approve the request manually. If the URL has no grant_id, the user has no active TaskFlow session. Sign in a user on the project, then open Vantage's authorization URL again.
Approving needs the same TaskFlow user's session, sent as the a_session_<PROJECT_ID> cookie, which holds the session secret. To find its value, open your browser's developer tools on the Network tab, look at any request to Appwrite, such as GET /v1/account, and copy the cookie from the request headers. Then send this request:
The Accept: application/json header asks for the redirect target as JSON instead of following it, which is what a consent screen needs and what lets you read the code here:
{ "redirectUrl": "https://vantage.localhost/auth/redirect?code=<CODE>&iss=..."}Copy the code value out of redirectUrl. Vantage uses it in the next step. Without the Accept header, Appwrite answers with a 303 redirect and the code appears only in the Location header.
3. Exchange the code for tokens
Vantage's server sends the code to the token endpoint. Vantage is a confidential client, so it authenticates with its client_secret. A public client sends a code_verifier in place of the secret, but only when its authorization request carried a code_challenge. Sending a verifier for a code that did not use PKCE is rejected, and sending a secret from a public client is rejected too.
The response contains an access token, a refresh token, and an ID token:
{ "access_token": "eyJ0eXAiOiJhdCtqd3Qi...", "token_type": "Bearer", "expires_in": 28800, "refresh_token": "eyJ0eXAiOiJKV1Qi...", "scope": "openid profile email", "id_token": "eyJ0eXAiOiJKV1Qi..."}4. Read the user's profile
Call the userinfo endpoint with the access token to confirm the sign-in worked end to end:
{ "sub": "6a5138d1971d49a87f0a", "email": "walter@example.com", "email_verified": true, "name": "Walter O'Brien", "updated_at": 1784040398}See Tokens for token structure, validation, refresh, and revocation.
Next steps
Enabling the server is half of becoming a provider. Integrators like Vantage rely on TaskFlow for two more things:
- Documentation that covers the discovery URL, the available scopes and what they grant, and how to register a client.
- A developer platform on TaskFlow's own website where integrators register and manage their clients with the
appsservice, which the Clients page walks through.
Was this page helpful?
Share what worked or what we should fix. Once approved, our agents automatically apply suggested updates to the docs.