Learn how to setup your first Android project powered by Appwrite and the Appwrite Android SDK.
Using Java?
Check out the Start with Android (Java) guide.
Open Android Studio and click New Project to create a new project.
Choose your desired project template, for example Empty Activity, and click Next.
Now enter your app name and package name. You will need both of these later when you create your project in the Appwrite console. Click Finish to create your project.
Head to the Appwrite Console.


If this is your first time using Appwrite, create an account and create your first project.
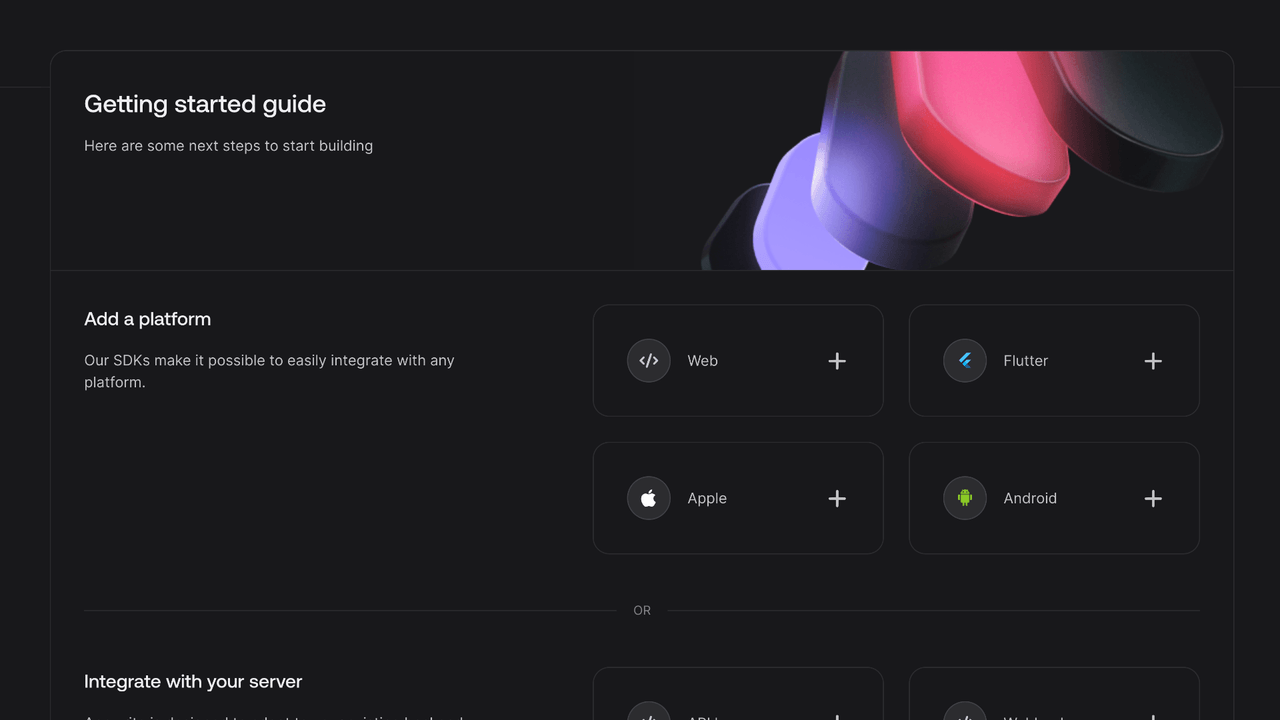
Then, under Add a platform, add an Android app.
Add your app's name and package name, your package name is the one entered when creating an Android project. For existing projects, you should use the applicationId in your app-level build.gradle file.


You can skip optional steps.
To add the Appwrite SDK for Android as a dependency, add the following to your app-level build.gradle.kts file inside the dependencies block.
implementation("io.appwrite:sdk-for-android:8.1.0")
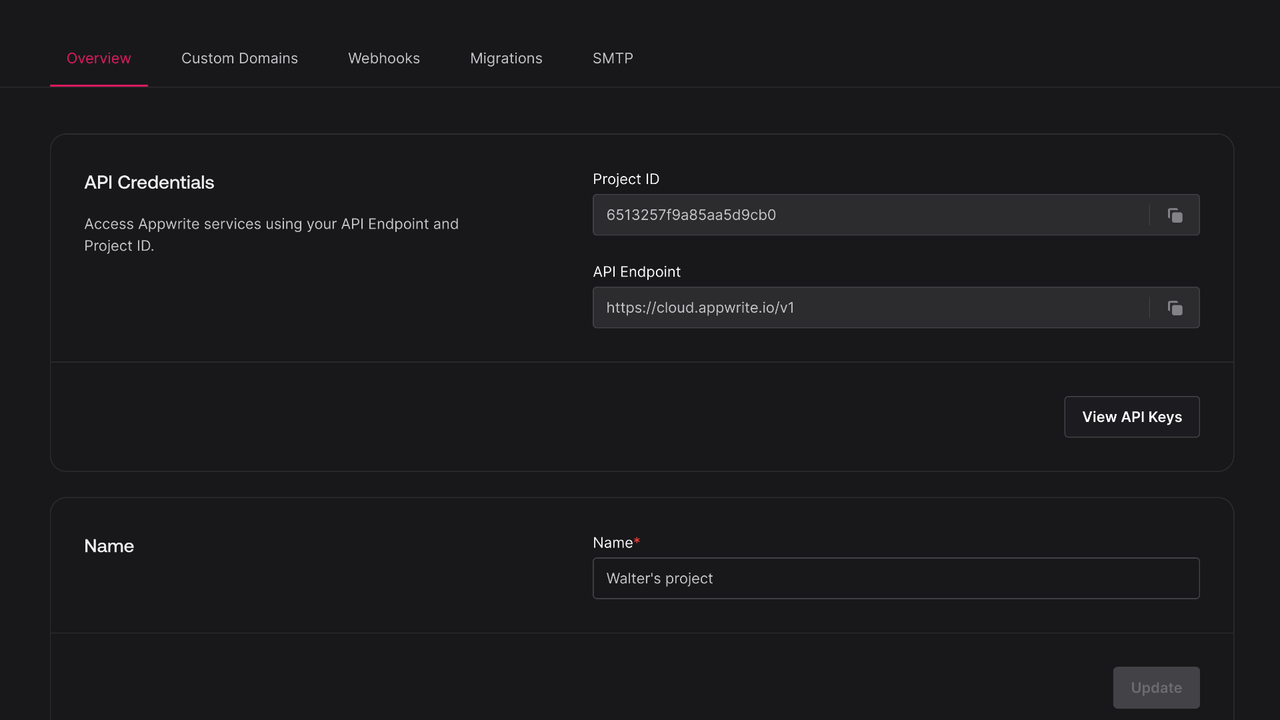
In order to allow creating OAuth sessions, the following activity needs to be added inside the <application> tag, along side the existing <activity> tags in your AndroidManifest.xml. Be sure to replace the <PROJECT_ID> string with your actual Appwrite project ID. You can find your Appwrite project ID in you project settings screen in your Appwrite Console.
<manifest ...>
  ...
  <application ...>
    ...
    <!-- Add this inside the `<application>` tag, along side the existing `<activity>` tags -->
    <activity android:name="io.appwrite.views.CallbackActivity" android:exported="true">
      <intent-filter android:label="android_web_auth">
        <action android:name="android.intent.action.VIEW" />
        <category android:name="android.intent.category.DEFAULT" />
        <category android:name="android.intent.category.BROWSABLE" />
        <data android:scheme="appwrite-callback-<PROJECT_ID>" />
      </intent-filter>
    </activity>
  </application>
</manifest>
Find your project's ID in the Settings page.


Create a new file Appwrite.kt and add the following code to it, replacing <PROJECT_ID> with your project ID.
package <YOUR_ROOT_PACKAGE_HERE>

import android.content.Context
import io.appwrite.Client
import io.appwrite.ID
import io.appwrite.models.*
import io.appwrite.services.*

object Appwrite {
    lateinit var client: Client
    lateinit var account: Account

    fun init(context: Context) {
        client = Client(context)
            .setEndpoint("https://<REGION>.cloud.appwrite.io/v1")
            .setProject("<PROJECT_ID>")

        account = Account(client)
    }

    suspend fun onLogin(
        email: String,
        password: String,
    ): Session {
        return account.createEmailPasswordSession(
            email,
            password,
        )
    }

    suspend fun onRegister(
        email: String,
        password: String,
    ): User<Map<String, Any>> {
        return account.create(
            userId = ID.unique(),
            email,
            password,
        )
    }

    suspend fun onLogout() {
        account.deleteSession("current")
    }
}
Add the following code to MainActivity.kt.
package <YOUR_ROOT_PACKAGE_HERE>

import android.os.Bundle
import androidx.activity.ComponentActivity
import androidx.activity.compose.setContent
import androidx.compose.foundation.layout.*
import androidx.compose.foundation.text.*
import androidx.compose.material3.*
import androidx.compose.runtime.*
import androidx.compose.ui.*
import androidx.compose.ui.text.input.*
import androidx.compose.ui.unit.*
import <YOUR_ROOT_PACKAGE_HERE>.ui.theme.MyApplicationTheme
import kotlinx.coroutines.launch

class MainActivity : ComponentActivity() {
    @OptIn(ExperimentalMaterial3Api::class)
    override fun onCreate(savedInstanceState: Bundle?) {
        super.onCreate(savedInstanceState)

        Appwrite.init(applicationContext)

        setContent {
            MyApplicationTheme {
                Surface(
                    modifier = Modifier.fillMaxSize(),
                    color = MaterialTheme.colorScheme.background
                ) {
                    val coroutineScope = rememberCoroutineScope()

                    var user by remember { mutableStateOf("") }
                    var email by remember { mutableStateOf("") }
                    var password by remember { mutableStateOf("") }

                    if (user.isNotEmpty()) {
                        Column(
                            modifier = Modifier.fillMaxSize(),
                            horizontalAlignment = Alignment.CenterHorizontally,
                            verticalArrangement = Arrangement.Center
                        ) {
                            Text(text = "Logged in as $user")
                            Button(onClick = {
                                coroutineScope.launch {
                                    Appwrite.onLogout()
                                }
                            }) {
                                Text("Logout")
                            }
                        }
                    }

                    Column(
                        modifier = Modifier.fillMaxSize(),
                        horizontalAlignment = Alignment.CenterHorizontally,
                        verticalArrangement = Arrangement.Center
                    ) {
                        TextField(
                            value = email,
                            onValueChange = { email = it },
                            label = { Text("Username") },
                            modifier = Modifier
                                .fillMaxWidth()
                                .padding(16.dp)
                        )
                        TextField(
                            value = password,
                            onValueChange = { password = it },
                            label = { Text("Password") },
                            modifier = Modifier
                                .fillMaxWidth()
                                .padding(16.dp),
                            visualTransformation = PasswordVisualTransformation(),
                            keyboardOptions = KeyboardOptions(keyboardType = KeyboardType.Password)
                        )
                        Row(
                            modifier = Modifier
                                .fillMaxWidth()
                                .padding(16.dp),
                            horizontalArrangement = Arrangement.SpaceBetween
                        ) {
                            Button(onClick = {
                                coroutineScope.launch {
                                    try {
                                        Appwrite.onLogin(email, password)

                                        user = email
                                    } catch (e: Exception) {
                                        e.printStackTrace()
                                    }
                                }
                            }) {
                                Text("Login")
                            }
                            Button(onClick = {
                                coroutineScope.launch {
                                    try {
                                        Appwrite.onRegister(email, password)
                                    } catch (e: Exception) {
                                        e.printStackTrace()
                                    }
                                }
                            }) {
                                Text("Register")
                            }
                        }
                    }
                }
            }
        }
    }
}
For enhanced type safety, you can use custom model classes with the nestedType parameter:
import io.appwrite.services.TablesDB

data class User(
    val name: String,
    val email: String,
    val isVerified: Boolean = false
)

// Usage with type safety
val tablesDB = TablesDB(Appwrite.client)

try {
    val users = tablesDB.listRows(
        databaseId = "[DATABASE_ID]",
        tableId = "[TABLE_ID]",
        nestedType = User::class.java // Enables type safety
    )

    for (user in users.rows) {
        Log.d("Appwrite", "User: ${user.name} (${user.email})")
    }
} catch (e: AppwriteException) {
    Log.e("Appwrite", "Error: ${e.message}")
}
Generate types automatically
Use the Appwrite CLI to generate model classes automatically: appwrite types ./models
Run your project by clicking Run app in Android Studio.