Hugging Face is a platform that hosts ML models for all types of applications, including text to speech. This example uses the "ESPnet2 TTS pretrained model" from Hugging Face to convert text to speech, but the same concept can be applied to other models.
Prerequisites
An Appwrite project
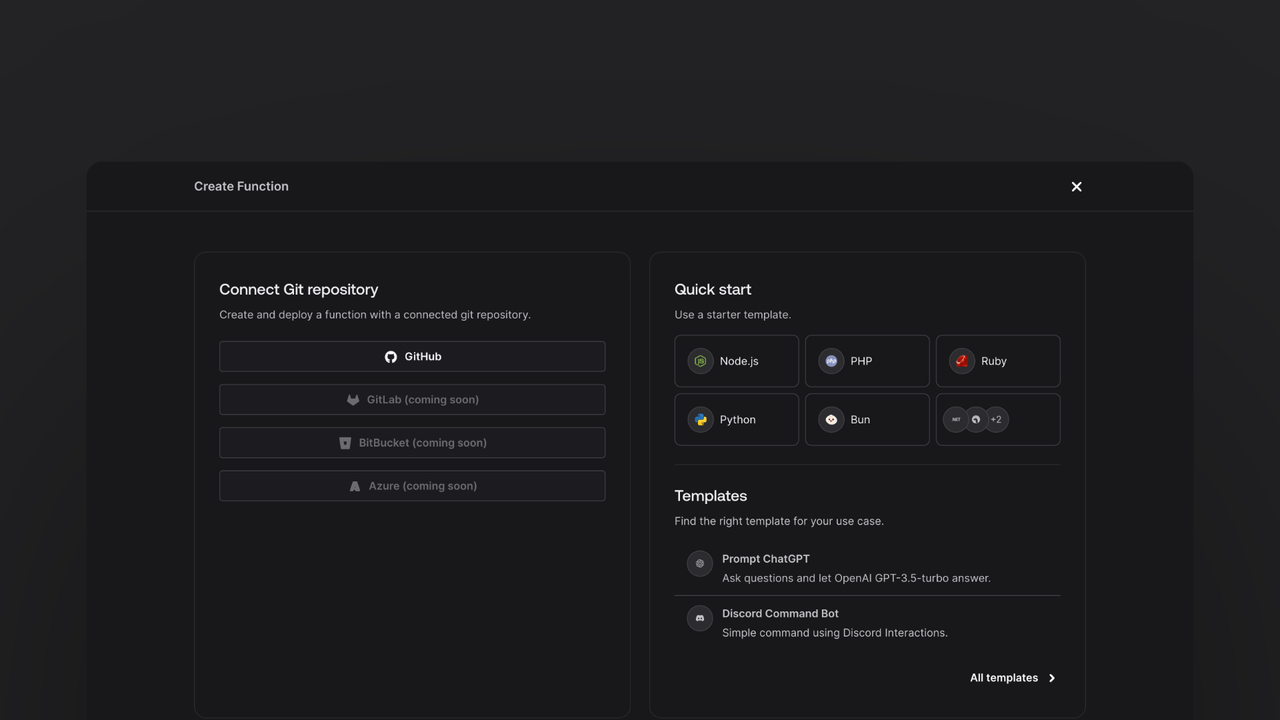
Create new function
Head to the Appwrite Console then click on Functions in the left sidebar and then click on the Create Function button.
In the Appwrite Console's sidebar, click Functions.
Click Create function.
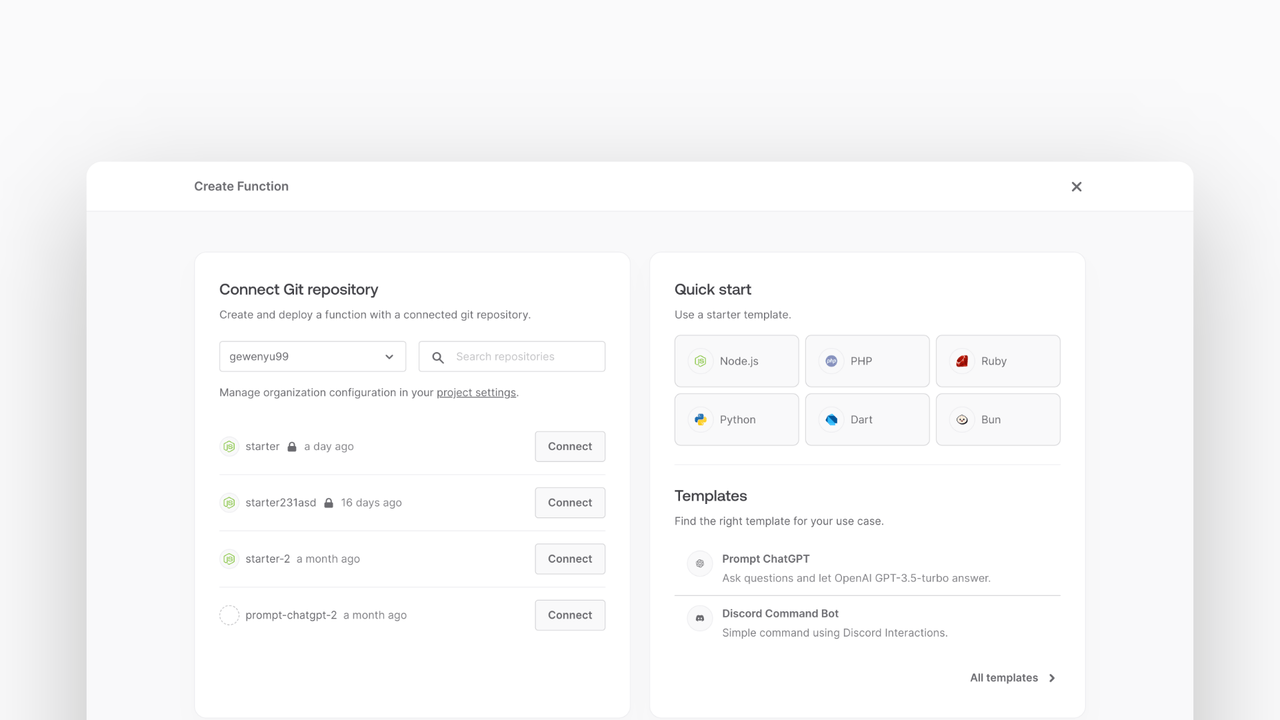
Under Connect Git repository, select your provider.
After connecting to GitHub, under Quick start, select the Node.js starter template.
In the Variables step, add the HUGGINGFACE_ACCESS_TOKEN, generate it here. For the APPWRITE_API_KEY, tick the box to Generate API key on completion.
Follow the step-by-step wizard and create the function.
Add dependencies
Once the function is created, clone the function and open it in your development environment.
Install the undici package (global fetch is not available in Node.js 16) to make requests to the Hugging Face API. Install the node-appwrite package, to simplify uploading the generated audio file to Appwrite Storage.
npm install undici node-appwrite
Create an Appwrite service
The function will interact with Appwrite to store the generated audio files and the text-to-speech data. To make this easier, create a service class that will handle all the Appwrite interactions.
Create a file called src/appwrite.js and implement the following class:
import { Client, ID, InputFile, Storage } from 'node-appwrite';

class AppwriteService {
  constructor() {
    const client = new Client();
    client
      .setEndpoint(
        process.env.APPWRITE_ENDPOINT ?? 'https://cloud.appwrite.io/v1'
      )
      .setProject(process.env.APPWRITE_FUNCTION_PROJECT_ID)
      .setKey(process.env.APPWRITE_API_KEY);

    this.storage = new Storage(client);
  }

  async createFile(bucketId, blob) {
    const file = await InputFile.fromBlob(blob, 'audio.flac');
    return await this.storage.createFile(bucketId, ID.unique(), file);
  }
}

export default AppwriteService;
Create Storage bucket
In order for this function to work, create a new bucket in the Appwrite Storage. You can do this by navigating to the Appwrite Console and clicking on Storage in the left sidebar, then clicking on the Create Bucket button.
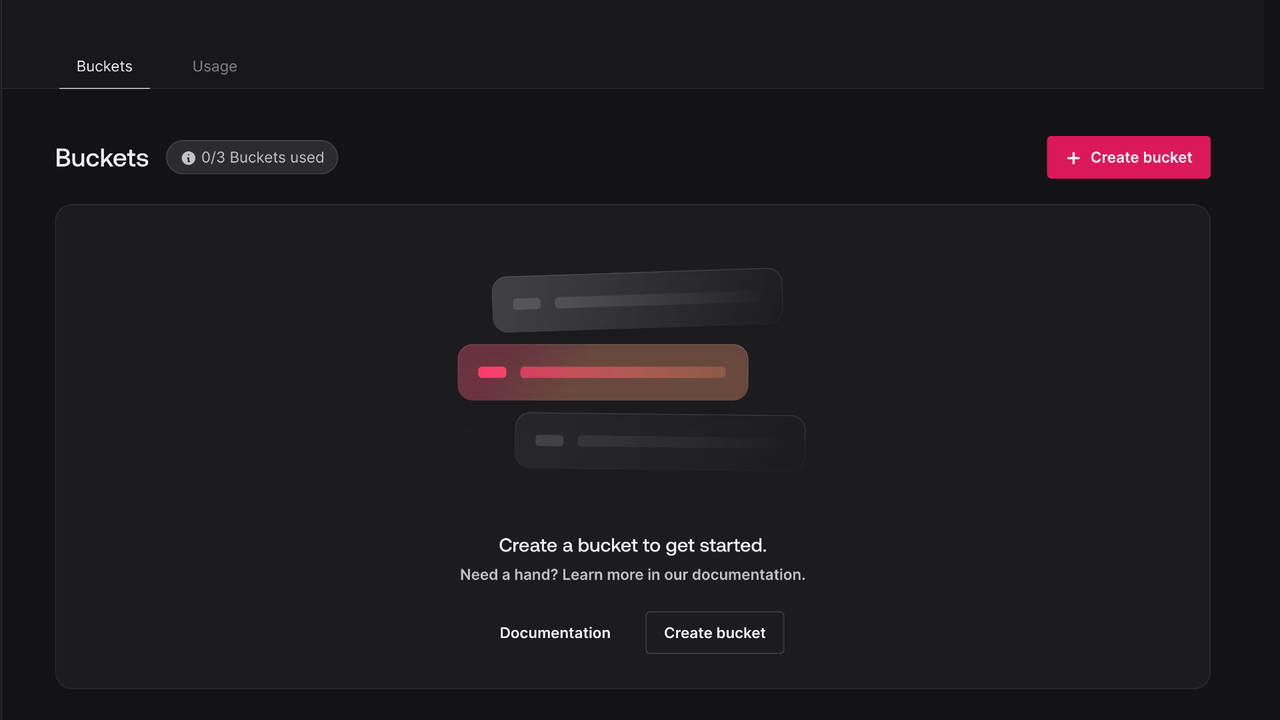
Use the default configuration for the bucket. Make sure to note down the bucket ID so you can add it as an environment variable later.
Integrate with Hugging Face
in src/main.js implement the following function to convert text to speech using the Hugging Face API.
import fetch from 'node-fetch';
import { throwIfMissing } from './utils.js';
import AppwriteService from './appwrite.js';

const HUGGINGFACE_API = 'https://api-inference.huggingface.co';

export default async ({ req, res, error }) => {
  const bucketId = process.env.APPWRITE_BUCKET_ID ?? 'generated_speech';

  if (!req.body.text || typeof req.body.text !== 'string') {
    return res.json({ ok: false, error: 'Missing required field `text`' }, 400);
  }

  const response = await fetch(
    `${HUGGINGFACE_API}/models/espnet/kan-bayashi_ljspeech_vits`,
    {
      headers: {
        Authorization: `Bearer ${process.env.HUGGINGFACE_ACCESS_TOKEN}`,
      },
      method: 'POST',
      body: JSON.stringify({
        inputs: req.body.text,
      }),
    }
  );

  if (!response.ok) {
    error(await response.text());
    return res.json({ ok: false, error: 'Failed to process text' }, 500);
  }

  const blob = await response.blob();
  const appwrite = new AppwriteService();
  const file = await appwrite.createFile(bucketId, blob);

  return res.json({
    ok: true,
    fileId: file.$id,
  });
};
This Appwrite Function checks if the required environment variables are set, then processes the text using the Hugging Face API, stores the generated audio file in Appwrite Storage, and creates a document in the Appwrite database of the original text.
Test the function
Test the function by sending a POST request to the function's endpoint with a JSON body containing the text parameter.
Navigate to your function in the Appwrite Console and click on Execute now. In the modal that appears, enter the following JSON body:
{
    "text": "Hello, world!"
}
Click Execute and you should see a response similar to the following:
{
    "ok": true,
    "fileId": "61f7b3b3c7b7d"
}
Then, use the fileId to download the generated audio file from the Appwrite Storage.