Learn to setup an Appwrite Function utilizing image classification with Hugging Face.
Prerequisites
An Appwrite project
Create new function
Head to the Appwrite Console then click on Functions in the left sidebar and then click on the Create Function button.
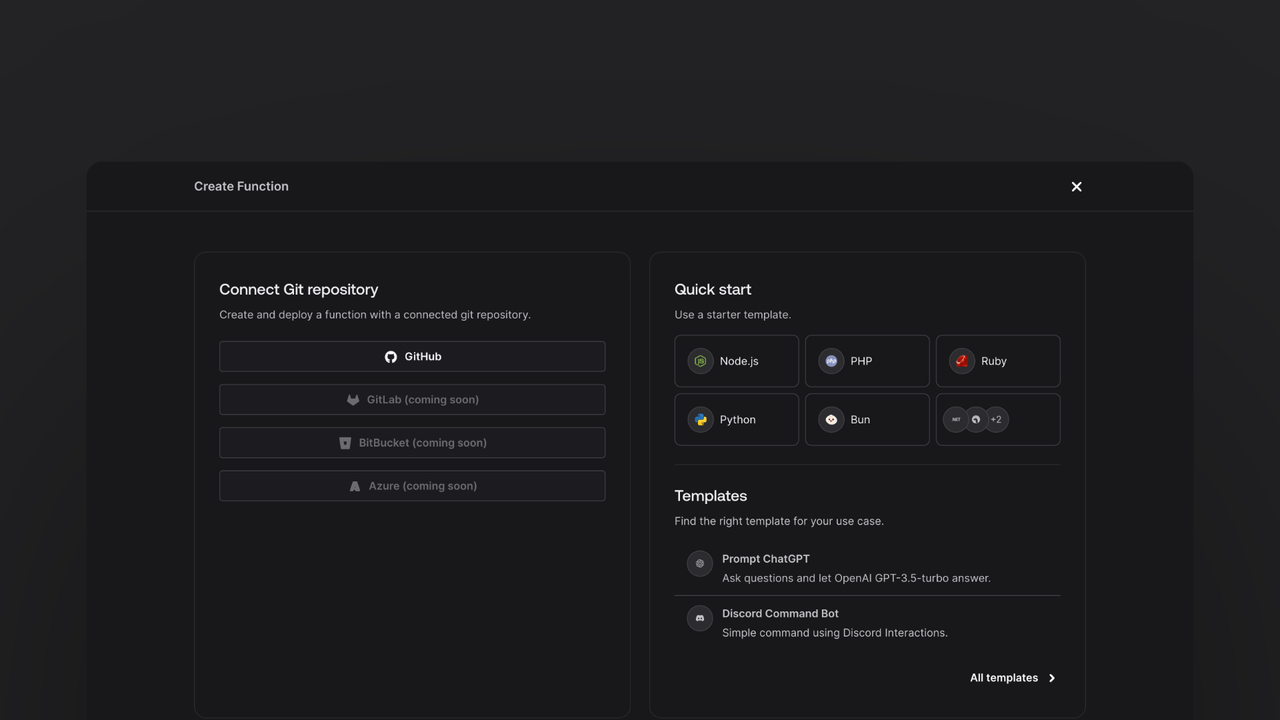
In the Appwrite Console's sidebar, click Functions.
Click Create function.
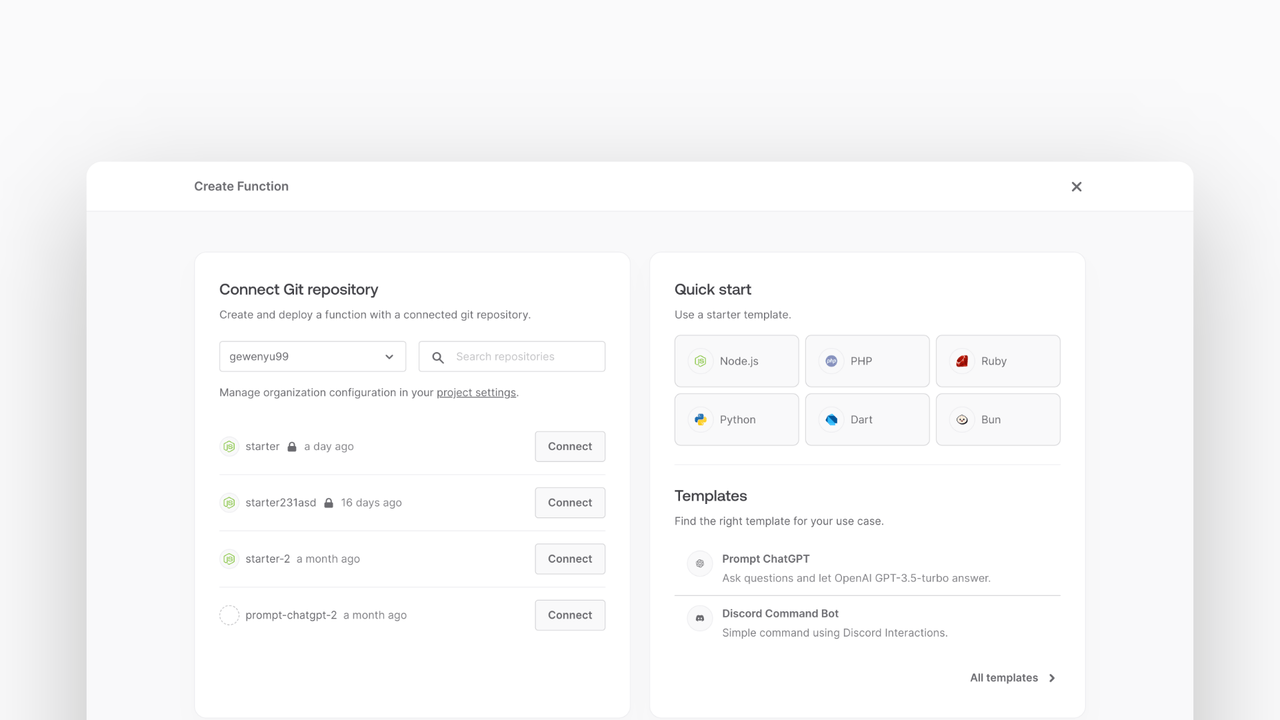
Under Connect Git repository, select your provider.
After connecting to GitHub, under Quick start, select the Node.js starter template.
In the Variables step, add the HUGGINGFACE_ACCESS_TOKEN, generate it here.
Follow the step-by-step wizard and create the function.
Add dependencies
Once the function is created, clone the function and open it in your development environment.
Once you have the repository open, you can install the Appwrite NodK and the Hugging Face inference SDK by running the following command in your terminal:
npm install @huggingface/inference node-appwrites
Parse payload body
After installing the SDK, write the code that will accept a JSON body. The function will serve two purposes: it can recieve a body via direct execution or it can be called via a file create event.
Open up your src/main.js file and replace the function body with the following code:
export default async ({ req, res, log, error }) => {
  const databaseId = process.env.APPWRITE_DATABASE_ID ?? 'ai';
  const collectionId = process.env.APPWRITE_COLLECTION_ID ?? 'image_classification';
  const bucketId = process.env.APPWRITE_BUCKET_ID ?? 'image_classification';

  // Allows using direct execution or file create event
  const fileId = req.body.$id || req.body.imageId;
  if (!fileId) {
    return res.send('Bad request', 400);
  }

  // Only allow specific bucketId
  if (
    req.body.bucketId &&
    req.body.bucketId != bucketId
  ) {
    return res.send('Bad request', 400);
  }
}
Create Storage bucket
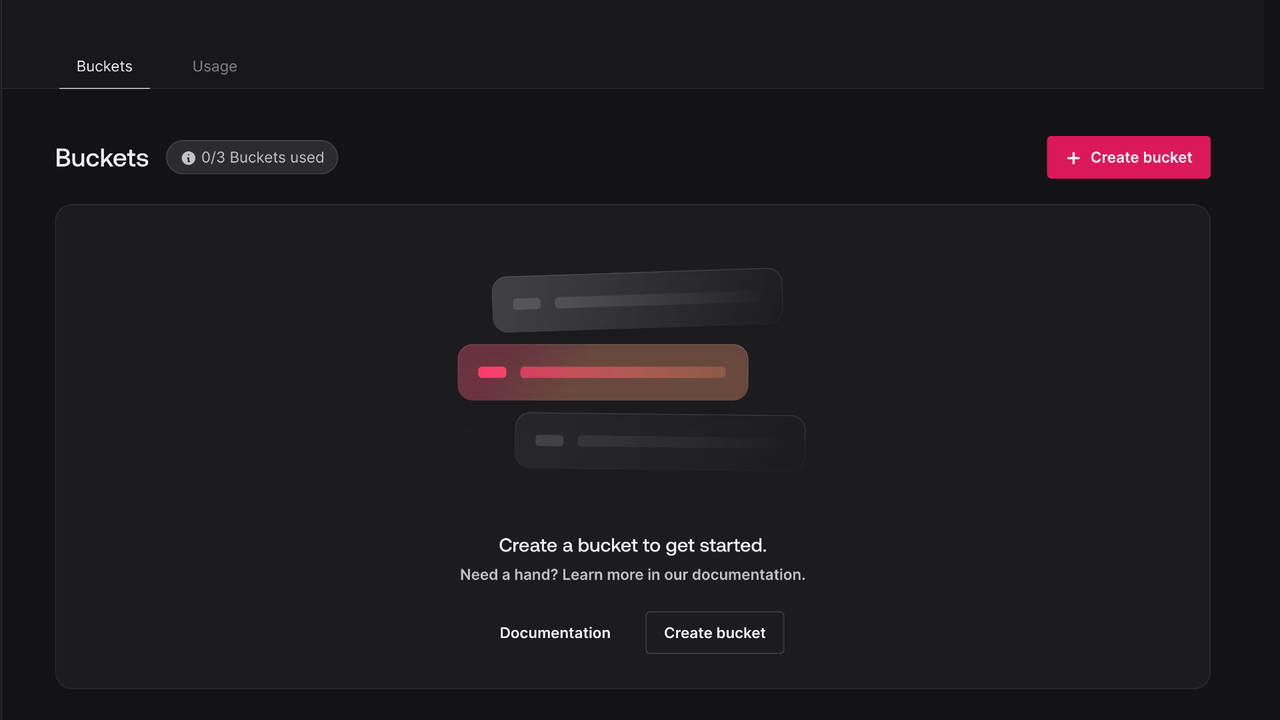
In order for this function to work, create a new bucket in the Appwrite Storage. You can do this by navigating to the Appwrite Console and clicking on Storage in the left sidebar, then clicking on the Create Bucket button.
Use the default configuration for the bucket. Make sure to note down the bucket ID so you can add it as an environment variable later.
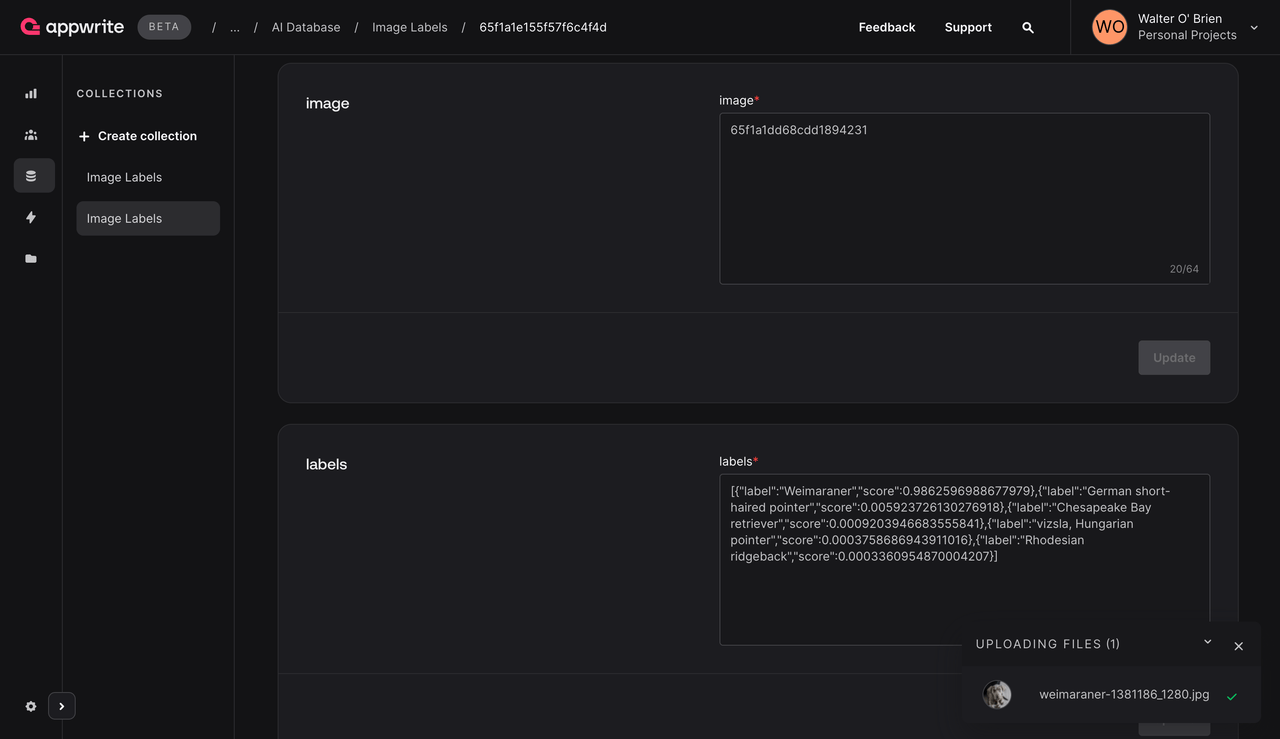
Create Appwrite collection
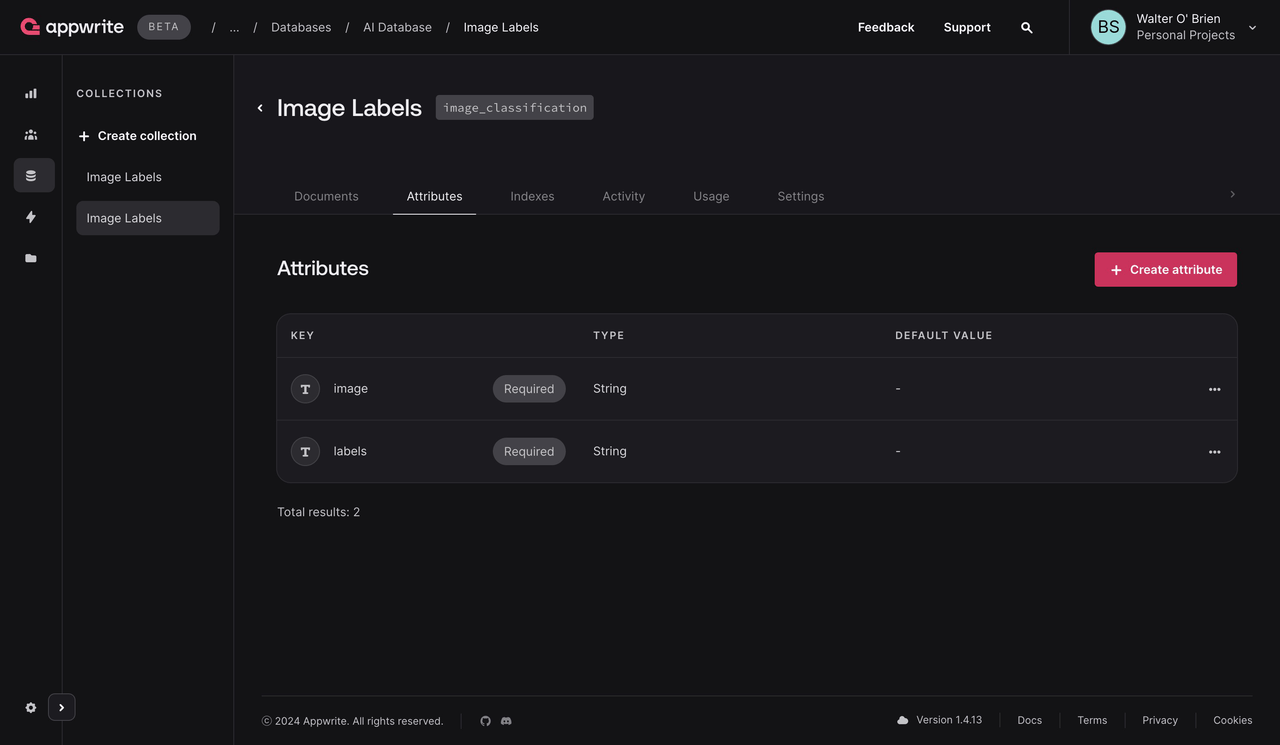
Before saving the classification result to Appwrite Databases, create a new database and collection in the Appwrite Console.
Navigate to the Appwrite Console and click on Database in the left sidebar, then click on the Create database button, and name it, for example AI. Once you've created the database, click on the Create collection button and create a new collection, and name it, for example Image Labels.
Next, create the following schema for the collection:
| Attribute | Type | Size | Required | Array |
| image | String | 256 | Yes | No |
| labels | String | 256 | Yes | Yes |
Downloading image
With the payload parsed, now you can download the image from Appwrite Storage.
Create a new file called appwrite.js in the src directory and add the following code:
import { Client, Databases, ID, Storage } from 'node-appwrite';

class AppwriteService {
  constructor() {
    const client = new Client();
    client
      .setEndpoint(
        process.env.APPWRITE_ENDPOINT ?? 'https://cloud.appwrite.io/v1'
      )
      .setProject(process.env.APPWRITE_FUNCTION_PROJECT_ID)
      .setKey(process.env.APPWRITE_API_KEY);

    this.databases = new Databases(client);
    this.storage = new Storage(client);
  }

  async getFile(bucketId, fileId) {
    return await this.storage.getFileDownload(bucketId, fileId);
  }
}

export default AppwriteService;
This code creates a new AppwriteService class that initializes the Appwrite client and provides a method to download a file from the Appwrite Storage.
Import the class into the src/index.js file, at the top of the file, add the following line:
import AppwriteService from './appwrite.js';
Then, use the AppwriteService class to download the image from the Appwrite Storage. After the bucket check in main.js add the following code:
  const appwrite = new AppwriteService();

  file = await appwrite.getFile(bucketId, fileId);
This code will download the file from the Appwrite Storage and return a 404 - File Not Found status code if the file is not found or a 400 - Bad request status code if an error occurs.
Integrate with Huggingface
With the image downloaded, use the Hugging Face inference SDK to classify the image.
At the top of the src/index.js file, add:
import { HfInference } from '@huggingface/inference';
Use the Hugging Face SDK and classify the image, for this task you can use various models that you can find on Hugging Face. This example uses the microsoft/resnet-50 model.
const hf = new HfInference(process.env.HUGGING_FACE_API_KEY);

const result = await hf.imageClassification({
  data: file,
  model: 'microsoft/resnet-50',
});
Save result
With the image classified, save the result to the Appwrite Databases.
To begin, add a new function to the appwrite.js file created earlier which will add these records in the database.
async createImageLabels(databaseId, collectionId, imageId, labels)
{
  await this.databases.createDocument(
    databaseId,
    collectionId,
    ID.unique(),
    {
      image: imageId,
      labels,
    }
  );
}
In the main.js file, save the result to the Appwrite Database.
Add the following code:
await appwrite.createImageLabels(databaseId, collectionId, fileId, result);

log('Image ' + fileId + ' classified', result);
return res.json(result);
Configure events
To test the function attach it directly to the Storage bucket using events.
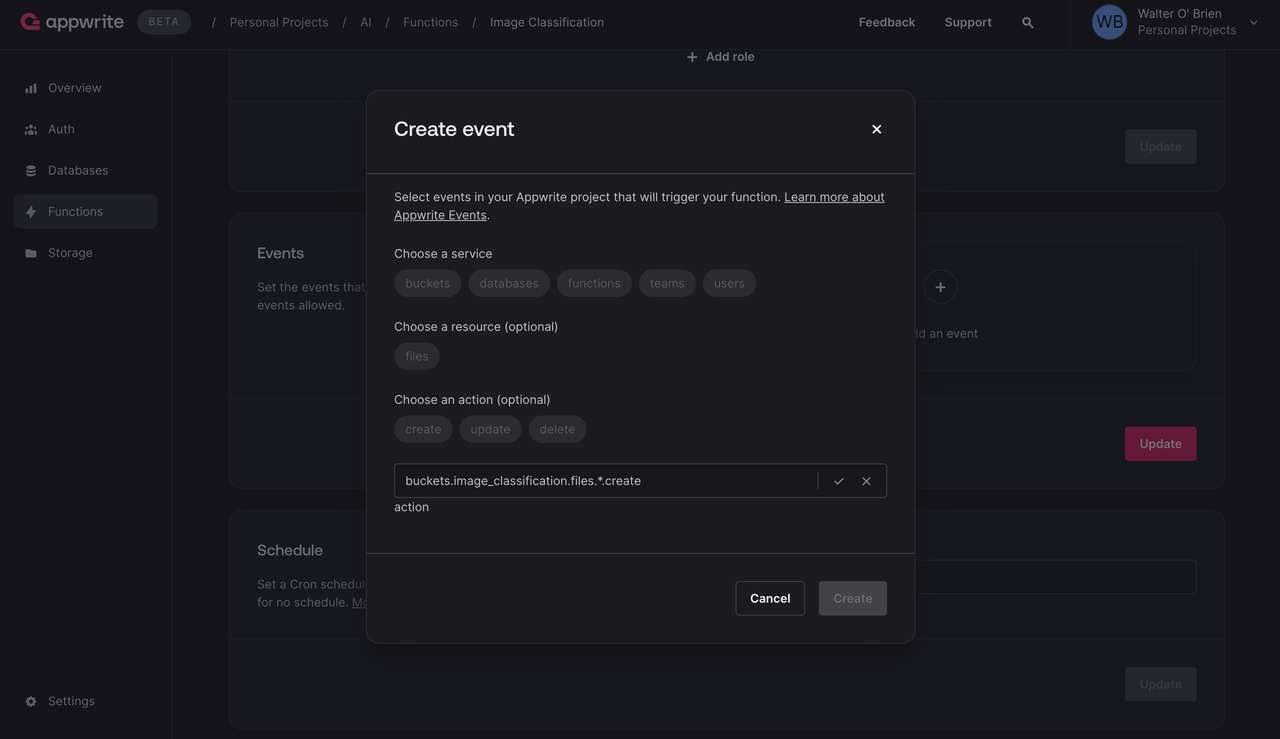
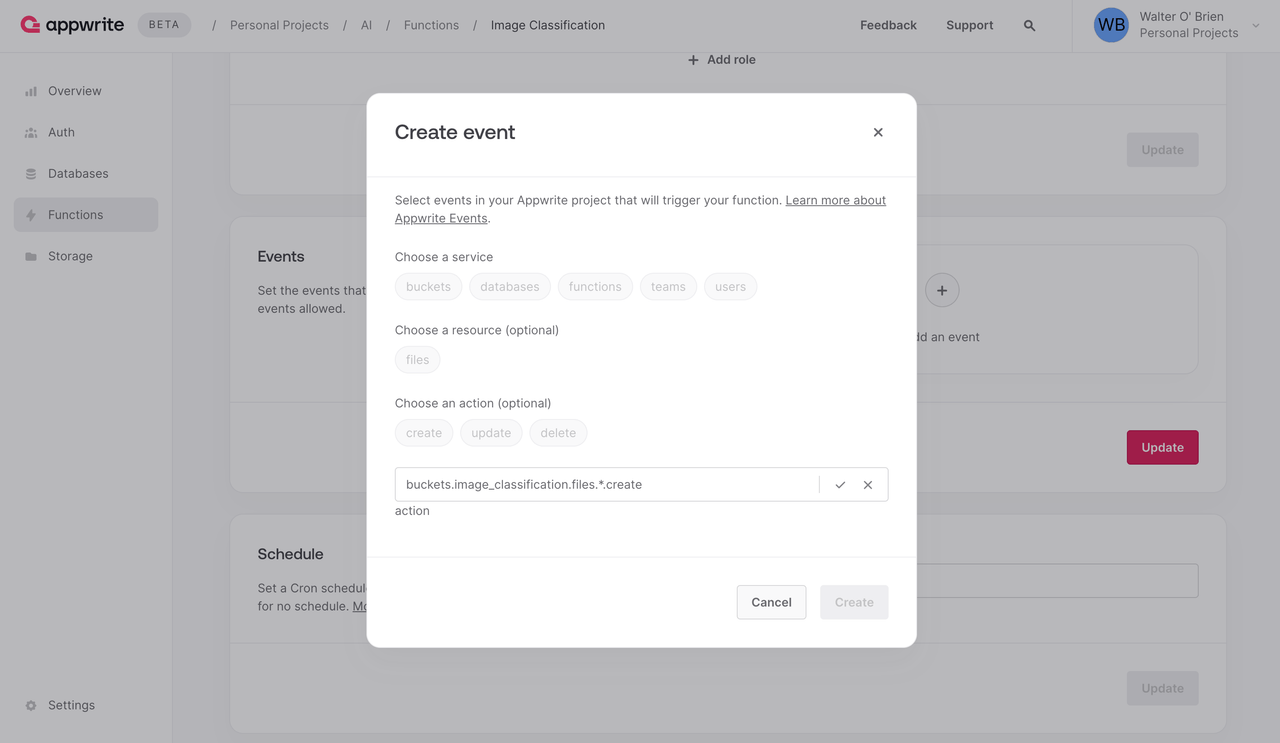
Navigate to your function in the Appwrite Console, under Settings > Events, click on the Add Event button.
At the bottom of the dialog within the text input, click on the pen icon and enter buckets.[Bucket ID].files.*.create. Making sure to replace [Bucket ID] with the ID of the bucket you created earlier.
Test the function
Commit the changes to the repository and deploy the function.
Test the function by uploading an image to the Appwrite Storage.
Navigate to the Appwrite Console and click on Storage in the left sidebar, then click on the Upload File button and upload an image. After a few seconds, you should see an execution appear in the function's execution logs and the classification result should be saved to the Appwrite Database.