Learn to setup an Appwrite Function utilizing object detection with Hugging Face.
Prerequisites
An Appwrite project
Create a new function
Head to the Appwrite Console then click on Functions in the left sidebar and then click on the Create Function button.
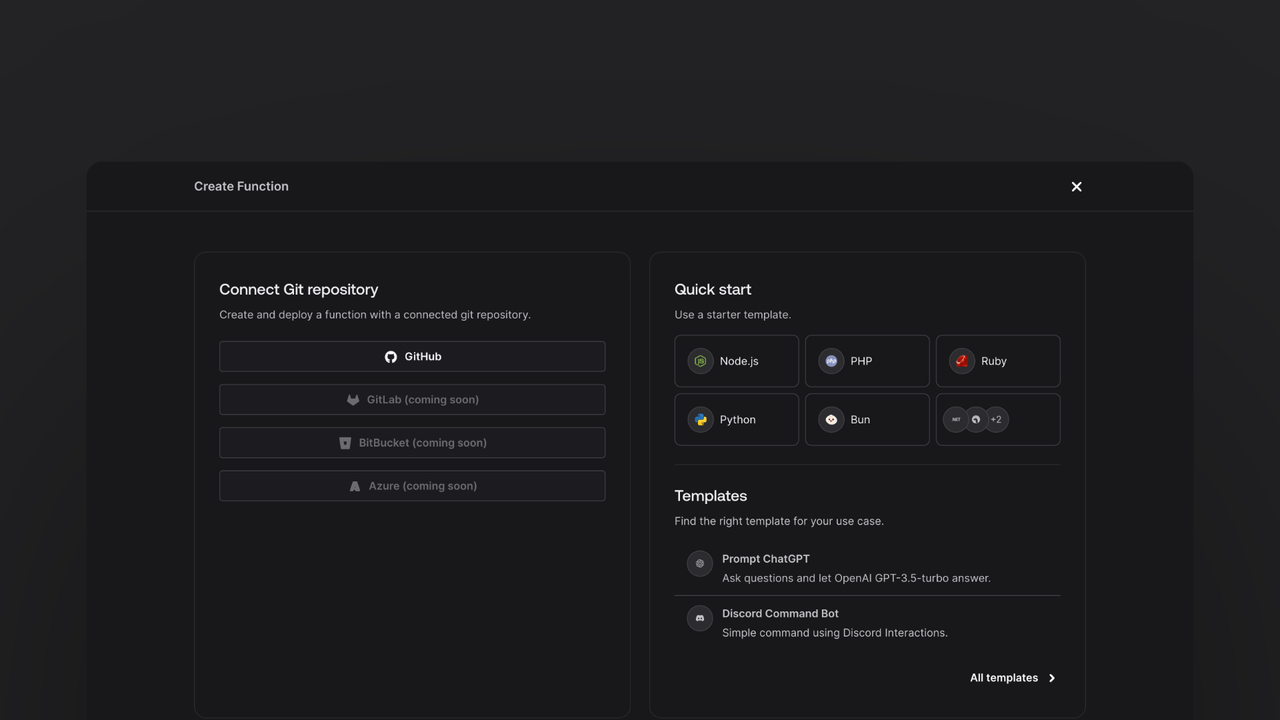
In the Appwrite Console's sidebar, click Functions.
Click Create function.
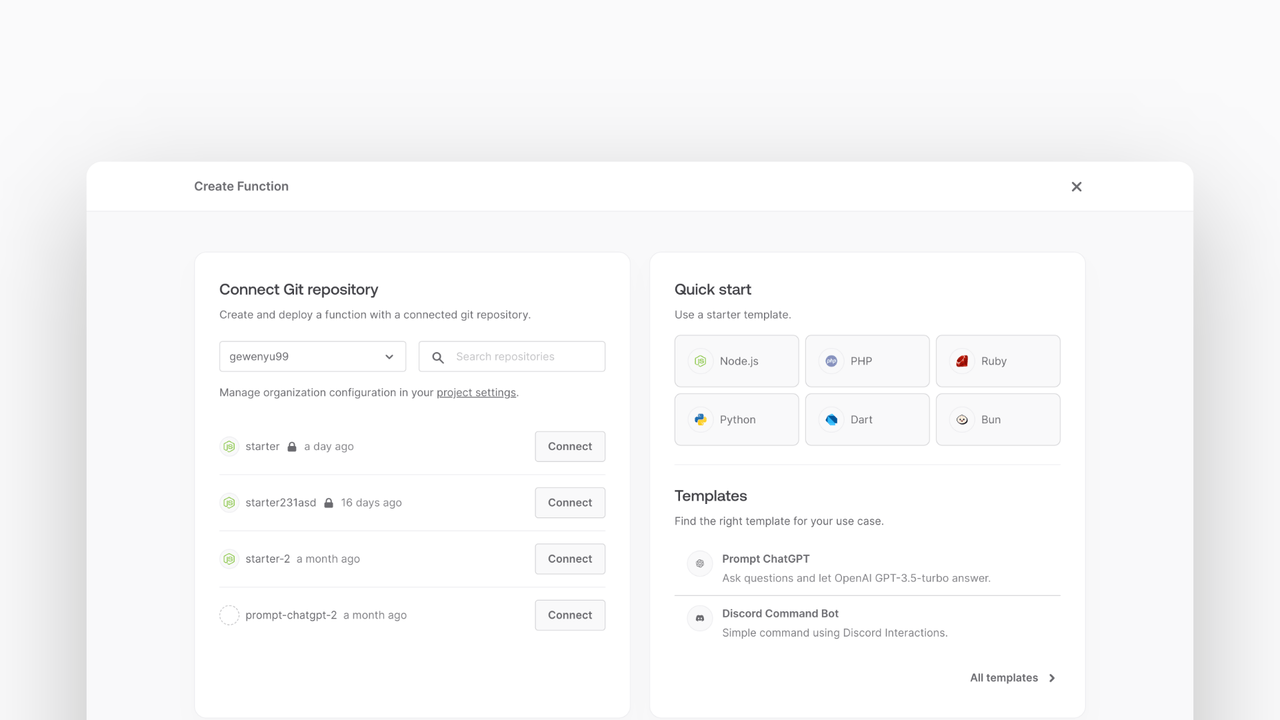
Under Connect Git repository, select your provider.
After connecting to GitHub, under Quick start, select the Node.js starter template.
In the Variables step, add the HUGGINGFACE_ACCESS_TOKEN, generate it here.
Follow the step-by-step wizard and create the function.
Add dependencies
Once the function is created, clone the function and open it in your development environment.
Once you have the repository open, you can install the Hugging Face inference SDK by running the following command in your terminal:
npm install @huggingface/inference node-appwrite
Parsing the body
After installing the SDK, write the code that will parse the body of the request. The function will serve two purposes: it can recieve a body via direct execution or it can be called via a file create event.
Open up your src/index.js file and replace the function body with the following code:
export default async ({ req, res, log, error }) => {
  const databaseId = process.env.APPWRITE_DATABASE_ID ?? 'ai';
  const collectionId = process.env.APPWRITE_COLLECTION_ID ?? 'image_classification';
  const bucketId = process.env.APPWRITE_BUCKET_ID ?? 'image_classification';

  // Allows using direct execution or file create event
  const fileId = req.body.$id || req.body.imageId;
  if (!fileId) {
    return res.send('Bad request', 400);
  }

  if (
    req.body.bucketId &&
    req.body.bucketId != bucketId
  ) {
    return res.send('Bad request', 400);
  }
}
This code will parse the body of the request and check if the request is a POST request. It will then check if the request contains the required fields and if the bucket ID matches the one we set in the environment variables.
Setting up your Appwrite Storage bucket
Create a new bucket in the Appwrite Storage. Navigate to the Appwrite Console and click on Storage in the left sidebar, then the Create Bucket button.
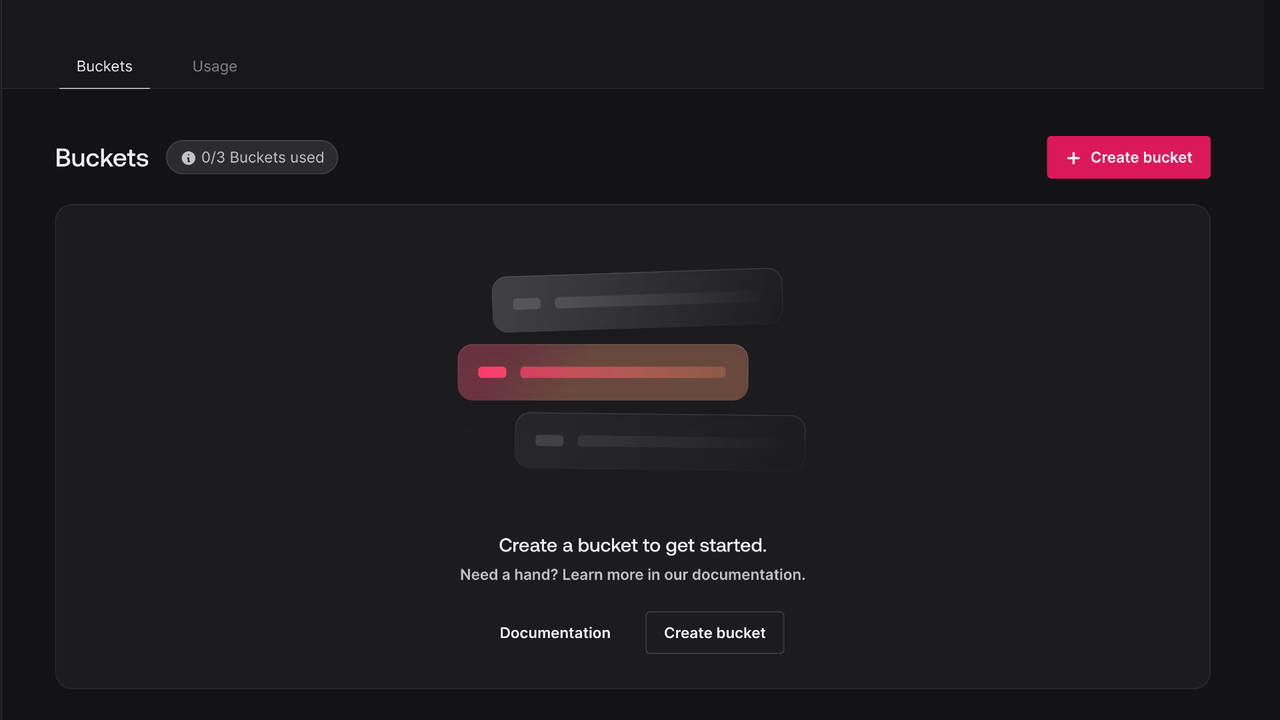
Note down the bucket ID so we can add it as an environment variable later.
Downloading the image using Appwrite Storage
With the payload parsed, you can now download the image from the Appwrite Storage.
Create a new file in the src directory called appwrite.js and add the following code:
import { Client, Databases, ID, Storage } from 'node-appwrite';

class AppwriteService {
  constructor() {
    const client = new Client();
    client
      .setEndpoint(
        process.env.APPWRITE_ENDPOINT ?? 'https://cloud.appwrite.io/v1'
      )
      .setProject(process.env.APPWRITE_FUNCTION_PROJECT_ID)
      .setKey(process.env.APPWRITE_API_KEY);

    this.databases = new Databases(client);
    this.storage = new Storage(client);
  }

  async getFile(bucketId, fileId) {
    return await this.storage.getFileDownload(bucketId, fileId);
  }
}

export default AppwriteService;
This code creates a new AppwriteService class that initializes the Appwrite client and provides a method to download a file from the Appwrite Storage.
Import the class into the src/index.js file, at the top of the file, add the following line:
import AppwriteService from './appwrite.js';
Then, we can use the AppwriteService class to download the image from the Appwrite Storage. After the bucket check within main.js add the following code:
  const appwrite = new AppwriteService();

  const file = await appwrite.getFile(bucketId, fileId);
This code will download the file from the Appwrite Storage and return a 404 - File Not Found status code if the file is not found or a 400 - Bad request status code if an error occurs.
Detecting objects in the image
With the image downloaded, we can now use the Hugging Face inference SDK to classify the image.
At the top of the src/index.js file, add:
import { HfInference } from '@huggingface/inference';
Next we're going to use the Hugging Face SDK and classify the image, for this task we can use various models that you can find on Hugging Face. For this example we'll be using the facebook/detr-resnet-50 model.
const hf = new HfInference(process.env.HUGGING_FACE_API_KEY);

const result = await hf.objectDetection({
  data: file,
  model: 'facebook/detr-resnet-50',
});
Setting up our database
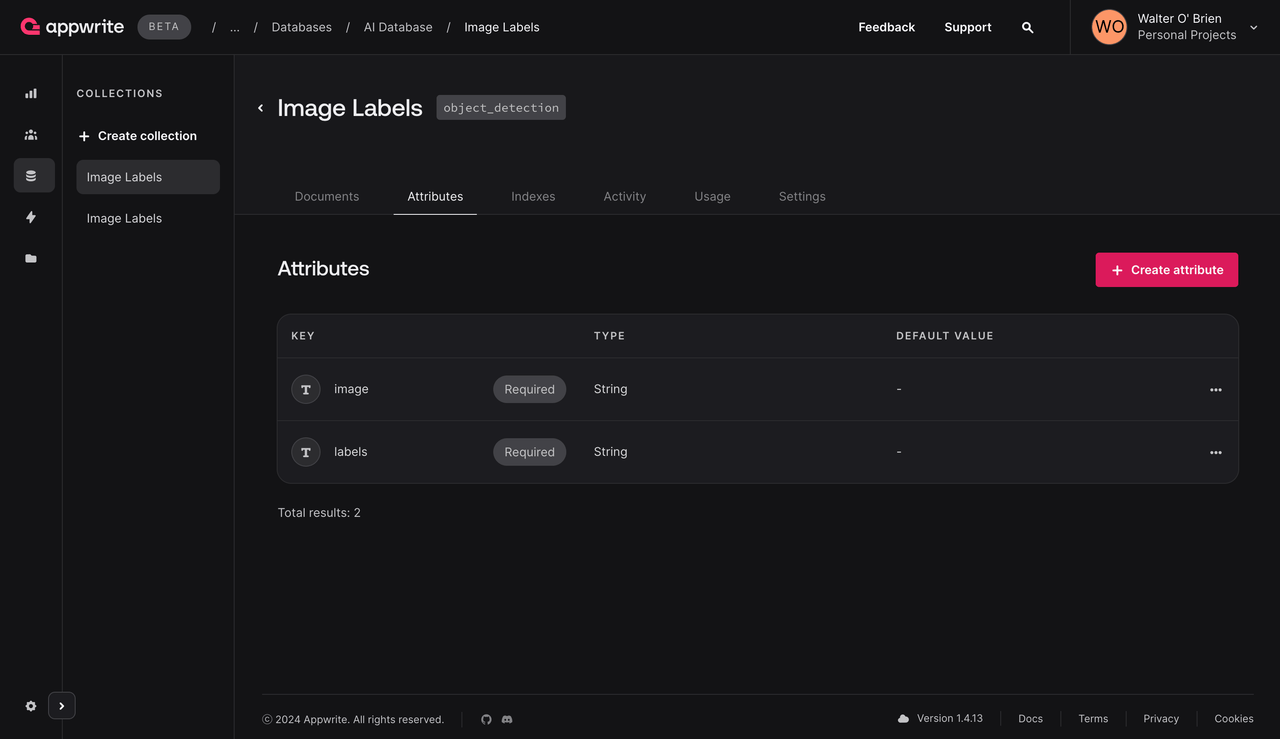
Before we can save our detection result to the Appwrite Database, we need to create a new database and collection in the Appwrite Console.
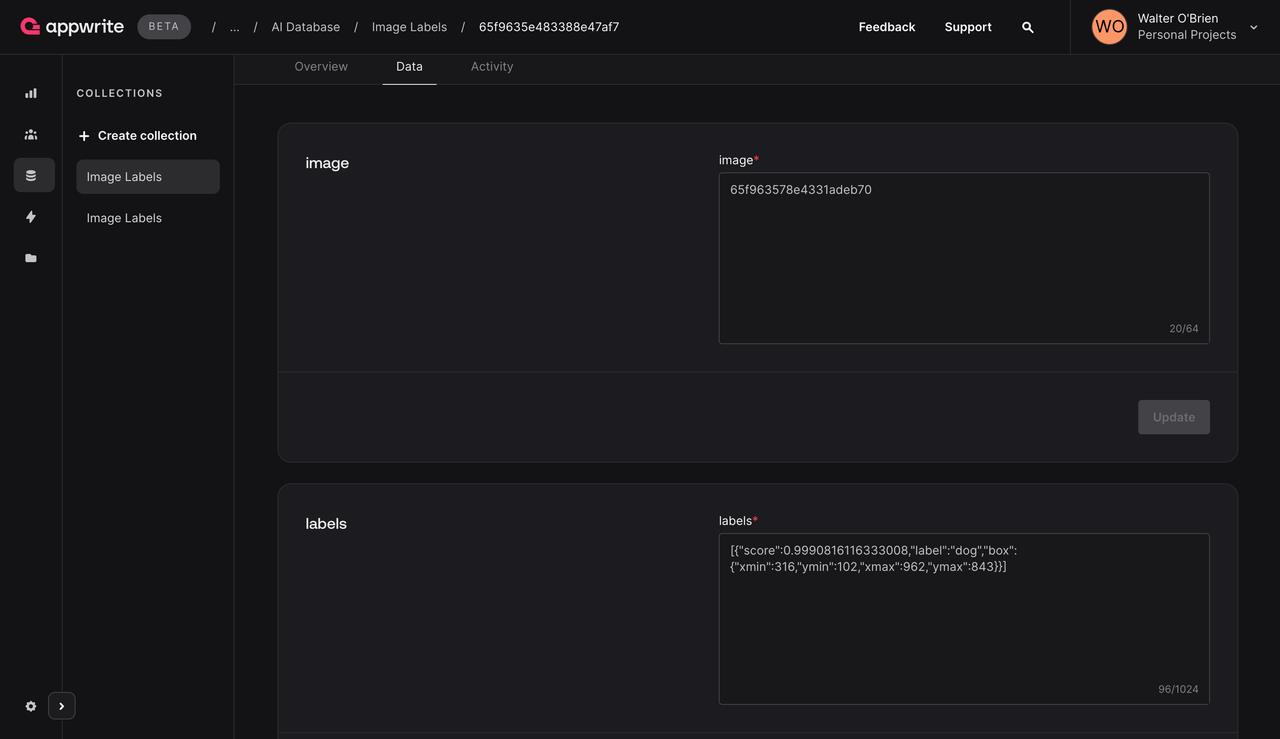
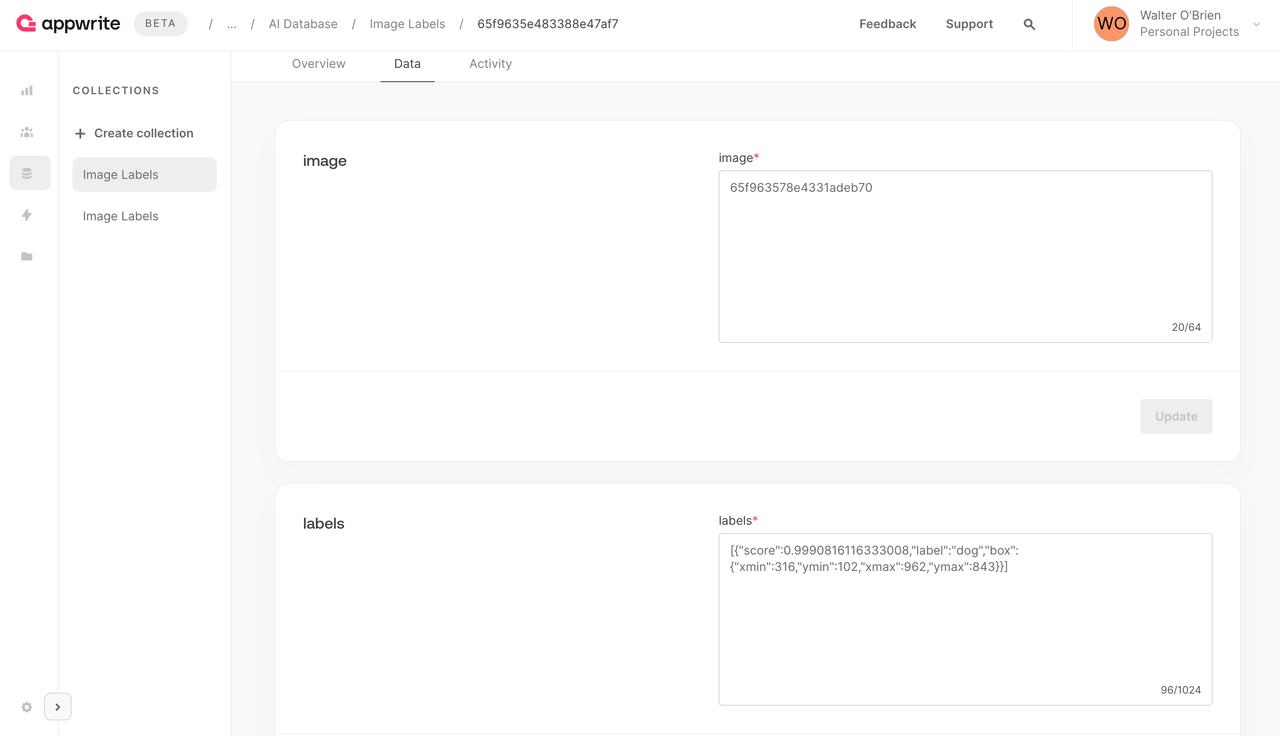
Navigate to the Appwrite Console and click on Database in the left sidebar, then click on the Create database button, you can call this database anything you like, for this example we'll call it AI. Once you've created the database, click on the Create collection button and create a new collection, once again you can call it anything you want but for this example we'll call it Image Labels.
Add two string attributes to our collection, image and labels. The image attribute will store the ID of the image we're detecting objects in and the labels attribute will store the detection result. Both of these attributes should be required with image having the size of 256 and labels having the size of around 4096.
Saving the object detection result
With the image classified, we can now save the result to the Appwrite Database.
To begin with we're going to add a new function to the appwrite.js file we created earlier which will create these records in the database.
async createImageLabels(databaseId, collectionId, imageId, labels)
{
  await this.databases.createDocument(
    databaseId,
    collectionId,
    ID.unique(),
    {
      image: imageId,
      labels: JSON.stringify(labels),
    }
  );
}
This abstraction keeps our codebase clean and makes it easier to test and maintain.
Next, using the function we just added we can save the object detection result to the Appwrite Database. We'll also add some logging and error handling to make sure everything is working as expected.
Add the following code:
await appwrite.createImageLabels(databaseId, collectionId, fileId, result);

log('Image ' + fileId + ' detected', result);
return res.json(result);
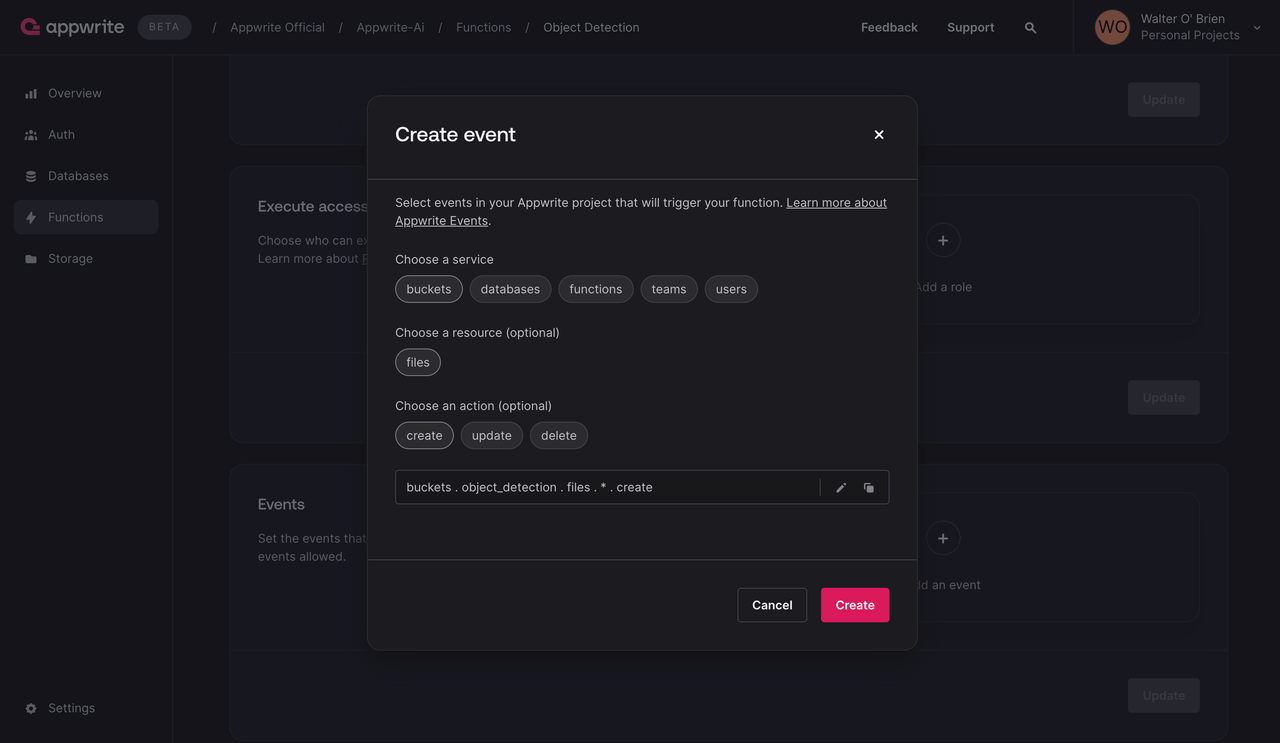
Configuring events
To test our function we're going to attach it directly to our Storage bucket using events.
Navigate to your function in the Appwrite Console and visit it's settings tab, then under the Events section click on the Add Event button.
At the bottom of the dialog within the text input, click on the pen icon and enter buckets.[Bucket ID].files.*.create. Making sure to replace [Bucket ID] with the ID of the bucket you created earlier.
Testing the function
Test our function by uploading an image to the Appwrite Storage.
Navigate to the Appwrite Console and click on Storage in the left sidebar, then click on the Upload File button and upload an image. After a few seconds, you should see an execution appear in the function's execution logs and the object detection result should be saved to the Appwrite Database.