fal.ai is an AI inference platform with popular models such as Stable Diffusion XL, ControlNet, Whisper available as ready-to-use APIs so that you can easily integrate them into your applications.
This tutorial will guide you through the process of setting up the fal.ai API to generate an image using the SDXL model and integrating it into your Appwrite project.
Prerequisites
An Appwrite Project
Create new function
Head to the Appwrite Console then click on Functions in the left sidebar and then click on the Create Function button.
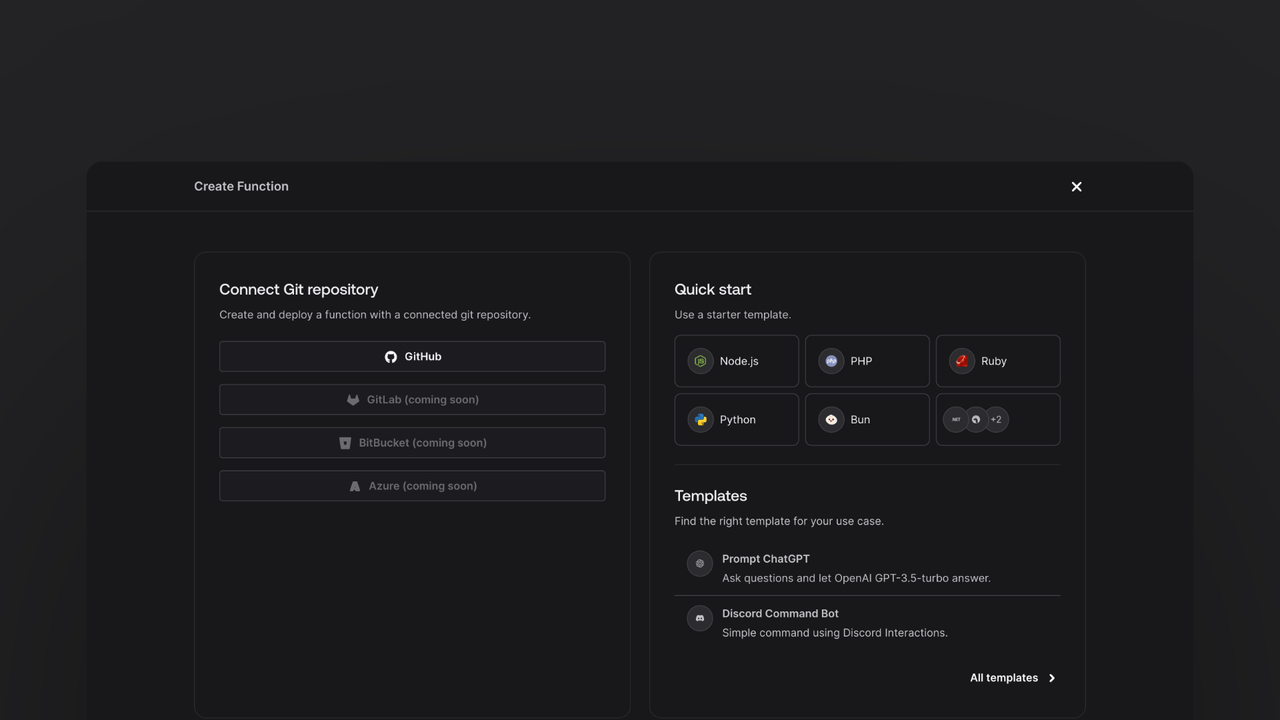
In the Appwrite Console's sidebar, click Functions.
Click Create function.
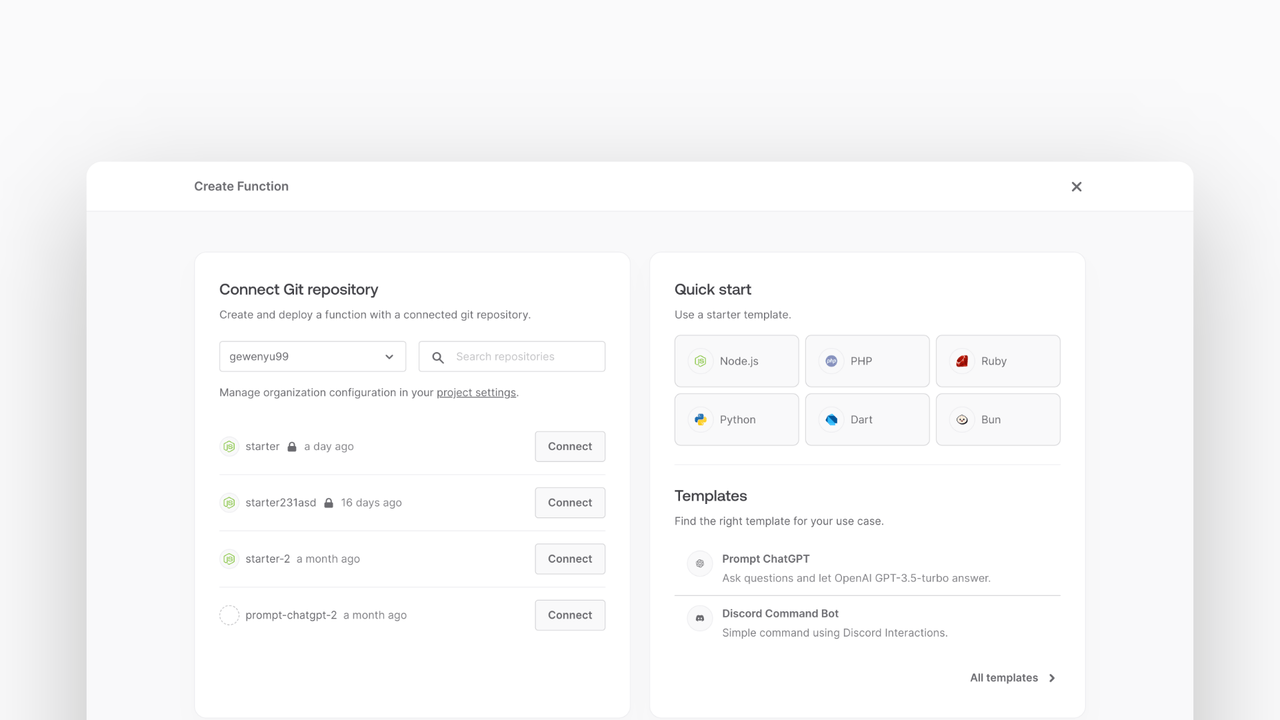
Under Connect Git repository, select your provider.
After connecting to GitHub, under Quick start, select the Node.js starter template.
In the Variables step, add the FAL_API_KEY, generate it here.
Follow the step-by-step wizard and create the function.
Add fal.ai SDK
Once the function is created, clone the function and open it in your development environment.
Once you have the repository open, you can install the fal.ai SDK by running the following command in your terminal:
npm install @fal-ai/serverless-client
Create utility function
In this example, the function will be able to accept both GET and POST requests.
For the GET request, return a static HTML page. It will use AlpineJS to make a POST request to the function. The POST request will use the fal.ai SDK to make a request to the fal.ai API.
Write the code to return a static HTML page. Create a new src/utils.js file with the following code:
import path from 'path';
import { fileURLToPath } from 'url';
import fs from 'fs';

const __filename = fileURLToPath(import.meta.url);
const __dirname = path.dirname(__filename);
const staticFolder = path.join(__dirname, '../static');

export function getStaticFile(fileName) {
  return fs.readFileSync(path.join(staticFolder, fileName)).toString();
}
Handle GET request
Write our GET request handler in the src/main.js file. This handler will return the static HTML page.
import { getStaticFile } from './utils.js';

export default async ({ req, res, error }) => {
  if (req.method === 'GET') {
    return res.send(getStaticFile('index.html'), 200, {
      'Content-Type': 'text/html; charset=utf-8',
    });
  }
};
Create static page
Create the static HTML page that the function will serve. Create a new file at static/index.html with some HTML boilerplate:
<!doctype html>
<html lang="en">
</html>
Within the <html> tag, add a <head> tag with the necessary meta tags, stylesheets, and scripts:
<head>
  <meta charset="UTF-8" />
  <meta http-equiv="X-UA-Compatible" content="IE=edge" />
  <meta name="viewport" content="width=device-width, initial-scale=1.0" />
  <title>fal.ai Demo</title>

  <script>
    async function onSubmit(prompt, type) {
      const response = await fetch('/', {
        method: 'POST',
        body: JSON.stringify({ prompt, type }),
        headers: {
          'Content-Type': 'application/json',
        },
      });

      const json = await response.json();

      if (!json.ok || json.error) {
        alert(json.error);
      }

      return json;
    }
  </script>

  <script src="//unpkg.com/alpinejs" defer></script>

  <link rel="stylesheet" href="https://unpkg.com/@appwrite.io/pink" />
  <link rel="stylesheet" href="https://unpkg.com/@appwrite.io/pink-icons" />
</head>
And after the </head> tag, add our <body> tag with the following content:
<body class="theme-dark">
  <main class="main-content">
    <div class="top-cover u-padding-block-end-56">
      <div class="container">
        <div class="u-flex u-gap-16 u-flex-justify-center u-margin-block-start-16">
          <h1 class="heading-level-1">fal.ai demo</h1>
          <code class="u-un-break-text"></code>
        </div>
        <p class="body-text-1 u-normal u-margin-block-start-8" style="max-width: 50rem">
          Use this page to test your implementation with fal.ai. Enter
          text and receive the model output as a response.
        </p>
      </div>
    </div>
    <div class="container u-margin-block-start-negative-56"
      x-data="{ prompt: '', result: { src: '' }, loading: false }">
      <div class="card u-flex u-gap-24 u-flex-vertical">
        <div class="u-flex u-cross-center u-gap-8">
          <div class="input-text-wrapper is-with-end-button u-width-full-line">
            <input x-model="prompt" type="search" placeholder="Prompt" />
            <div class="icon-search" aria-hidden="true"></div>
          </div>
          <button class="button" x-bind:disabled="loading"
            x-on:click="async () => { loading = true; result = { src: '' }; try { result = await onSubmit(prompt) } catch(err) { console.error(err); } finally { loading = false; } }">
            <span class="text">Generate</span>
          </button>
        </div>
        <template x-if="answer.type">
          <div class="u-flex u-flex-vertical u-gap-12">
            <div class="u-flex u-flex-vertical u-gap-12 card">
              <div class="u-flex u-gap-12">
                <h5 class="eyebrow-heading-2">Result:</h5>
              </div>
              <img class="u-max-width-400" x-bind:src="result.src" alt="fal.ai output" />
            </div>
          </div>
        </template>
      </div>
    </div>
  </main>
</body>
This HTML form will allow users to input a prompt and generate an image using the fal.ai API. The AlpineJS script handles the form submission and display the result.
Handle POST Request
Add methods necessary to integrate with fal.ai's API.
Import the fal.ai SDK at the top of the main.js file:
import * as fal from '@fal-ai/serverless-client';
Handle the POST requests to the function. Initialize the fal.ai SDK at the end of the handler function:
fal.config({ credentials: process.env.FAL_API_KEY });
Make the request to generate an image using the SDXL model, and return the result:
const result = await fal.subscribe('fal-ai/fast-sdxl', {
  input: {
    prompt: req.body.prompt,
  },
});
return res.json({ ok: true, src: result.images[0].url });
With the function complete, deploy it to Appwrite by pushing the changes to your repository.
Additional models can be found in the fal.ai model catalogue.
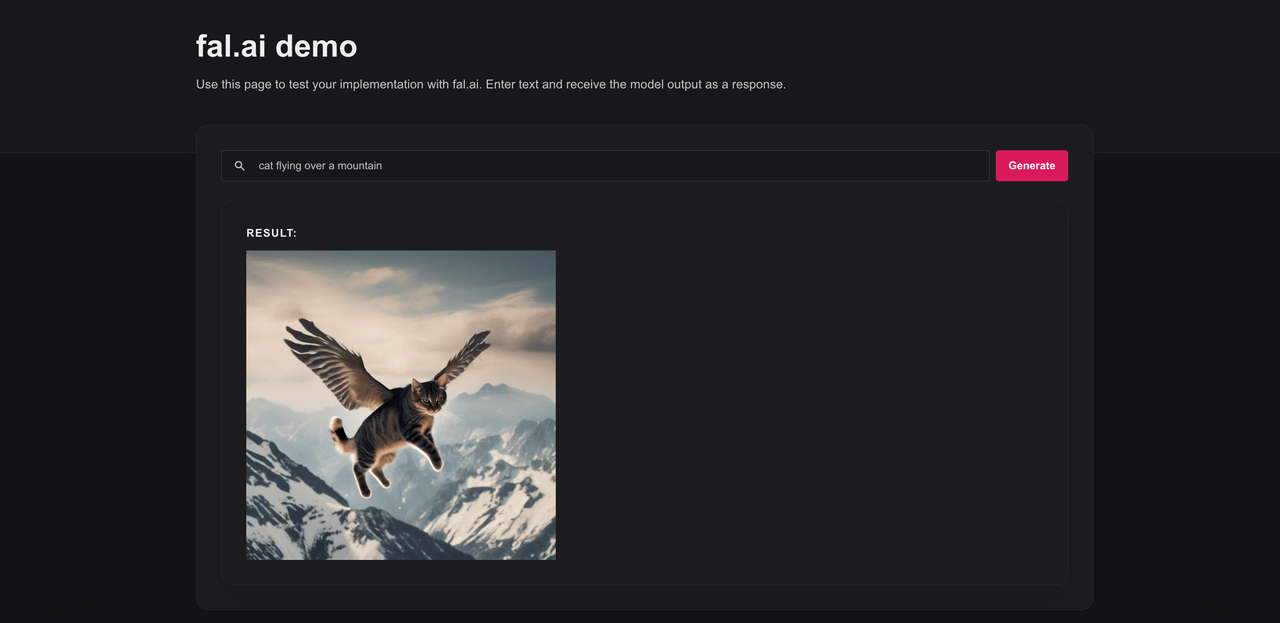
Test the function
Now that the function is deployed, test it by visiting the function URL in a browser. The UI created earlier will be visible. To test it, write a prompt and click the submit button, after a brief the completion should appear below the input.