The fastest way to get started with Appwrite in Claude Code is to install the Appwrite plugin from the official marketplace. The plugin includes agent skills for the CLI and all major SDKs and sets up MCP servers for both the Appwrite API and documentation, giving Claude Code everything it needs to work with your Appwrite projects.
To install the plugin, run the following command in your terminal:
claude plugin install appwrite@claude-plugins-official
Once installed, run Claude Code and configure the plugin:
- Run
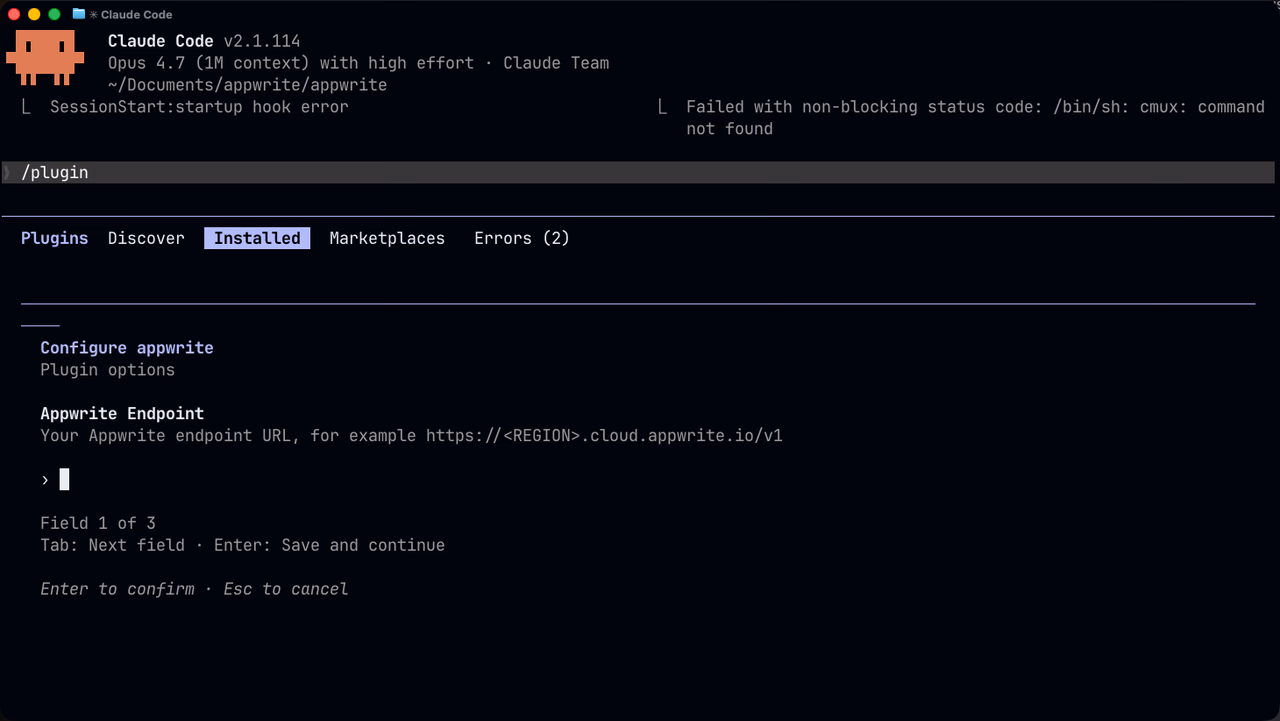
/pluginsin Claude Code. - Go to the Installed tab.
- Select the Appwrite plugin from the list.
- Choose Configure options.
- Enter your Appwrite endpoint, project ID, and API key when prompted.
After saving the configuration, run /reload-plugins to apply the changes to your current session. The appwrite-api MCP server will be ready alongside the agent skills, and Claude Code can now interact with your Appwrite project.
Prefer manual setup?
If you'd rather configure MCP servers individually, skip to Step 3.
Get started quickly with these pre-built prompts for common Appwrite integrations:
Browse all quick start prompts
If you installed the Appwrite plugin in Step 1, MCP servers are already configured and you can skip to Step 4.
Connect Appwrite MCP servers to Claude Code for deeper integration with the Appwrite API and documentation.
Before you begin, ensure you have the following pre-requisites installed on your system:
Run the following commands in your terminal to add the MCP servers:
claude mcp add-json appwrite-api '{"command":"uvx","args":["mcp-server-appwrite"],"env":{"APPWRITE_PROJECT_ID": "your-project-id", "APPWRITE_API_KEY": "your-api-key", "APPWRITE_ENDPOINT": "https://<REGION>.cloud.appwrite.io/v1"}}'
claude mcp add appwrite-docs <https://mcp-for-docs.appwrite.io> -t http
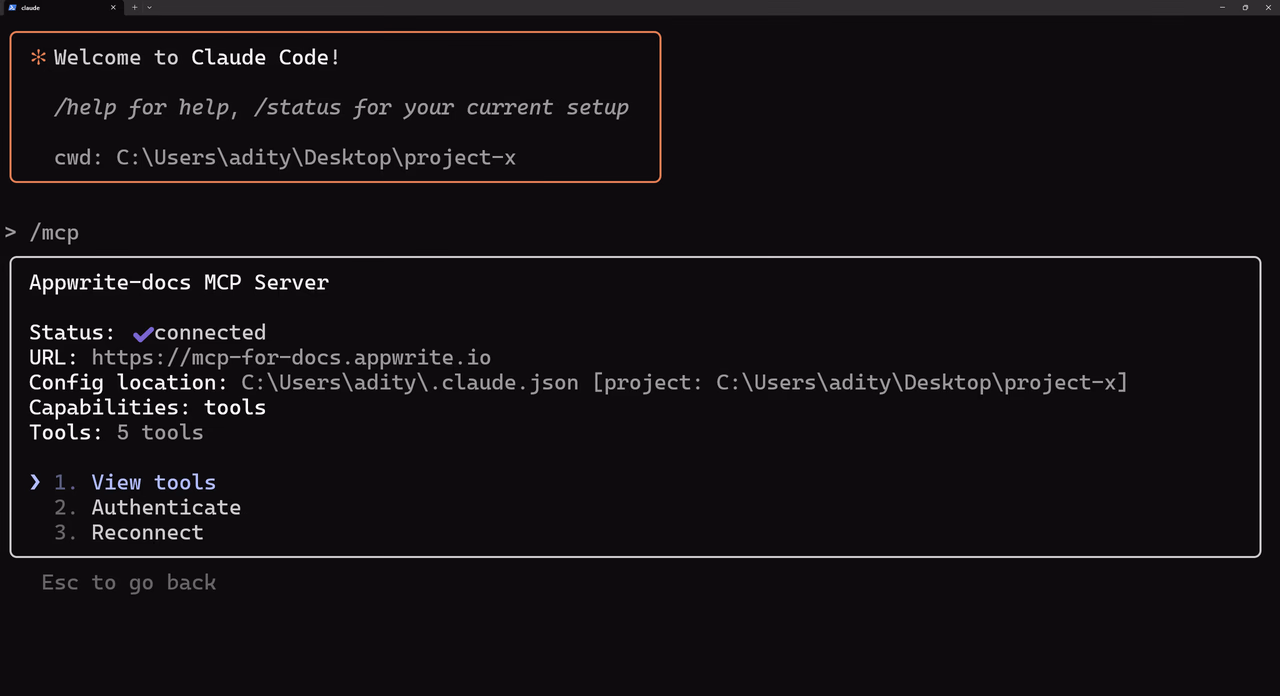
Run the following command in your terminal (where Claude Code is running).
/mcp
You should see the added MCP servers listed there.
Try out the following example prompts based on the MCP server you have configured:
Example prompts:
Create a new user in my Appwrite projectList all databases in my projectShow me the collections in my databaseCreate a new document in my collectionDelete a specific user by ID
Example prompts:
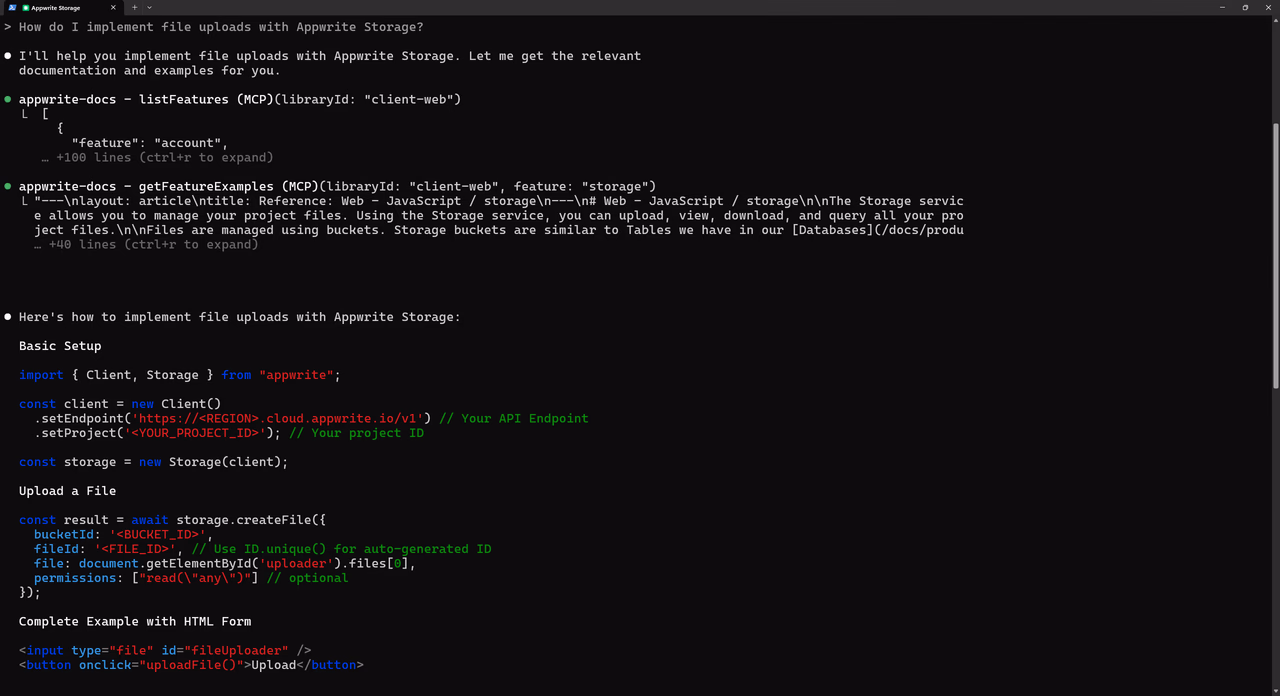
How do I set up real-time subscriptions in Appwrite?Show me how to authenticate users with OAuthWhat are the best practices for database queries?How do I implement file uploads with Appwrite Storage?Show me an example of using Appwrite Functions