This guide will walk you through installing Appwrite on your server using Docker. Appwrite is designed to run on any operating system that supports Docker.
System requirements
Before installing Appwrite, ensure your system meets these minimum requirements:
- 2 CPU cores
- 4GB of RAM
- 2GB of swap memory
- Operating system that supports Docker
- Docker Compose Version 2
Install with Docker
The easiest way to install Appwrite is using our Docker installer. The installer launches a web-based setup wizard that guides you through the entire process.
Before running the installation command, ensure you have Docker CLI installed on your host machine.
Firewall configuration
The installation wizard runs on port 20080. If you are installing on a remote server, ensure that port 20080 is open in your firewall or security group settings before proceeding. You can close this port after installation is complete.
Installation commands
Run the following command in your terminal:
docker run -it --rm \
    --publish 20080:20080 \
    --volume /var/run/docker.sock:/var/run/docker.sock \
    --volume "$(pwd)"/appwrite:/usr/src/code/appwrite:rw \
    --entrypoint="install" \
    appwrite/appwrite:1.9.5
docker run -it --rm ^
    --publish 20080:20080 ^
    --volume //var/run/docker.sock:/var/run/docker.sock ^
    --volume "%cd%"/appwrite:/usr/src/code/appwrite:rw ^
    --entrypoint="install" ^
    appwrite/appwrite:1.9.5
docker run -it --rm `
    --publish 20080:20080 `
    --volume /var/run/docker.sock:/var/run/docker.sock `
    --volume ${pwd}/appwrite:/usr/src/code/appwrite:rw `
    --entrypoint="install" `
    appwrite/appwrite:1.9.5
Once the command is running, open your browser and navigate to http://localhost:20080 to access the setup wizard.
Setup wizard
The setup wizard walks you through four steps to configure your Appwrite instance.
Step 1: Setup your app
Configure your Appwrite instance's basic settings.

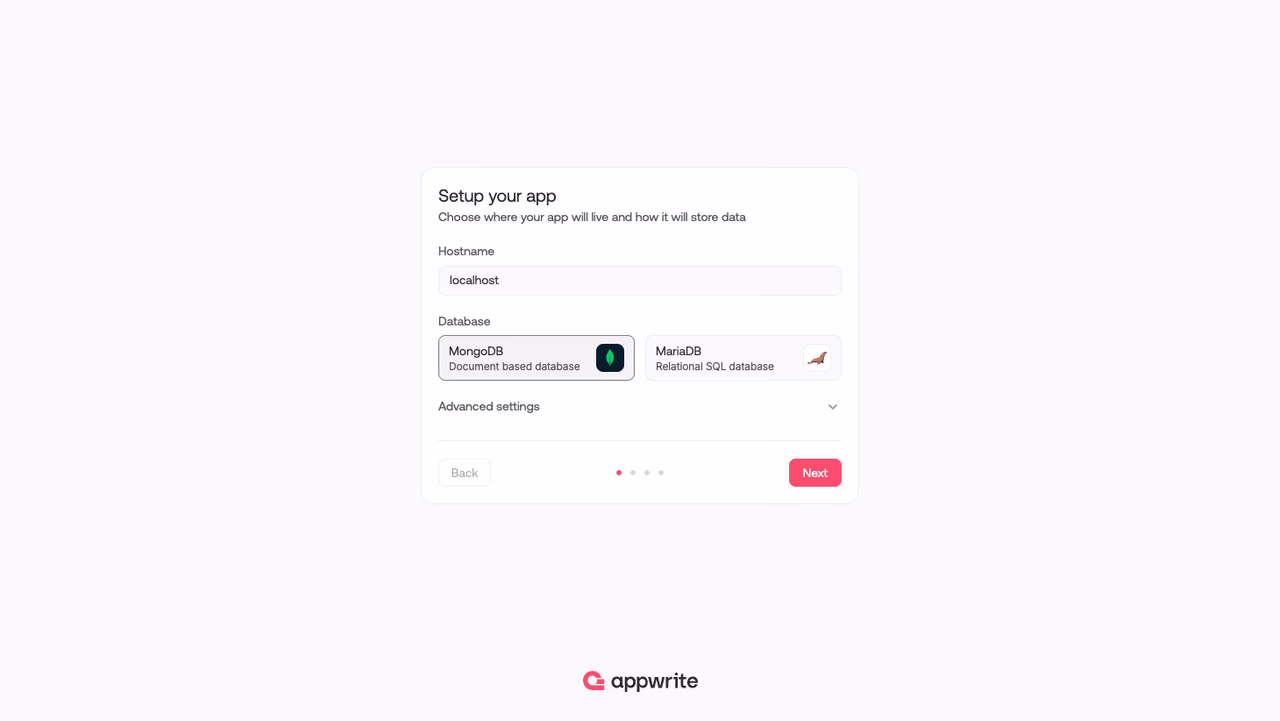
- Hostname - The domain or IP address where your Appwrite instance will be accessible.
- Database - Choose between MongoDB or MariaDB as your database backend. MongoDB is selected by default.
- Advanced settings - Optionally configure HTTP and HTTPS ports, SSL certificate email, and an OpenAI API key for the Appwrite Assistant.
Step 2: Secure your app
A secret API key is automatically generated for your instance. This key is used to encrypt sensitive data.

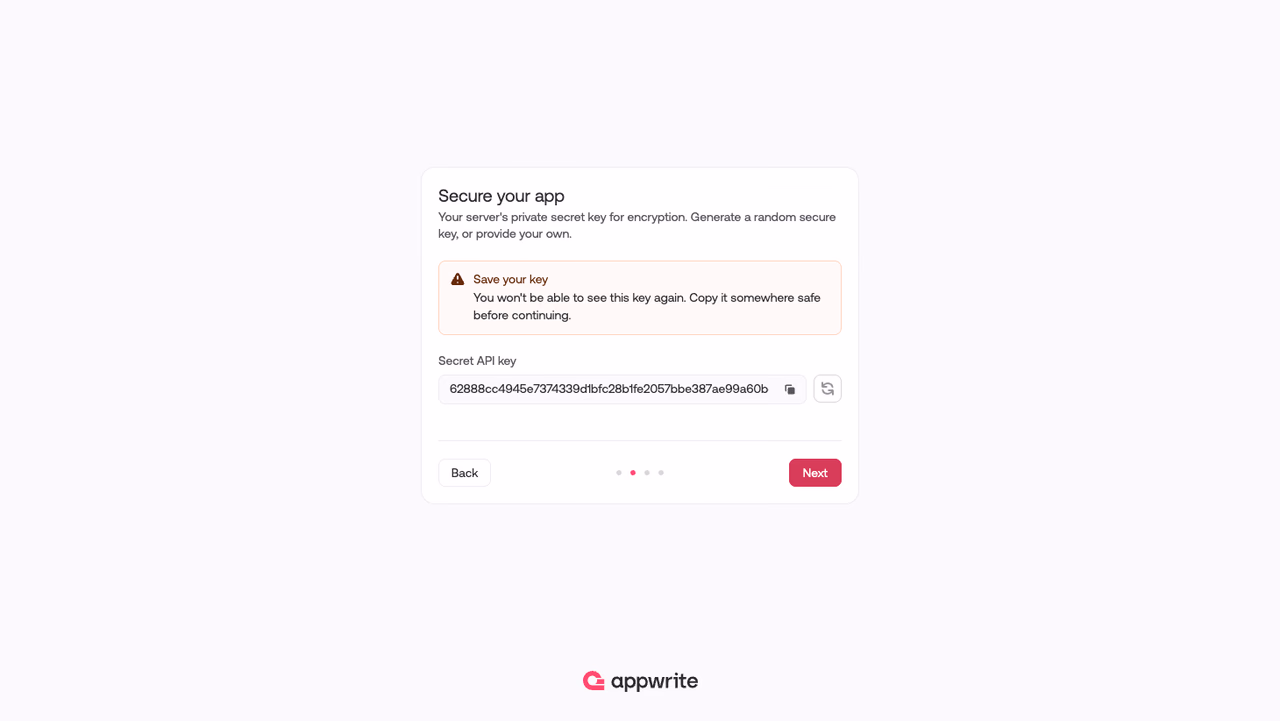
Save your key
You won't be able to see this key again after proceeding. Copy it somewhere safe before continuing.
You can use the Copy button to copy the key or Regenerate to create a new one.
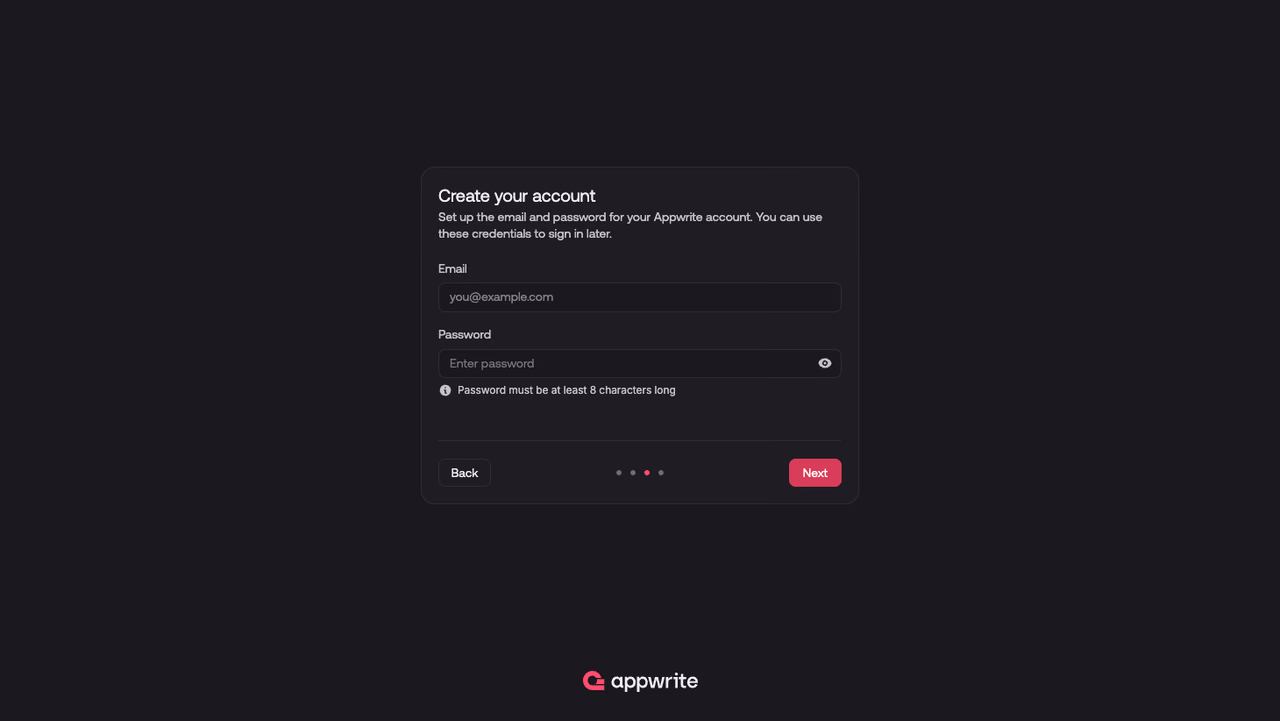
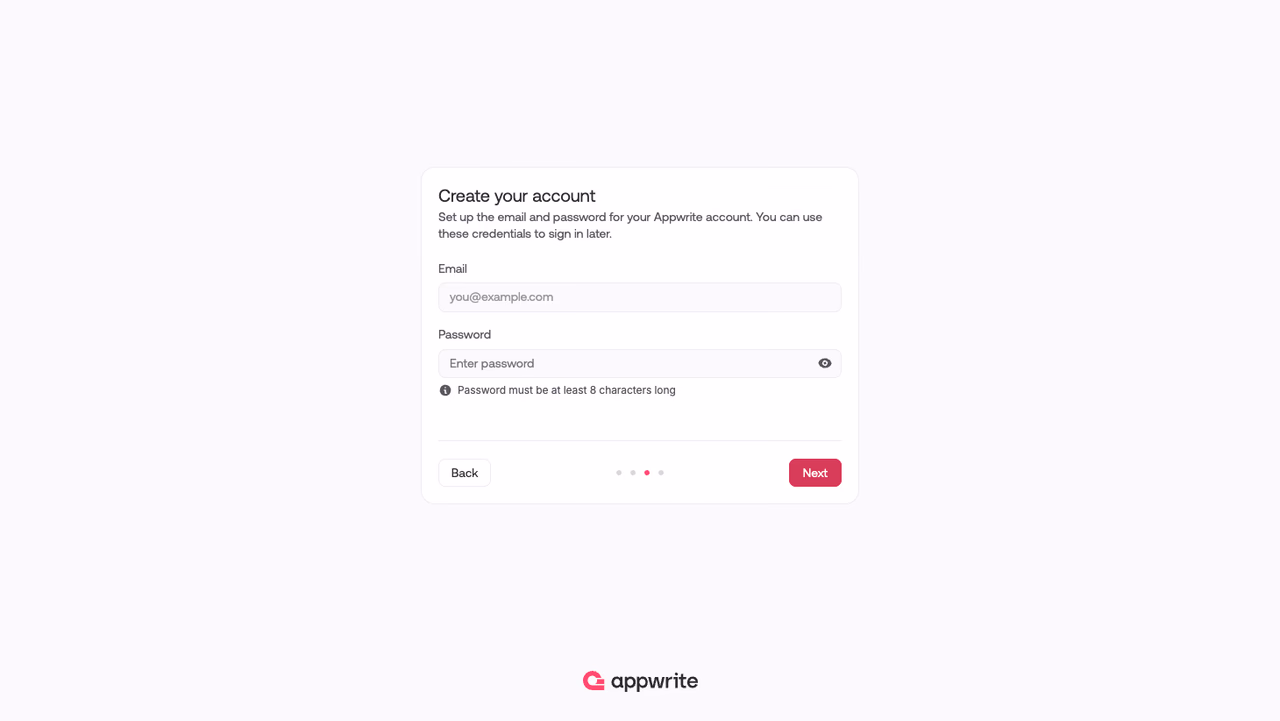
Step 3: Create your account
Set up the email and password for your Appwrite account. You'll use these credentials to sign in to the Appwrite Console after installation.
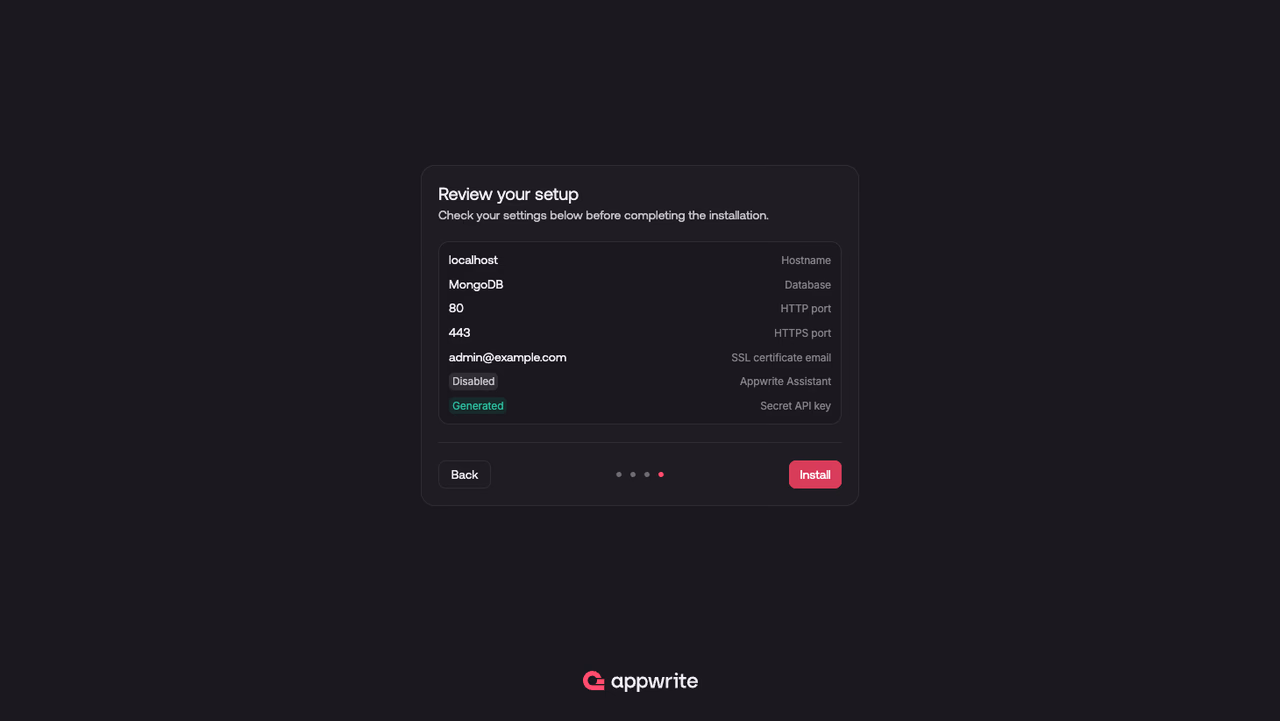
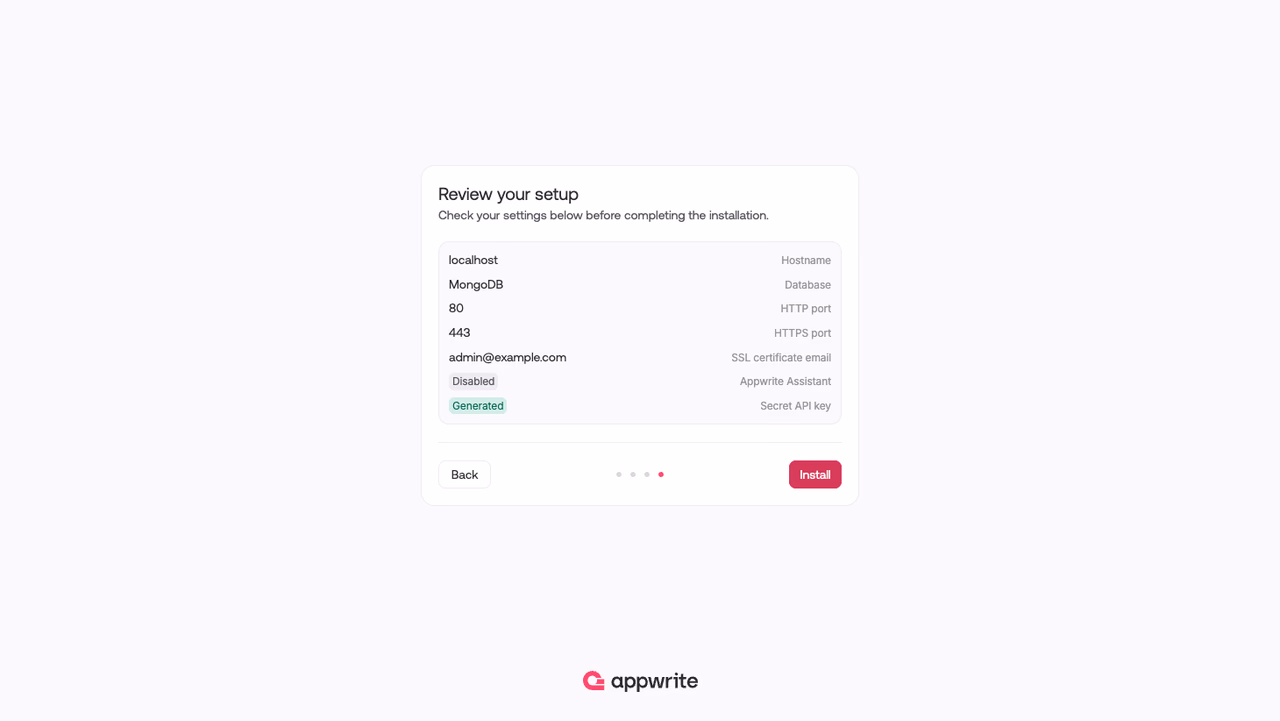
Step 4: Review your setup
Review all your configuration settings. If anything looks wrong, use the Back button to make changes. When you're ready, click Install to begin the installation.
Manual installation
For advanced users who prefer manual setup, you can install Appwrite using Docker Compose directly.
Generate configuration files
x-logging: &x-logging
logging:
driver: 'json-file'
options:
max-file: '5'
max-size: '10m'
services:
traefik:
image: traefik:3.6
container_name: appwrite-traefik
<<: *x-logging
command:
- --providers.file.directory=/storage/config
- --providers.file.watch=true
- --providers.docker=true
- --providers.docker.exposedByDefault=false
- --providers.docker.constraints=Label(`traefik.constraint-label-stack`,`appwrite`)
- --entrypoints.appwrite_web.address=:80
- --entrypoints.appwrite_websecure.address=:443
restart: unless-stopped
ports:
- 80:80
- 443:443
volumes:
- /var/run/docker.sock:/var/run/docker.sock
- appwrite-config:/storage/config:ro
- appwrite-certificates:/storage/certificates:ro
depends_on:
- appwrite
networks:
- gateway
- appwrite
appwrite:
image: appwrite/appwrite:1.9.5
container_name: appwrite
<<: *x-logging
restart: unless-stopped
networks:
- appwrite
labels:
- traefik.enable=true
- traefik.constraint-label-stack=appwrite
- traefik.docker.network=appwrite
- traefik.http.services.appwrite_api.loadbalancer.server.port=80
#http
- traefik.http.routers.appwrite_api_http.entrypoints=appwrite_web
- traefik.http.routers.appwrite_api_http.rule=PathPrefix(`/`)
- traefik.http.routers.appwrite_api_http.service=appwrite_api
# https
- traefik.http.routers.appwrite_api_https.entrypoints=appwrite_websecure
- traefik.http.routers.appwrite_api_https.rule=PathPrefix(`/`)
- traefik.http.routers.appwrite_api_https.service=appwrite_api
- traefik.http.routers.appwrite_api_https.tls=true
volumes:
- appwrite-uploads:/storage/uploads:rw
- appwrite-imports:/storage/imports:rw
- appwrite-cache:/storage/cache:rw
- appwrite-config:/storage/config:rw
- appwrite-certificates:/storage/certificates:rw
- appwrite-functions:/storage/functions:rw
- appwrite-sites:/storage/sites:rw
- appwrite-builds:/storage/builds:rw
depends_on:
redis:
condition: service_healthy
mongodb:
condition: service_healthy
# - clamav
environment:
- _APP_ENV
- _APP_WORKER_PER_CORE
- _APP_LOCALE
- _APP_COMPRESSION_MIN_SIZE_BYTES
- _APP_CONSOLE_WHITELIST_ROOT
- _APP_CONSOLE_WHITELIST_EMAILS
- _APP_CONSOLE_SESSION_ALERTS
- _APP_CONSOLE_WHITELIST_IPS
- _APP_CONSOLE_HOSTNAMES
- _APP_SYSTEM_EMAIL_NAME
- _APP_SYSTEM_EMAIL_ADDRESS
- _APP_EMAIL_SECURITY
- _APP_SYSTEM_RESPONSE_FORMAT
- _APP_OPTIONS_ABUSE
- _APP_OPTIONS_ROUTER_PROTECTION
- _APP_OPTIONS_FORCE_HTTPS
- _APP_OPTIONS_ROUTER_FORCE_HTTPS
- _APP_OPENSSL_KEY_V1
- _APP_DOMAIN
- _APP_DOMAIN_TARGET_CNAME
- _APP_DOMAIN_TARGET_AAAA
- _APP_DOMAIN_TARGET_A
- _APP_DOMAIN_TARGET_CAA
- _APP_DNS
- _APP_DOMAIN_FUNCTIONS
- _APP_REDIS_HOST
- _APP_REDIS_PORT
- _APP_REDIS_USER
- _APP_REDIS_PASS
- _APP_DB_ADAPTER
- _APP_DB_HOST
- _APP_DB_PORT
- _APP_DB_SCHEMA
- _APP_DB_USER
- _APP_DB_PASS
- _APP_SMTP_HOST
- _APP_SMTP_PORT
- _APP_SMTP_SECURE
- _APP_SMTP_USERNAME
- _APP_SMTP_PASSWORD
- _APP_USAGE_STATS
- _APP_STORAGE_LIMIT
- _APP_STORAGE_PREVIEW_LIMIT
- _APP_STORAGE_ANTIVIRUS
- _APP_STORAGE_ANTIVIRUS_HOST
- _APP_STORAGE_ANTIVIRUS_PORT
- _APP_STORAGE_DEVICE
- _APP_STORAGE_S3_ACCESS_KEY
- _APP_STORAGE_S3_SECRET
- _APP_STORAGE_S3_REGION
- _APP_STORAGE_S3_BUCKET
- _APP_STORAGE_S3_ENDPOINT
- _APP_STORAGE_DO_SPACES_ACCESS_KEY
- _APP_STORAGE_DO_SPACES_SECRET
- _APP_STORAGE_DO_SPACES_REGION
- _APP_STORAGE_DO_SPACES_BUCKET
- _APP_STORAGE_BACKBLAZE_ACCESS_KEY
- _APP_STORAGE_BACKBLAZE_SECRET
- _APP_STORAGE_BACKBLAZE_REGION
- _APP_STORAGE_BACKBLAZE_BUCKET
- _APP_STORAGE_LINODE_ACCESS_KEY
- _APP_STORAGE_LINODE_SECRET
- _APP_STORAGE_LINODE_REGION
- _APP_STORAGE_LINODE_BUCKET
- _APP_STORAGE_WASABI_ACCESS_KEY
- _APP_STORAGE_WASABI_SECRET
- _APP_STORAGE_WASABI_REGION
- _APP_STORAGE_WASABI_BUCKET
- _APP_COMPUTE_SIZE_LIMIT
- _APP_FUNCTIONS_TIMEOUT
- _APP_SITES_TIMEOUT
- _APP_COMPUTE_BUILD_TIMEOUT
- _APP_COMPUTE_CPUS
- _APP_COMPUTE_MEMORY
- _APP_FUNCTIONS_RUNTIMES
- _APP_SITES_RUNTIMES
- _APP_DOMAIN_SITES
- _APP_EXECUTOR_SECRET
- _APP_EXECUTOR_HOST
- _APP_LOGGING_CONFIG
- _APP_MAINTENANCE_INTERVAL
- _APP_MAINTENANCE_DELAY
- _APP_MAINTENANCE_START_TIME
- _APP_MAINTENANCE_RETENTION_EXECUTION
- _APP_MAINTENANCE_RETENTION_CACHE
- _APP_MAINTENANCE_RETENTION_ABUSE
- _APP_MAINTENANCE_RETENTION_AUDIT
- _APP_MAINTENANCE_RETENTION_AUDIT_CONSOLE
- _APP_MAINTENANCE_RETENTION_USAGE_HOURLY
- _APP_MAINTENANCE_RETENTION_SCHEDULES
- _APP_SMS_PROVIDER
- _APP_SMS_FROM
- _APP_GRAPHQL_INTROSPECTION
- _APP_GRAPHQL_MAX_BATCH_SIZE
- _APP_GRAPHQL_MAX_COMPLEXITY
- _APP_GRAPHQL_MAX_DEPTH
- _APP_VCS_GITHUB_APP_NAME
- _APP_VCS_GITHUB_PRIVATE_KEY
- _APP_VCS_GITHUB_APP_ID
- _APP_VCS_GITHUB_WEBHOOK_SECRET
- _APP_VCS_GITHUB_CLIENT_SECRET
- _APP_VCS_GITHUB_CLIENT_ID
- _APP_MIGRATIONS_FIREBASE_CLIENT_ID
- _APP_MIGRATIONS_FIREBASE_CLIENT_SECRET
- _APP_ASSISTANT_OPENAI_API_KEY
appwrite-console:
<<: *x-logging
container_name: appwrite-console
image: appwrite/console:8.7.5
restart: unless-stopped
networks:
- appwrite
labels:
- "traefik.enable=true"
- "traefik.constraint-label-stack=appwrite"
- "traefik.docker.network=appwrite"
- "traefik.http.services.appwrite_console.loadbalancer.server.port=80"
#ws
- traefik.http.routers.appwrite_console_http.entrypoints=appwrite_web
- traefik.http.routers.appwrite_console_http.rule=PathPrefix(`/console`)
- traefik.http.routers.appwrite_console_http.service=appwrite_console
# wss
- traefik.http.routers.appwrite_console_https.entrypoints=appwrite_websecure
- traefik.http.routers.appwrite_console_https.rule=PathPrefix(`/console`)
- traefik.http.routers.appwrite_console_https.service=appwrite_console
- traefik.http.routers.appwrite_console_https.tls=true
appwrite-realtime:
image: appwrite/appwrite:1.9.5
entrypoint: realtime
container_name: appwrite-realtime
<<: *x-logging
restart: unless-stopped
labels:
- "traefik.enable=true"
- "traefik.constraint-label-stack=appwrite"
- "traefik.docker.network=appwrite"
- "traefik.http.services.appwrite_realtime.loadbalancer.server.port=80"
#ws
- traefik.http.routers.appwrite_realtime_ws.entrypoints=appwrite_web
- traefik.http.routers.appwrite_realtime_ws.rule=PathPrefix(`/v1/realtime`)
- traefik.http.routers.appwrite_realtime_ws.service=appwrite_realtime
# wss
- traefik.http.routers.appwrite_realtime_wss.entrypoints=appwrite_websecure
- traefik.http.routers.appwrite_realtime_wss.rule=PathPrefix(`/v1/realtime`)
- traefik.http.routers.appwrite_realtime_wss.service=appwrite_realtime
- traefik.http.routers.appwrite_realtime_wss.tls=true
networks:
- appwrite
depends_on:
redis:
condition: service_healthy
mongodb:
condition: service_healthy
environment:
- _APP_ENV
- _APP_WORKER_PER_CORE
- _APP_OPTIONS_ABUSE
- _APP_OPTIONS_ROUTER_PROTECTION
- _APP_OPENSSL_KEY_V1
- _APP_REDIS_HOST
- _APP_REDIS_PORT
- _APP_REDIS_USER
- _APP_REDIS_PASS
- _APP_DB_ADAPTER
- _APP_DB_HOST
- _APP_DB_PORT
- _APP_DB_SCHEMA
- _APP_DB_USER
- _APP_DB_PASS
- _APP_USAGE_STATS
- _APP_LOGGING_CONFIG
appwrite-worker-audits:
image: appwrite/appwrite:1.9.5
entrypoint: worker-audits
<<: *x-logging
container_name: appwrite-worker-audits
restart: unless-stopped
networks:
- appwrite
depends_on:
redis:
condition: service_healthy
mongodb:
condition: service_healthy
environment:
- _APP_ENV
- _APP_WORKER_PER_CORE
- _APP_OPENSSL_KEY_V1
- _APP_REDIS_HOST
- _APP_REDIS_PORT
- _APP_REDIS_USER
- _APP_REDIS_PASS
- _APP_DB_ADAPTER
- _APP_DB_HOST
- _APP_DB_PORT
- _APP_DB_SCHEMA
- _APP_DB_USER
- _APP_DB_PASS
- _APP_LOGGING_CONFIG
appwrite-worker-webhooks:
image: appwrite/appwrite:1.9.5
entrypoint: worker-webhooks
<<: *x-logging
container_name: appwrite-worker-webhooks
restart: unless-stopped
networks:
- appwrite
depends_on:
redis:
condition: service_healthy
mongodb:
condition: service_healthy
environment:
- _APP_ENV
- _APP_WORKER_PER_CORE
- _APP_OPENSSL_KEY_V1
- _APP_EMAIL_SECURITY
- _APP_SYSTEM_SECURITY_EMAIL_ADDRESS
- _APP_DB_ADAPTER
- _APP_DB_HOST
- _APP_DB_PORT
- _APP_DB_SCHEMA
- _APP_DB_USER
- _APP_DB_PASS
- _APP_REDIS_HOST
- _APP_REDIS_PORT
- _APP_REDIS_USER
- _APP_REDIS_PASS
- _APP_LOGGING_CONFIG
appwrite-worker-deletes:
image: appwrite/appwrite:1.9.5
entrypoint: worker-deletes
<<: *x-logging
container_name: appwrite-worker-deletes
restart: unless-stopped
networks:
- appwrite
depends_on:
redis:
condition: service_healthy
mongodb:
condition: service_healthy
volumes:
- appwrite-uploads:/storage/uploads:rw
- appwrite-cache:/storage/cache:rw
- appwrite-functions:/storage/functions:rw
- appwrite-sites:/storage/sites:rw
- appwrite-builds:/storage/builds:rw
- appwrite-certificates:/storage/certificates:rw
environment:
- _APP_ENV
- _APP_WORKER_PER_CORE
- _APP_OPENSSL_KEY_V1
- _APP_REDIS_HOST
- _APP_REDIS_PORT
- _APP_REDIS_USER
- _APP_REDIS_PASS
- _APP_DB_ADAPTER
- _APP_DB_HOST
- _APP_DB_PORT
- _APP_DB_SCHEMA
- _APP_DB_USER
- _APP_DB_PASS
- _APP_STORAGE_DEVICE
- _APP_STORAGE_S3_ACCESS_KEY
- _APP_STORAGE_S3_SECRET
- _APP_STORAGE_S3_REGION
- _APP_STORAGE_S3_BUCKET
- _APP_STORAGE_S3_ENDPOINT
- _APP_STORAGE_DO_SPACES_ACCESS_KEY
- _APP_STORAGE_DO_SPACES_SECRET
- _APP_STORAGE_DO_SPACES_REGION
- _APP_STORAGE_DO_SPACES_BUCKET
- _APP_STORAGE_BACKBLAZE_ACCESS_KEY
- _APP_STORAGE_BACKBLAZE_SECRET
- _APP_STORAGE_BACKBLAZE_REGION
- _APP_STORAGE_BACKBLAZE_BUCKET
- _APP_STORAGE_LINODE_ACCESS_KEY
- _APP_STORAGE_LINODE_SECRET
- _APP_STORAGE_LINODE_REGION
- _APP_STORAGE_LINODE_BUCKET
- _APP_STORAGE_WASABI_ACCESS_KEY
- _APP_STORAGE_WASABI_SECRET
- _APP_STORAGE_WASABI_REGION
- _APP_STORAGE_WASABI_BUCKET
- _APP_LOGGING_CONFIG
- _APP_EXECUTOR_SECRET
- _APP_EXECUTOR_HOST
- _APP_MAINTENANCE_RETENTION_ABUSE
- _APP_MAINTENANCE_RETENTION_AUDIT
- _APP_MAINTENANCE_RETENTION_AUDIT_CONSOLE
- _APP_MAINTENANCE_RETENTION_EXECUTION
- _APP_SYSTEM_SECURITY_EMAIL_ADDRESS
- _APP_EMAIL_CERTIFICATES
appwrite-worker-databases:
image: appwrite/appwrite:1.9.5
entrypoint: worker-databases
<<: *x-logging
container_name: appwrite-worker-databases
restart: unless-stopped
networks:
- appwrite
depends_on:
redis:
condition: service_healthy
mongodb:
condition: service_healthy
environment:
- _APP_ENV
- _APP_WORKER_PER_CORE
- _APP_OPENSSL_KEY_V1
- _APP_REDIS_HOST
- _APP_REDIS_PORT
- _APP_REDIS_USER
- _APP_REDIS_PASS
- _APP_DB_ADAPTER
- _APP_DB_HOST
- _APP_DB_PORT
- _APP_DB_SCHEMA
- _APP_DB_USER
- _APP_DB_PASS
- _APP_LOGGING_CONFIG
appwrite-worker-builds:
image: appwrite/appwrite:1.9.5
entrypoint: worker-builds
<<: *x-logging
container_name: appwrite-worker-builds
restart: unless-stopped
networks:
- appwrite
depends_on:
redis:
condition: service_healthy
mongodb:
condition: service_healthy
volumes:
- appwrite-functions:/storage/functions:rw
- appwrite-sites:/storage/sites:rw
- appwrite-builds:/storage/builds:rw
- appwrite-uploads:/storage/uploads:rw
environment:
- _APP_ENV
- _APP_WORKER_PER_CORE
- _APP_OPENSSL_KEY_V1
- _APP_EXECUTOR_SECRET
- _APP_EXECUTOR_HOST
- _APP_REDIS_HOST
- _APP_REDIS_PORT
- _APP_REDIS_USER
- _APP_REDIS_PASS
- _APP_DB_ADAPTER
- _APP_DB_HOST
- _APP_DB_PORT
- _APP_DB_SCHEMA
- _APP_DB_USER
- _APP_DB_PASS
- _APP_LOGGING_CONFIG
- _APP_VCS_GITHUB_APP_NAME
- _APP_VCS_GITHUB_PRIVATE_KEY
- _APP_VCS_GITHUB_APP_ID
- _APP_FUNCTIONS_TIMEOUT
- _APP_SITES_TIMEOUT
- _APP_COMPUTE_BUILD_TIMEOUT
- _APP_COMPUTE_CPUS
- _APP_COMPUTE_MEMORY
- _APP_COMPUTE_SIZE_LIMIT
- _APP_OPEN_RUNTIMES_NFT
- _APP_OPTIONS_FORCE_HTTPS
- _APP_OPTIONS_ROUTER_FORCE_HTTPS
- _APP_DOMAIN
- _APP_STORAGE_DEVICE
- _APP_STORAGE_S3_ACCESS_KEY
- _APP_STORAGE_S3_SECRET
- _APP_STORAGE_S3_REGION
- _APP_STORAGE_S3_BUCKET
- _APP_STORAGE_S3_ENDPOINT
- _APP_STORAGE_DO_SPACES_ACCESS_KEY
- _APP_STORAGE_DO_SPACES_SECRET
- _APP_STORAGE_DO_SPACES_REGION
- _APP_STORAGE_DO_SPACES_BUCKET
- _APP_STORAGE_BACKBLAZE_ACCESS_KEY
- _APP_STORAGE_BACKBLAZE_SECRET
- _APP_STORAGE_BACKBLAZE_REGION
- _APP_STORAGE_BACKBLAZE_BUCKET
- _APP_STORAGE_LINODE_ACCESS_KEY
- _APP_STORAGE_LINODE_SECRET
- _APP_STORAGE_LINODE_REGION
- _APP_STORAGE_LINODE_BUCKET
- _APP_STORAGE_WASABI_ACCESS_KEY
- _APP_STORAGE_WASABI_SECRET
- _APP_STORAGE_WASABI_REGION
- _APP_STORAGE_WASABI_BUCKET
- _APP_DOMAIN_SITES
appwrite-worker-screenshots:
image: appwrite/appwrite:1.9.5
entrypoint: worker-screenshots
<<: *x-logging
container_name: appwrite-worker-screenshots
restart: unless-stopped
networks:
- appwrite
volumes:
- appwrite-uploads:/storage/uploads:rw
depends_on:
redis:
condition: service_healthy
mongodb:
condition: service_healthy
environment:
- _APP_ENV
- _APP_WORKER_PER_CORE
- _APP_OPENSSL_KEY_V1
- _APP_BROWSER_HOST
- _APP_OPTIONS_FORCE_HTTPS
- _APP_REDIS_HOST
- _APP_REDIS_PORT
- _APP_REDIS_USER
- _APP_REDIS_PASS
- _APP_DB_ADAPTER
- _APP_DB_HOST
- _APP_DB_PORT
- _APP_DB_SCHEMA
- _APP_DB_USER
- _APP_DB_PASS
- _APP_LOGGING_CONFIG
- _APP_STORAGE_DEVICE
- _APP_STORAGE_S3_ACCESS_KEY
- _APP_STORAGE_S3_SECRET
- _APP_STORAGE_S3_REGION
- _APP_STORAGE_S3_BUCKET
- _APP_STORAGE_S3_ENDPOINT
- _APP_STORAGE_DO_SPACES_ACCESS_KEY
- _APP_STORAGE_DO_SPACES_SECRET
- _APP_STORAGE_DO_SPACES_REGION
- _APP_STORAGE_DO_SPACES_BUCKET
- _APP_STORAGE_BACKBLAZE_ACCESS_KEY
- _APP_STORAGE_BACKBLAZE_SECRET
- _APP_STORAGE_BACKBLAZE_REGION
- _APP_STORAGE_BACKBLAZE_BUCKET
- _APP_STORAGE_LINODE_ACCESS_KEY
- _APP_STORAGE_LINODE_SECRET
- _APP_STORAGE_LINODE_REGION
- _APP_STORAGE_LINODE_BUCKET
- _APP_STORAGE_WASABI_ACCESS_KEY
- _APP_STORAGE_WASABI_SECRET
- _APP_STORAGE_WASABI_REGION
- _APP_STORAGE_WASABI_BUCKET
appwrite-worker-certificates:
image: appwrite/appwrite:1.9.5
entrypoint: worker-certificates
<<: *x-logging
container_name: appwrite-worker-certificates
restart: unless-stopped
networks:
- appwrite
depends_on:
redis:
condition: service_healthy
mongodb:
condition: service_healthy
volumes:
- appwrite-config:/storage/config:rw
- appwrite-certificates:/storage/certificates:rw
environment:
- _APP_ENV
- _APP_WORKER_PER_CORE
- _APP_OPENSSL_KEY_V1
- _APP_DOMAIN
- _APP_DOMAIN_TARGET_CNAME
- _APP_DOMAIN_TARGET_AAAA
- _APP_DOMAIN_TARGET_A
- _APP_DOMAIN_TARGET_CAA
- _APP_DNS
- _APP_DOMAIN_FUNCTIONS
- _APP_EMAIL_CERTIFICATES
- _APP_REDIS_HOST
- _APP_REDIS_PORT
- _APP_REDIS_USER
- _APP_REDIS_PASS
- _APP_DB_ADAPTER
- _APP_DB_HOST
- _APP_DB_PORT
- _APP_DB_SCHEMA
- _APP_DB_USER
- _APP_DB_PASS
- _APP_LOGGING_CONFIG
appwrite-worker-executions:
image: appwrite/appwrite:1.9.5
entrypoint: worker-executions
<<: *x-logging
container_name: appwrite-worker-executions
restart: unless-stopped
networks:
- appwrite
depends_on:
redis:
condition: service_healthy
mongodb:
condition: service_healthy
environment:
- _APP_ENV
- _APP_WORKER_PER_CORE
- _APP_REDIS_HOST
- _APP_REDIS_PORT
- _APP_REDIS_USER
- _APP_REDIS_PASS
- _APP_DB_ADAPTER
- _APP_DB_HOST
- _APP_DB_PORT
- _APP_DB_SCHEMA
- _APP_DB_USER
- _APP_DB_PASS
- _APP_LOGGING_CONFIG
appwrite-worker-functions:
image: appwrite/appwrite:1.9.5
entrypoint: worker-functions
<<: *x-logging
container_name: appwrite-worker-functions
restart: unless-stopped
networks:
- appwrite
depends_on:
redis:
condition: service_healthy
mongodb:
condition: service_healthy
openruntimes-executor:
condition: service_started
environment:
- _APP_ENV
- _APP_WORKER_PER_CORE
- _APP_OPENSSL_KEY_V1
- _APP_DOMAIN
- _APP_OPTIONS_FORCE_HTTPS
- _APP_REDIS_HOST
- _APP_REDIS_PORT
- _APP_REDIS_USER
- _APP_REDIS_PASS
- _APP_DB_ADAPTER
- _APP_DB_HOST
- _APP_DB_PORT
- _APP_DB_SCHEMA
- _APP_DB_USER
- _APP_DB_PASS
- _APP_FUNCTIONS_TIMEOUT
- _APP_SITES_TIMEOUT
- _APP_COMPUTE_BUILD_TIMEOUT
- _APP_COMPUTE_CPUS
- _APP_COMPUTE_MEMORY
- _APP_EXECUTOR_SECRET
- _APP_EXECUTOR_HOST
- _APP_USAGE_STATS
- _APP_DOCKER_HUB_USERNAME
- _APP_DOCKER_HUB_PASSWORD
- _APP_LOGGING_CONFIG
appwrite-worker-mails:
image: appwrite/appwrite:1.9.5
entrypoint: worker-mails
<<: *x-logging
container_name: appwrite-worker-mails
restart: unless-stopped
networks:
- appwrite
depends_on:
redis:
condition: service_healthy
mongodb:
condition: service_healthy
environment:
- _APP_ENV
- _APP_WORKER_PER_CORE
- _APP_OPENSSL_KEY_V1
- _APP_SYSTEM_EMAIL_NAME
- _APP_SYSTEM_EMAIL_ADDRESS
- _APP_DB_ADAPTER
- _APP_DB_HOST
- _APP_DB_PORT
- _APP_DB_SCHEMA
- _APP_DB_USER
- _APP_DB_PASS
- _APP_REDIS_HOST
- _APP_REDIS_PORT
- _APP_REDIS_USER
- _APP_REDIS_PASS
- _APP_SMTP_HOST
- _APP_SMTP_PORT
- _APP_SMTP_SECURE
- _APP_SMTP_USERNAME
- _APP_SMTP_PASSWORD
- _APP_LOGGING_CONFIG
- _APP_DOMAIN
- _APP_OPTIONS_FORCE_HTTPS
appwrite-worker-messaging:
image: appwrite/appwrite:1.9.5
entrypoint: worker-messaging
<<: *x-logging
container_name: appwrite-worker-messaging
restart: unless-stopped
networks:
- appwrite
volumes:
- appwrite-uploads:/storage/uploads:rw
depends_on:
redis:
condition: service_healthy
mongodb:
condition: service_healthy
environment:
- _APP_ENV
- _APP_WORKER_PER_CORE
- _APP_OPENSSL_KEY_V1
- _APP_REDIS_HOST
- _APP_REDIS_PORT
- _APP_REDIS_USER
- _APP_REDIS_PASS
- _APP_DB_ADAPTER
- _APP_DB_HOST
- _APP_DB_PORT
- _APP_DB_SCHEMA
- _APP_DB_USER
- _APP_DB_PASS
- _APP_LOGGING_CONFIG
- _APP_SMS_FROM
- _APP_SMS_PROVIDER
- _APP_STORAGE_DEVICE
- _APP_STORAGE_S3_ACCESS_KEY
- _APP_STORAGE_S3_SECRET
- _APP_STORAGE_S3_REGION
- _APP_STORAGE_S3_BUCKET
- _APP_STORAGE_S3_ENDPOINT
- _APP_STORAGE_DO_SPACES_ACCESS_KEY
- _APP_STORAGE_DO_SPACES_SECRET
- _APP_STORAGE_DO_SPACES_REGION
- _APP_STORAGE_DO_SPACES_BUCKET
- _APP_STORAGE_BACKBLAZE_ACCESS_KEY
- _APP_STORAGE_BACKBLAZE_SECRET
- _APP_STORAGE_BACKBLAZE_REGION
- _APP_STORAGE_BACKBLAZE_BUCKET
- _APP_STORAGE_LINODE_ACCESS_KEY
- _APP_STORAGE_LINODE_SECRET
- _APP_STORAGE_LINODE_REGION
- _APP_STORAGE_LINODE_BUCKET
- _APP_STORAGE_WASABI_ACCESS_KEY
- _APP_STORAGE_WASABI_SECRET
- _APP_STORAGE_WASABI_REGION
- _APP_STORAGE_WASABI_BUCKET
appwrite-worker-migrations:
image: appwrite/appwrite:1.9.5
entrypoint: worker-migrations
<<: *x-logging
container_name: appwrite-worker-migrations
restart: unless-stopped
networks:
- appwrite
volumes:
- appwrite-imports:/storage/imports:rw
depends_on:
mongodb:
condition: service_healthy
environment:
- _APP_ENV
- _APP_WORKER_PER_CORE
- _APP_OPENSSL_KEY_V1
- _APP_DOMAIN
- _APP_DOMAIN_TARGET_CNAME
- _APP_DOMAIN_TARGET_AAAA
- _APP_DOMAIN_TARGET_A
- _APP_DOMAIN_TARGET_CAA
- _APP_DNS
- _APP_EMAIL_SECURITY
- _APP_REDIS_HOST
- _APP_REDIS_PORT
- _APP_REDIS_USER
- _APP_REDIS_PASS
- _APP_DB_ADAPTER
- _APP_DB_HOST
- _APP_DB_PORT
- _APP_DB_SCHEMA
- _APP_DB_USER
- _APP_DB_PASS
- _APP_LOGGING_CONFIG
- _APP_MIGRATIONS_FIREBASE_CLIENT_ID
- _APP_MIGRATIONS_FIREBASE_CLIENT_SECRET
appwrite-task-maintenance:
image: appwrite/appwrite:1.9.5
entrypoint: maintenance
<<: *x-logging
container_name: appwrite-task-maintenance
restart: unless-stopped
networks:
- appwrite
depends_on:
redis:
condition: service_healthy
mongodb:
condition: service_healthy
environment:
- _APP_ENV
- _APP_WORKER_PER_CORE
- _APP_DOMAIN
- _APP_DOMAIN_TARGET_CNAME
- _APP_DOMAIN_TARGET_AAAA
- _APP_DOMAIN_TARGET_A
- _APP_DOMAIN_TARGET_CAA
- _APP_DNS
- _APP_DOMAIN_FUNCTIONS
- _APP_OPENSSL_KEY_V1
- _APP_REDIS_HOST
- _APP_REDIS_PORT
- _APP_REDIS_USER
- _APP_REDIS_PASS
- _APP_DB_ADAPTER
- _APP_DB_HOST
- _APP_DB_PORT
- _APP_DB_SCHEMA
- _APP_DB_USER
- _APP_DB_PASS
- _APP_MAINTENANCE_INTERVAL
- _APP_MAINTENANCE_RETENTION_EXECUTION
- _APP_MAINTENANCE_RETENTION_CACHE
- _APP_MAINTENANCE_RETENTION_ABUSE
- _APP_MAINTENANCE_RETENTION_AUDIT
- _APP_MAINTENANCE_RETENTION_AUDIT_CONSOLE
- _APP_MAINTENANCE_RETENTION_USAGE_HOURLY
- _APP_MAINTENANCE_RETENTION_SCHEDULES
appwrite-task-interval:
image: appwrite/appwrite:1.9.5
entrypoint: interval
<<: *x-logging
container_name: appwrite-task-interval
restart: unless-stopped
networks:
- appwrite
depends_on:
mongodb:
condition: service_healthy
redis:
condition: service_healthy
environment:
- _APP_ENV
- _APP_WORKER_PER_CORE
- _APP_OPENSSL_KEY_V1
- _APP_DOMAIN
- _APP_DOMAIN_TARGET_CNAME
- _APP_DOMAIN_TARGET_AAAA
- _APP_DOMAIN_TARGET_A
- _APP_DOMAIN_TARGET_CAA
- _APP_DNS
- _APP_DOMAIN_FUNCTIONS
- _APP_DOMAIN_SITES
- _APP_REDIS_HOST
- _APP_REDIS_PORT
- _APP_REDIS_USER
- _APP_REDIS_PASS
- _APP_DB_ADAPTER
- _APP_DB_HOST
- _APP_DB_PORT
- _APP_DB_SCHEMA
- _APP_DB_USER
- _APP_DB_PASS
- _APP_LOGGING_CONFIG
appwrite-task-stats-resources:
image: appwrite/appwrite:1.9.5
container_name: appwrite-task-stats-resources
entrypoint: stats-resources
<<: *x-logging
restart: unless-stopped
networks:
- appwrite
depends_on:
redis:
condition: service_healthy
mongodb:
condition: service_healthy
environment:
- _APP_ENV
- _APP_WORKER_PER_CORE
- _APP_OPENSSL_KEY_V1
- _APP_DB_ADAPTER
- _APP_DB_HOST
- _APP_DB_PORT
- _APP_DB_SCHEMA
- _APP_DB_USER
- _APP_DB_PASS
- _APP_REDIS_HOST
- _APP_REDIS_PORT
- _APP_REDIS_USER
- _APP_REDIS_PASS
- _APP_USAGE_STATS
- _APP_LOGGING_CONFIG
- _APP_DATABASE_SHARED_TABLES
- _APP_STATS_RESOURCES_INTERVAL
appwrite-worker-stats-resources:
image: appwrite/appwrite:1.9.5
entrypoint: worker-stats-resources
container_name: appwrite-worker-stats-resources
<<: *x-logging
restart: unless-stopped
networks:
- appwrite
depends_on:
redis:
condition: service_healthy
mongodb:
condition: service_healthy
environment:
- _APP_ENV
- _APP_WORKER_PER_CORE
- _APP_OPENSSL_KEY_V1
- _APP_DB_ADAPTER
- _APP_DB_HOST
- _APP_DB_PORT
- _APP_DB_SCHEMA
- _APP_DB_USER
- _APP_DB_PASS
- _APP_REDIS_HOST
- _APP_REDIS_PORT
- _APP_REDIS_USER
- _APP_REDIS_PASS
- _APP_USAGE_STATS
- _APP_LOGGING_CONFIG
- _APP_STATS_RESOURCES_INTERVAL
appwrite-worker-stats-usage:
image: appwrite/appwrite:1.9.5
entrypoint: worker-stats-usage
container_name: appwrite-worker-stats-usage
<<: *x-logging
restart: unless-stopped
networks:
- appwrite
depends_on:
redis:
condition: service_healthy
mongodb:
condition: service_healthy
environment:
- _APP_ENV
- _APP_WORKER_PER_CORE
- _APP_OPENSSL_KEY_V1
- _APP_DB_ADAPTER
- _APP_DB_HOST
- _APP_DB_PORT
- _APP_DB_SCHEMA
- _APP_DB_USER
- _APP_DB_PASS
- _APP_REDIS_HOST
- _APP_REDIS_PORT
- _APP_REDIS_USER
- _APP_REDIS_PASS
- _APP_USAGE_STATS
- _APP_LOGGING_CONFIG
- _APP_USAGE_AGGREGATION_INTERVAL
appwrite-task-scheduler-functions:
image: appwrite/appwrite:1.9.5
entrypoint: schedule-functions
container_name: appwrite-task-scheduler-functions
<<: *x-logging
restart: unless-stopped
networks:
- appwrite
depends_on:
mongodb:
condition: service_healthy
redis:
condition: service_healthy
environment:
- _APP_ENV
- _APP_WORKER_PER_CORE
- _APP_OPENSSL_KEY_V1
- _APP_MIGRATION_HOST
- _APP_REDIS_HOST
- _APP_REDIS_PORT
- _APP_REDIS_USER
- _APP_REDIS_PASS
- _APP_DB_ADAPTER
- _APP_DB_HOST
- _APP_DB_PORT
- _APP_DB_SCHEMA
- _APP_DB_USER
- _APP_DB_PASS
appwrite-task-scheduler-executions:
image: appwrite/appwrite:1.9.5
entrypoint: schedule-executions
container_name: appwrite-task-scheduler-executions
<<: *x-logging
restart: unless-stopped
networks:
- appwrite
depends_on:
mongodb:
condition: service_healthy
redis:
condition: service_healthy
environment:
- _APP_ENV
- _APP_WORKER_PER_CORE
- _APP_OPENSSL_KEY_V1
- _APP_MIGRATION_HOST
- _APP_REDIS_HOST
- _APP_REDIS_PORT
- _APP_REDIS_USER
- _APP_REDIS_PASS
- _APP_DB_ADAPTER
- _APP_DB_HOST
- _APP_DB_PORT
- _APP_DB_SCHEMA
- _APP_DB_USER
- _APP_DB_PASS
appwrite-task-scheduler-messages:
image: appwrite/appwrite:1.9.5
entrypoint: schedule-messages
container_name: appwrite-task-scheduler-messages
<<: *x-logging
restart: unless-stopped
networks:
- appwrite
depends_on:
mongodb:
condition: service_healthy
redis:
condition: service_healthy
environment:
- _APP_ENV
- _APP_WORKER_PER_CORE
- _APP_OPENSSL_KEY_V1
- _APP_REDIS_HOST
- _APP_REDIS_PORT
- _APP_REDIS_USER
- _APP_REDIS_PASS
- _APP_DB_ADAPTER
- _APP_DB_HOST
- _APP_DB_PORT
- _APP_DB_SCHEMA
- _APP_DB_USER
- _APP_DB_PASS
appwrite-assistant:
image: appwrite/assistant:0.8.4
container_name: appwrite-assistant
<<: *x-logging
restart: unless-stopped
networks:
- appwrite
environment:
- _APP_ASSISTANT_OPENAI_API_KEY
appwrite-browser:
image: appwrite/browser:0.3.2
container_name: appwrite-browser
<<: *x-logging
restart: unless-stopped
networks:
- appwrite
openruntimes-executor:
container_name: exc1
hostname: exc1
<<: *x-logging
restart: unless-stopped
stop_signal: SIGINT
image: openruntimes/executor:0.25.1
networks:
- appwrite
- runtimes
volumes:
- /var/run/docker.sock:/var/run/docker.sock
- appwrite-builds:/storage/builds:rw
- appwrite-functions:/storage/functions:rw
- appwrite-sites:/storage/sites:rw
# Host mount nessessary to share files between executor and runtimes.
# It's not possible to share mount file between 2 containers without host mount (copying is too slow)
- /tmp:/tmp:rw
environment:
- OPR_EXECUTOR_INACTIVE_TRESHOLD=$_APP_COMPUTE_INACTIVE_THRESHOLD
- OPR_EXECUTOR_MAINTENANCE_INTERVAL=$_APP_COMPUTE_MAINTENANCE_INTERVAL
- OPR_EXECUTOR_NETWORK=$_APP_COMPUTE_RUNTIMES_NETWORK
- OPR_EXECUTOR_DOCKER_HUB_USERNAME=$_APP_DOCKER_HUB_USERNAME
- OPR_EXECUTOR_DOCKER_HUB_PASSWORD=$_APP_DOCKER_HUB_PASSWORD
- OPR_EXECUTOR_ENV=$_APP_ENV
- OPR_EXECUTOR_RUNTIMES=$_APP_FUNCTIONS_RUNTIMES,$_APP_SITES_RUNTIMES
- OPR_EXECUTOR_SECRET=$_APP_EXECUTOR_SECRET
- OPR_EXECUTOR_RUNTIME_VERSIONS=v5
- OPEN_RUNTIMES_NFT=$_APP_OPEN_RUNTIMES_NFT
- OPR_EXECUTOR_LOGGING_CONFIG=$_APP_LOGGING_CONFIG
- OPR_EXECUTOR_STORAGE_DEVICE=$_APP_STORAGE_DEVICE
- OPR_EXECUTOR_STORAGE_S3_ACCESS_KEY=$_APP_STORAGE_S3_ACCESS_KEY
- OPR_EXECUTOR_STORAGE_S3_SECRET=$_APP_STORAGE_S3_SECRET
- OPR_EXECUTOR_STORAGE_S3_REGION=$_APP_STORAGE_S3_REGION
- OPR_EXECUTOR_STORAGE_S3_BUCKET=$_APP_STORAGE_S3_BUCKET
- OPR_EXECUTOR_STORAGE_S3_ENDPOINT=$_APP_STORAGE_S3_ENDPOINT
- OPR_EXECUTOR_STORAGE_DO_SPACES_ACCESS_KEY=$_APP_STORAGE_DO_SPACES_ACCESS_KEY
- OPR_EXECUTOR_STORAGE_DO_SPACES_SECRET=$_APP_STORAGE_DO_SPACES_SECRET
- OPR_EXECUTOR_STORAGE_DO_SPACES_REGION=$_APP_STORAGE_DO_SPACES_REGION
- OPR_EXECUTOR_STORAGE_DO_SPACES_BUCKET=$_APP_STORAGE_DO_SPACES_BUCKET
- OPR_EXECUTOR_STORAGE_BACKBLAZE_ACCESS_KEY=$_APP_STORAGE_BACKBLAZE_ACCESS_KEY
- OPR_EXECUTOR_STORAGE_BACKBLAZE_SECRET=$_APP_STORAGE_BACKBLAZE_SECRET
- OPR_EXECUTOR_STORAGE_BACKBLAZE_REGION=$_APP_STORAGE_BACKBLAZE_REGION
- OPR_EXECUTOR_STORAGE_BACKBLAZE_BUCKET=$_APP_STORAGE_BACKBLAZE_BUCKET
- OPR_EXECUTOR_STORAGE_LINODE_ACCESS_KEY=$_APP_STORAGE_LINODE_ACCESS_KEY
- OPR_EXECUTOR_STORAGE_LINODE_SECRET=$_APP_STORAGE_LINODE_SECRET
- OPR_EXECUTOR_STORAGE_LINODE_REGION=$_APP_STORAGE_LINODE_REGION
- OPR_EXECUTOR_STORAGE_LINODE_BUCKET=$_APP_STORAGE_LINODE_BUCKET
- OPR_EXECUTOR_STORAGE_WASABI_ACCESS_KEY=$_APP_STORAGE_WASABI_ACCESS_KEY
- OPR_EXECUTOR_STORAGE_WASABI_SECRET=$_APP_STORAGE_WASABI_SECRET
- OPR_EXECUTOR_STORAGE_WASABI_REGION=$_APP_STORAGE_WASABI_REGION
- OPR_EXECUTOR_STORAGE_WASABI_BUCKET=$_APP_STORAGE_WASABI_BUCKET
mongodb:
image: mongo:8.2.5
container_name: appwrite-mongodb
<<: *x-logging
restart: unless-stopped
networks:
- appwrite
volumes:
- appwrite-mongodb:/data/db
- appwrite-mongodb-keyfile:/data/keyfile
environment:
- MONGO_INITDB_ROOT_USERNAME=root
- MONGO_INITDB_ROOT_PASSWORD=${_APP_DB_ROOT_PASS}
- MONGO_INITDB_DATABASE=${_APP_DB_SCHEMA}
- MONGO_INITDB_USERNAME=${_APP_DB_USER}
- MONGO_INITDB_PASSWORD=${_APP_DB_PASS}
entrypoint:
- /bin/bash
- -c
- |
set -e
KEYFILE_PATH="/data/keyfile/mongo-keyfile"
INIT_FLAG="/data/db/.mongodb_initialized"
# Generate keyfile if it doesn't exist
if [ ! -f "$KEYFILE_PATH" ]; then
echo "Generating random MongoDB keyfile..."
mkdir -p /data/keyfile
openssl rand -base64 756 > "$KEYFILE_PATH"
fi
chmod 400 "$KEYFILE_PATH"
chown mongodb:mongodb "$KEYFILE_PATH" 2>/dev/null || chown 999:999 "$KEYFILE_PATH"
# If not initialized, start without auth first to set up replica set and users
if [ ! -f "$INIT_FLAG" ]; then
echo "First-time initialization: starting MongoDB without auth..."
mongod --replSet rs0 --bind_ip_all --fork --logpath /var/log/mongodb/mongod.log --dbpath /data/db
echo "Waiting for MongoDB to start..."
sleep 5
echo "Initializing replica set..."
mongosh --eval "rs.initiate({_id: 'rs0', members: [{_id: 0, host: 'mongodb:27017'}]})"
echo "Waiting for replica set to initialize..."
sleep 5
echo "Creating root user..."
mongosh admin --eval "db.createUser({user: '$MONGO_INITDB_ROOT_USERNAME', pwd: '$MONGO_INITDB_ROOT_PASSWORD', roles: ['root']})"
echo "Creating application user..."
mongosh admin --eval "db.createUser({user: '$MONGO_INITDB_USERNAME', pwd: '$MONGO_INITDB_PASSWORD', roles: [{role: 'readWrite', db: '$MONGO_INITDB_DATABASE'}]})"
echo "Shutting down MongoDB..."
mongod --dbpath /data/db --shutdown
touch "$INIT_FLAG"
echo "Initialization complete."
fi
echo "Starting MongoDB with authentication..."
exec mongod --replSet rs0 --bind_ip_all --auth --keyFile "$KEYFILE_PATH"
healthcheck:
test: |
mongosh -u root -p "$MONGO_INITDB_ROOT_PASSWORD" --authenticationDatabase admin --quiet --eval "rs.status().ok" | grep -q 1
interval: 10s
timeout: 10s
retries: 10
start_period: 60s
redis:
image: redis:7.4.7-alpine
container_name: appwrite-redis
<<: *x-logging
restart: unless-stopped
command: >
redis-server
--maxmemory 512mb
--maxmemory-policy allkeys-lru
--maxmemory-samples 5
networks:
- appwrite
volumes:
- appwrite-redis:/data:rw
healthcheck:
test: ["CMD", "redis-cli", "ping"]
interval: 10s
timeout: 5s
retries: 5
start_period: 10s
# clamav:
# image: appwrite/clamav:1.2.0
# container_name: appwrite-clamav
# restart: unless-stopped
# networks:
# - appwrite
# volumes:
# - appwrite-uploads:/storage/uploads
networks:
gateway:
name: gateway
appwrite:
name: appwrite
runtimes:
name: runtimes
volumes:
appwrite-mongodb:
appwrite-mongodb-keyfile:
appwrite-redis:
appwrite-cache:
appwrite-uploads:
appwrite-imports:
appwrite-certificates:
appwrite-functions:
appwrite-sites:
appwrite-builds:
appwrite-config:
Install Appwrite
- Create a directory named
appwriteand place bothdocker-compose.ymland.envinside - Edit the
.envfile to customize your installation. At minimum, update_APP_OPENSSL_KEY_V1and_APP_EXECUTOR_SECRETwith unique secret values - Start the Appwrite stack:
docker compose up -d --remove-orphans
Post-installation
After installation completes:
- Access the Console - Navigate to your machine's hostname or IP address in your browser
- Create your first project - Set up your development environment
Startup time
On non-Linux hosts, the server might take a few minutes to start after installation completes. This is normal behavior.
SDK version compatibility
The tables below map each released self-hosted Appwrite version to the SDK versions that were current at the time of that release. Use this to pin your SDK to a version known to work with your server. The latest stable self-hosted Appwrite release is 1.9.5.
Client SDKs
| Appwrite | Web | Flutter | React Native | Apple | Android |
1.7.0 | 18.0.0 | 16.0.0 | 0.9.0 | 10.0.0 | 8.0.0 |
1.7.1 to 1.7.3 | 18.0.0 | 16.0.0 | 0.9.0 | 10.0.0 | 8.0.0 |
1.7.4 | 18.1.1 | 17.0.0 | 0.10.0 | 10.0.0 | 8.0.0 |
1.7.5 | 18.1.1 | 17.0.0 | 0.10.0 | 10.0.0 | 8.0.0 |
1.8.0 | 21.4.0 | 20.3.0 | 0.18.0 | 13.3.0 | 11.3.0 |
1.8.1 | 23.0.0 | 22.0.0 | 0.25.0 | 15.0.0 | 13.0.0 |
1.9.0 | 24.1.1 | 23.0.0 | 0.27.1 | 16.0.0 | 14.1.0 |
1.9.5 | 26.1.0 | 25.2.0 | 0.33.0 | 18.2.0 | 25.2.0 |
Server SDKs
| Appwrite | Node.js | Python | PHP | Dart | Ruby | .NET | Go | Swift | Kotlin | CLI |
1.7.0 | 17.0.0 | 11.0.0 | 15.0.0 | 16.0.0 | 16.0.0 | 0.13.0 | v0.7.0 | 10.0.0 | 9.0.0 | 6.2.3 |
1.7.1 to 1.7.3 | 17.0.0 | 11.0.0 | 15.0.0 | 16.0.0 | 16.0.0 | 0.13.0 | v0.7.0 | 10.0.0 | 9.0.0 | 6.2.3 |
1.7.4 | 17.1.0 | 11.0.0 | 15.0.0 | 16.1.0 | 16.0.0 | 0.13.0 | v0.7.0 | 10.0.0 | 9.0.0 | 8.0.0 |
1.7.5 | 17.1.0 | 11.0.0 | 15.0.0 | 16.1.0 | 16.0.0 | 0.13.0 | v0.7.0 | 10.0.0 | 9.0.0 | 8.0.0 |
1.8.0 | 20.2.1 | 13.4.1 | 17.5.0 | 19.3.0 | 19.3.0 | 0.22.0 | v0.13.1 | 13.2.2 | 12.3.0 | 12.0.1 |
1.8.1 | 22.1.3 | 16.0.0 | 20.2.1 | 21.3.0 | 21.1.0 | 1.0.0 | v1.0.0 | 15.2.0 | 14.1.0 | 15.0.0 |
1.9.0 | 23.1.0 | 17.0.0 | 21.0.0 | 22.0.0 | 22.0.0 | 2.0.0 | v2.0.0 | 16.0.0 | 15.0.0 | 17.4.0 |
1.9.5 | 26.2.0 | 21.0.0 | 26.1.0 | 25.1.0 | 25.1.0 | 5.1.0 | v5.1.0 | 19.1.0 | 18.1.0 | 22.3.0 |
Managing your installation
Stop Appwrite
To stop your Appwrite containers:
docker compose stop
Restart Appwrite
To restart your Appwrite containers:
docker compose start
Uninstall Appwrite
To completely remove Appwrite and all its data:
docker compose down -v
Data loss warning
The uninstall command will permanently delete all your Appwrite data. Make sure to backup any important information before running this command.
Next steps
After successfully installing Appwrite, you can:
Deploy on cloud platforms - Learn how to deploy on AWS, DigitalOcean, and other cloud providers
Configure services - Set up email, SMS, storage, and other services
Configure databases - Learn more about MongoDB and MariaDB configuration
Production setup - Prepare your installation for production use
Update Appwrite - Keep your installation up to date