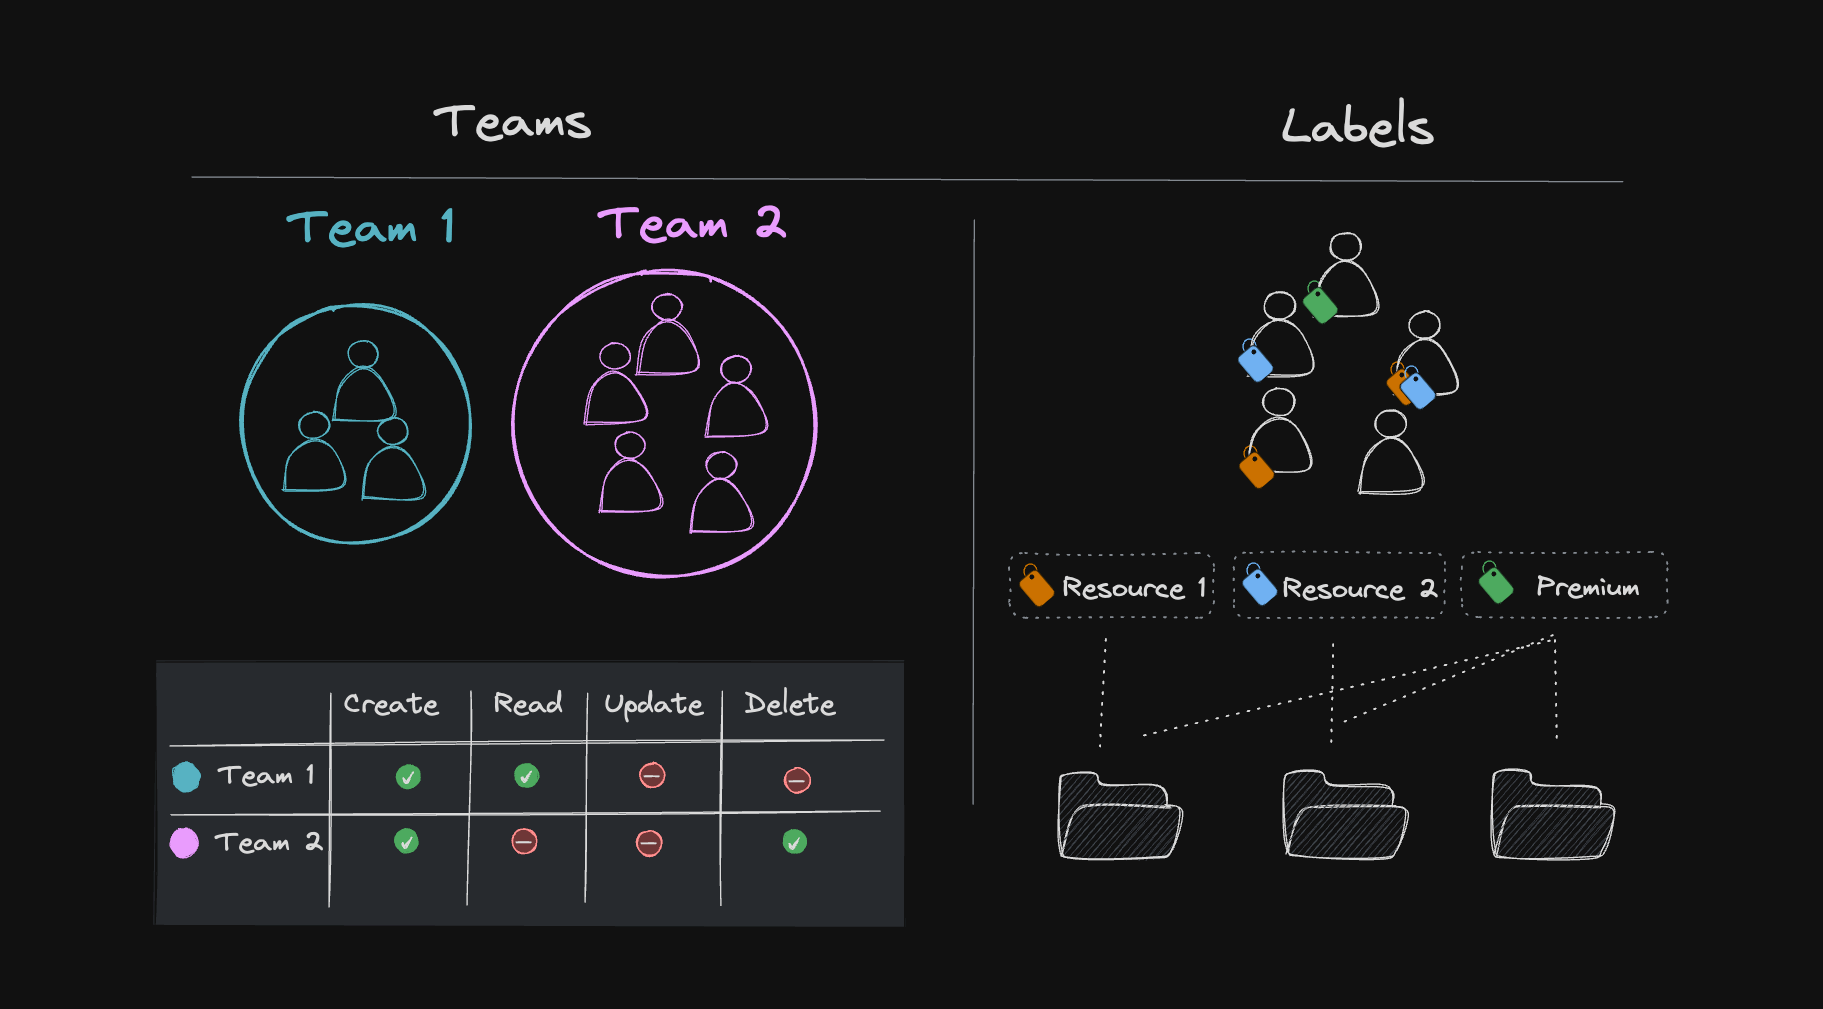
Teams and Labels allow us to categorize and group users together, allowing us to set permissions to resources at the Team and label level instead of at the individual user level. Grouping users together makes managing permissions to documents, files and functions much more efficient this way.
To think of this in real-world terms, imagine for a second we were building the next social media application. Teams can be used to create admins and moderators, and these admins and moderators would have permission to delete and flag posts that don’t meet community guidelines. The owner at the document level would have the ability to update and delete this post, but anyone who is on the moderator Team would also have the ability to delete the post, something that is normally restricted to only the owner of the post. We can also change which users have these permissions at any point by adding and removing users and updating the group-level permissions.
Another example we can take a look at would be a streaming service like Amazon Video. How do we give users access to a movie or show they paid for? This is where Teams and Labels make our lives easier. By simply adding Labels to users we could decide which users have access to specific resources like movies or shows in our application.
Without Teams and Labels, we could always assign permissions to users individually, but this can become problematic very quickly when we start trying to modify these permissions and update who has access to what.
So let’s dive into the next section and see how Teams and Labels work and the differences between the two.
Teams Vs Labels
Teams and labels accomplish much of the same thing, however there are some technical and fundamental differences between the two. While deciding which one to use will be based on your preferences and specific needs, I’ll point out the key differences and try to guide you in the right direction by providing an example of when one may be preferred over the other.
Teams
Teams are designed to group users together, allowing for shared access to resources within an application. For example, in an app like Discord or Slack, we can create Teams and invite users to be a part of the Team (Ex: Server or chat room).
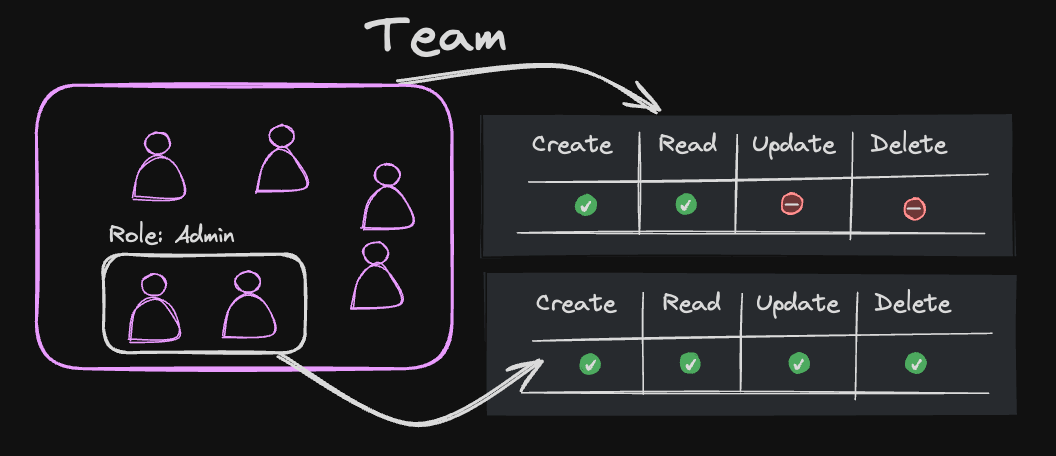
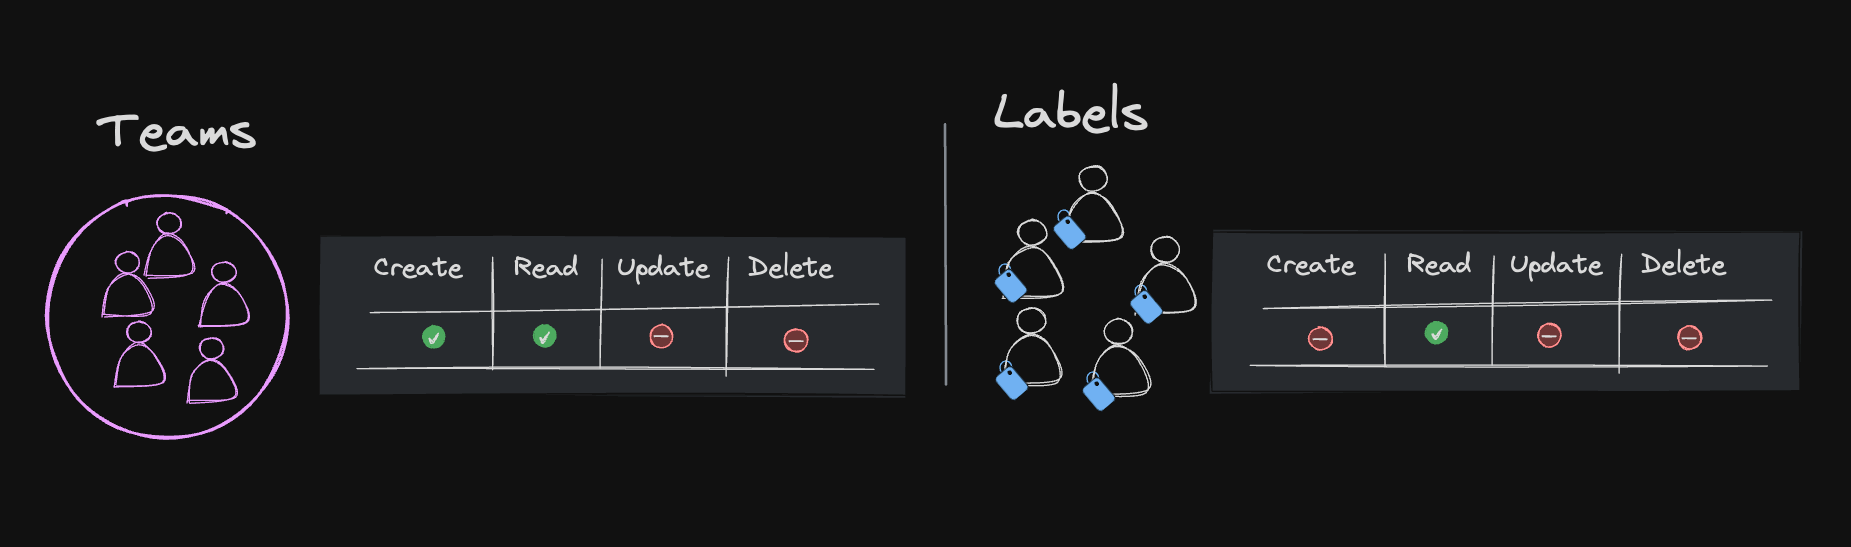
One of the key differences between Teams and Labels is that Teams have the ability to set roles within a Team and assign permissions to those roles. This means all users in a Team will inherit permissions from the Team such as read access to all messages in the chat room, but will also inherit permissions from their role as well if they have been assigned one, such as moderator or admin.
This allows for granular control over what each Team member can do based on their role within the Team.
Labels
Labels are essentially custom tags that you can assign to a user. They act as custom-defined markers or classifications that we can place on specific users.
Just like Teams, we can grant permissions to specific Labels. Labels are attached to individual user accounts and are used to categorize users on a one-to-one basis. Labels can be used in a similar manner to Teams but are a more lightweight and flexible way to manage users and permissions.
This would make Labels a great option for managing which users can view restricted content behind a paywall like a course on Udemy or an e-book on a digital library platform. In this example you would simply attach a label that is unique to a user after they pay to access a product, and from that point on, the label would grant the user permission. If this access was subscription-based and the user stopped paying, we could simply remove the label from the user, and their access would be revoked since they no longer carry the label that gives them access.
Summary
Labels are great for tagging users and assigning permissions based on those tags, while Teams are for grouping users together and allowing role-based management within a Team.
Labels classify users based on attributes or behaviors, whereas Teams facilitate collaboration and shared access among a group.
Labels offer flexibility in user segmentation, while Teams provide structure for collaborative environments.
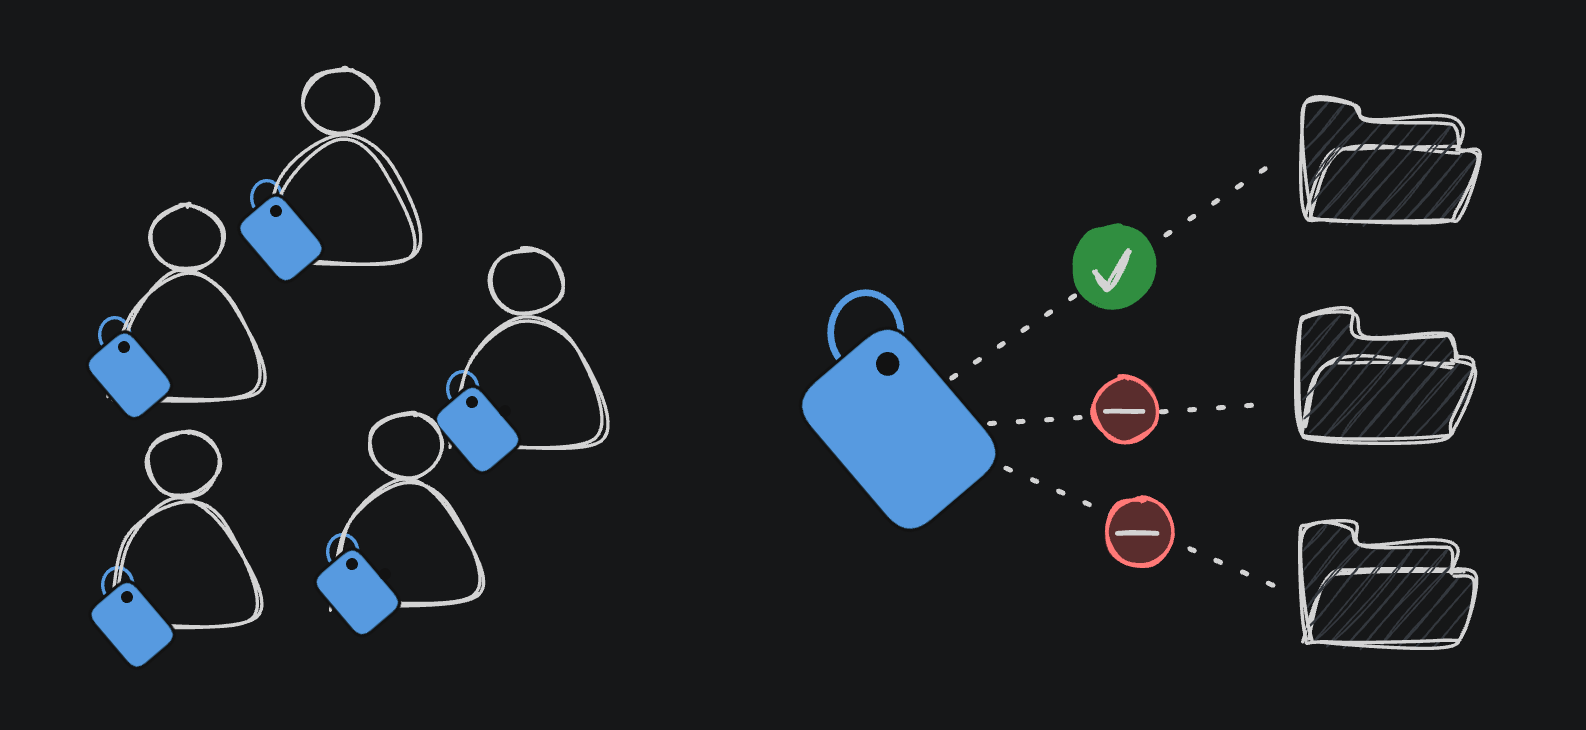
How permissions work with Teams and labels
Here’s the process of granting users permission to resources through Teams and labels. Be sure to pay attention to step 3 in the process. There’s a slight difference in how users connect to Teams Vs. labels.
Create a Team or Label
Assign permissions to that Team or Label
Team: Add users to the Team / Label: Add a Label to the user
Users now inherit permissions from the Team they are on or the Labels they have been given.
Did you catch the difference between Labels and Teams in step #3? With Teams, we are adding users to the Team, and with Labels, we do the opposite by assigning Labels to a user.
Managing Teams & Labels from the Console
When getting started with Teams and Labels, it could be helpful to set things up from the console manually so you can better visualize how things work.
Teams
Let's start with creating a new Team, adding members, and assigning roles to those members of the Team.
1 - To create a Team, you can go to the “Auth” tab from your console and select “Teams”. From here, you can click on “Create Team” and complete the process of creating by giving your new Team a name
2 - Once your Team is created, you can add a Member to the Team by selecting the “Members” tab and clicking “Create Membership”. Here you will enter the user's email address (name can be left blank) and assign a role to the member. Roles are optional, so you can leave this part blank.
That’s it for creating a Team and adding members from the appwrite console. Now you can assign document, storage, and function permissions to your Teams. As an example, for collection level permissions, you can go to the “settings'' tab in a collection, and in the “permissions” section, choose “Select Teams'' to give permissions to an entire Team or “Custom permissions” if you want to assign permission to only users with a particular role within the Team.
Labels
Labels can also be assigned from the auth tab. To assign a label select a user and add a label in the “Labels” section.
Assigning permissions to labels is the same as it is for Teams, only you would choose the “Label” section in the drop down menu.
SDK Usage
From a technical perspective, it’s important to note a key difference in how we use Teams and Labels when it comes to the SDK.
Labels can only be created & modified from the console or Server SDK, while Teams can be created and modified with both the client and server SDK’s.
Teams
Server SDK - Yes
Client SDK - Yes
import { Client, Teams } from "appwrite";

const client = //...

const Teams = new Teams(client);

const promise = Teams.create('<TEAM_ID>', '[NAME]');
Labels
Server SDK - Yes
Client SDK - No
const sdk = require('node-appwrite');

const client = //...

const users = new sdk.Users(client);

const promise = users.updateLabels('<USER_ID>', ['subscriber']);
Resources
Learn more about Labels and Teams in our documentation:
Watch the video tutorial on 'how to manage user permissions with Labels and Teams' on YouTube.